Print Version | New Features How-to Webpage
Before you begin to use Target Analytics ResearchPoint, take a moment to review the following notes, which highlight new features and changes to existing features. It is important to share this information with all Target Analytics ResearchPoint users in your organization. For more information about any of the new features listed, see the ResearchPoint How-to Documentation page.
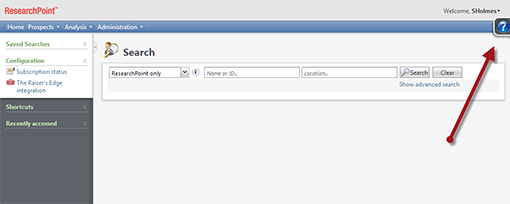
Recently, we reviewed the way you use ResearchPoint and how we answer your questions when you want to know more about a task or need help learning the product. To improve your work processes and get you back to your tasks more quickly, we improved the ResearchPoint help. As you may notice when you log in, we now have a help pane that you can quickly access with a click of the tab on the right side of the page.
When you access the help, the help pane flies in from the right. You do not need to navigate to another tab or window in your Internet browser. Instead, we bring new features, how-to videos, Customer Support resources, and help information to you. Also, the help pane provides many enhanced features outlined below.
Every time you update to a new release, the help pane will automatically fly out to inform you of the latest ResearchPoint new features. Any time you need a reminder of what was updated in the latest release, use the link at the top of the help pane.
At the top of the help pane, open the videos page to watch ResearchPoint-specific videos. The link opens in a separate browser tab or window (based on your Internet browser preferences) and navigates you to the Blackbaud website. You can watch videos about new features or important program tasks.
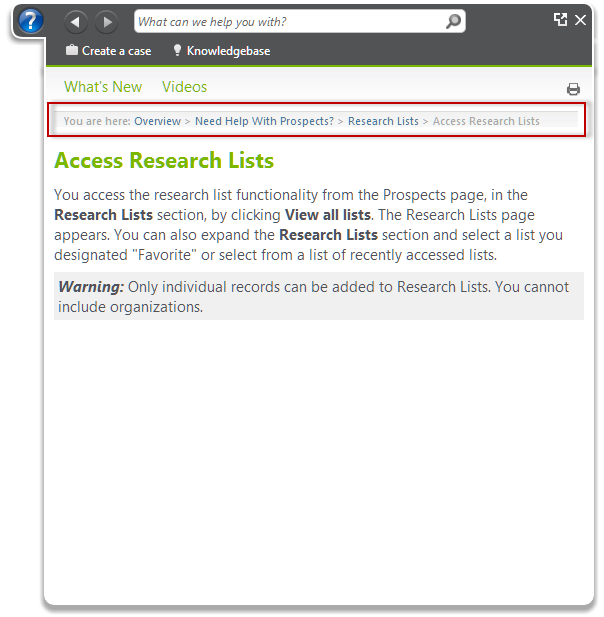
Whenever you see the Take me there icon and link, click the link in the help to navigate to that page in the program.

For example, if you search for research lists in the help, click the link to navigate to the Research Lists page. We’ve started with a few Take me there links but we’ll continue to add more as we improve your ability to learn the product through the help!
At the top of the help, use the search box to type in the question or topic you want to know more about.

The number of results appears at the top. To open a help topic, click the topic name. If your search was less specific and many results appear, scroll down to see more results. You can also put your search term in quotes to limit results to an exact set of terms. For example, you can type in “resolve duplicates.” Instead of 39 help topics results, you narrowed it down to 7.
Is the help pane blocking a part of the program you want to see while you read the help? In the upper right corner of the help pane, click the docking button to undock the help from the right side of the page.

Now you can click and drag the help to a better position in the program. However, because the help is attached to the program, you can not move the pane outside the ResearchPoint browser window. Instead, we recommend you maximize the browser window and then move the help to a better location. You can click the docking button again to dock the help back to the right side of the page or you can close the help pane. The next time you open the help, the pane will be docked again.
At the top of most help topics, breadcrumbs appear to help you find your way back to where you came from or review related information.
In the breadcrumbs, the last topic listed is the topic you are currently reading. Click any of the other topic names to go to that topic.
Just like your Internet browser window, you can use the help’s forward and back buttons to navigate through your help topic history.

For example, if you click a helpful link in a topic. You can review the information and then click the back button to go back to your previous topic. You can only go back or forward to the places you have been. Unfortunately, we don’t have a time machine to take you back to the future.
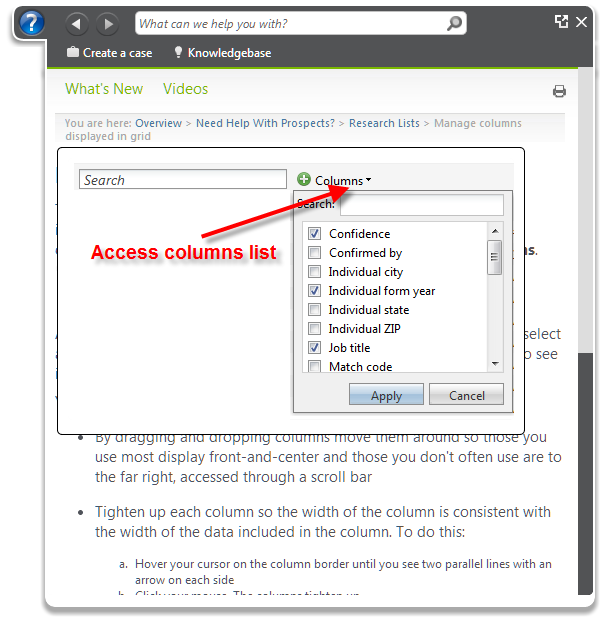
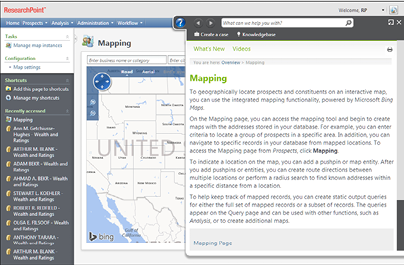
We know there are times that it would be helpful to see an image of what we describe in the help or provide an illustration of a concept. Now, with the help pane, we can include images as thumbnails. When you hover your mouse over the image, the image will expand to a bigger size. Move the mouse off the image and it returns to thumbnail size!
One major feature we did not change in the new help pane is that when you open help, you’ll still receive help specific to where you are in ResearchPoint. You can navigate around the help as much as you need! Then, when you close and re-open, we’ll go back to the help specific to your current page. For example, if you click the help icon from the Mapping page, the Mapping topic opens.
On any topic you want a printer-friendly version, click the print icon . A new window appears with a print dialog. Depending on your computer settings, you can save the printer-friendly version as a PDF, to Google Drive, send to your printer, and more! After you click Print or Save, you return to ResearchPoint.
We made it easier for you to access your Customer Support resources when you need them. If you don’t find the answer to your question or software issue in the help file, you can also go to Knowledgebase to search the solutions database. Knowledgebase does require you to log in with your Blackbaud.com user name and password.
If you do not find the answer to your problem, we recommend you click Create a case to contact Customer Support. From Create a case, you can easily access Case Central to see a history of your existing cases.

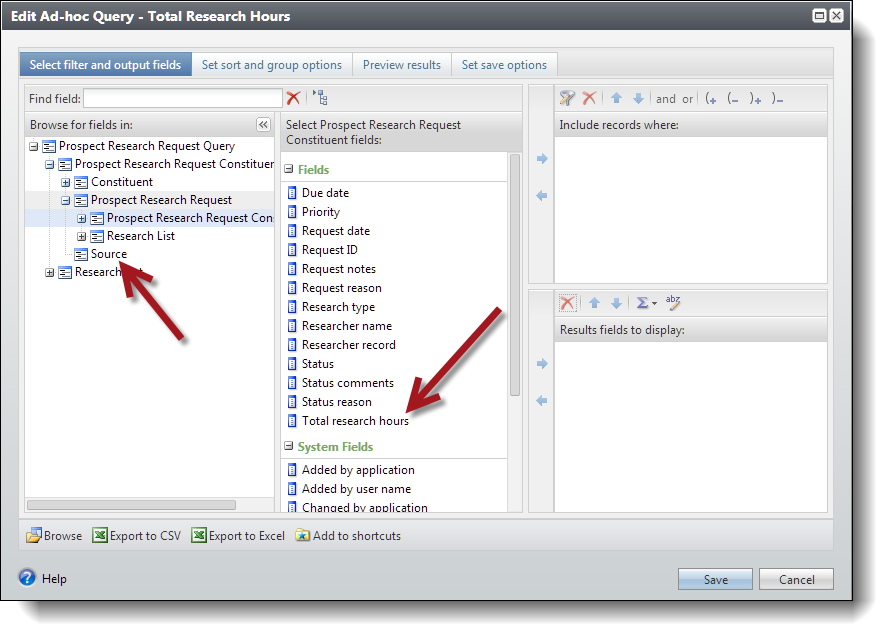
When you complete a prospect research request for an individual, if your organization tracks the total number of research hours, you can now filter and track those hours in Query.
From a prospect research request constituent query, under the Prospect Research Request Constituent node, you can filter and display results with the new Total research hours field. Under the Prospect Research Request Constituent node, we also added a new Source node, with additional fields to filter and display results about the completed individual research request.
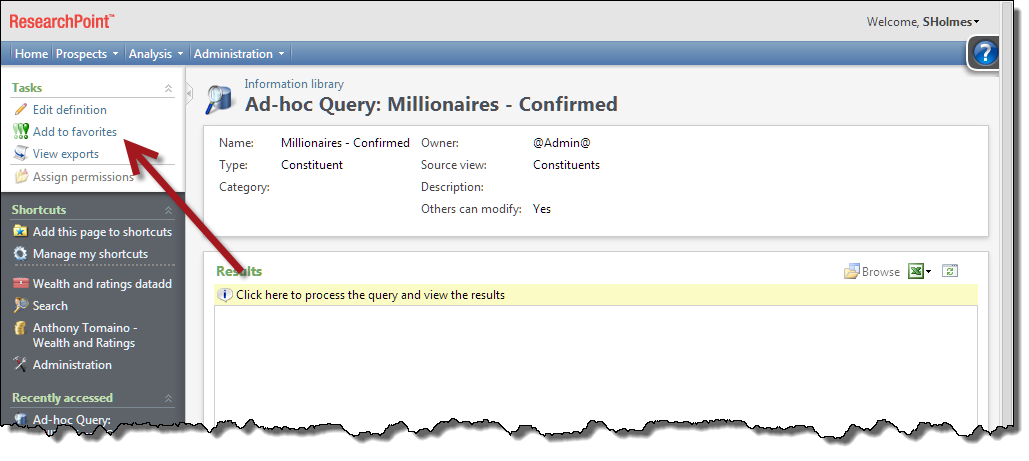
You can now mark queries as a favorite from the query. From Analysis, Information Library, open the query record. To mark as a favorite, under Tasks, click Add to favorites.
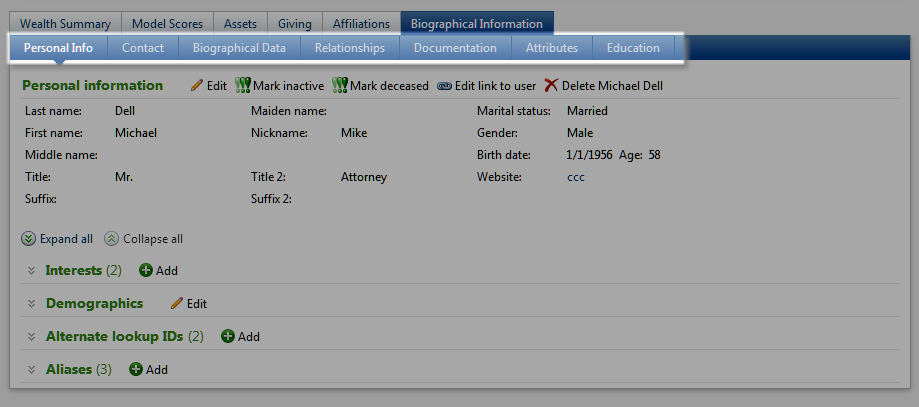
To improve performance and ease of navigation on the prospect record, we updated the Biographical Information tab. Within the Biographical Information tab, you now access the following information as sub-tabs: Personal Info, Contact, Biographical Data, Relationships, Documentation, Attributes, and Education. We separated these previous sections to make it easier to see the prospect's information as well as load the information faster.