Exercise 10: Add a Batch Event Handler
Note: If your instructor provided a training environment, skip Step 1 and continue with Step 2.
Step 1 - Create and prepare a new Visual Studio client project.
To prepare the client project for the new event handler, create a client project named Blackbaud.CustomFx.Foodbank.Client within your Visual Studio solution to go along with the existing Blackbaud.CustomFx.Foodbank.Catalog project.
Create a folder within the Blackbaud.CustomFx.Foodbank.Client project named BatchEventHandlers and a subfolder named Food Item.
Step 3 - Add a batch event handler to the client project.
Right-click the new Food Item folder, and select Add/New Item… from the popup menu. Select Blackbaud AppFx Client as the category, and select Batch Event Handler as the template.
Provide the name of FoodItemAddBatchEventHandler.vb for the class file.
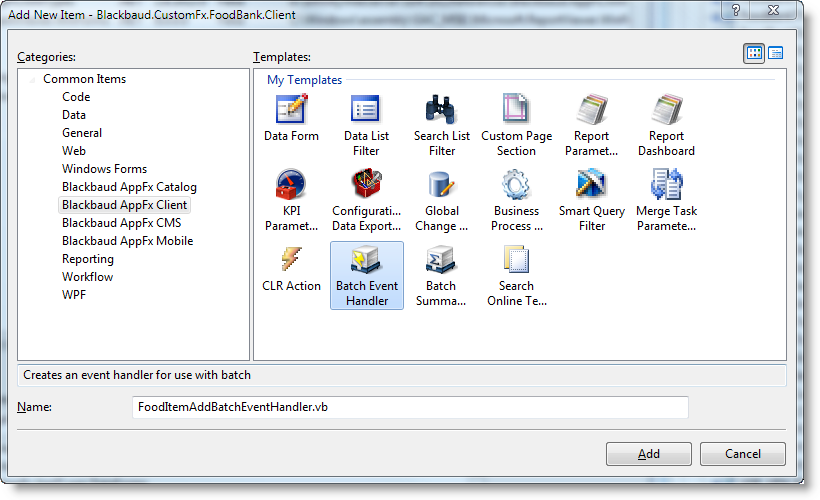
Figure: Add an event handler to the Blackbaud.CustomFx.FoodBank.Client project
By default, the Visual Studio item template for the event handler provides some code and begins to shed some light on what is possible. To start, we see that our new event handler class inherits from Blackbaud.AppFx.Browser.Batch.BatchEntryHandler. It also looks like we have access to buttons and menus on the batch user interface.
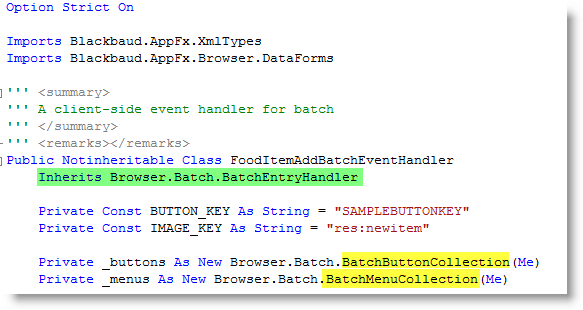
Figure: The event handler class inherits Browser.Batch.BatchEntryHandler.
If we continue further down the class file, we see that the template overrides GetBatchButtons() and GetBatchMenu() from the base class: Blackbaud.AppFx.Browser.Batch.BatchEntryHandler. These functions are responsible for returning menus and buttons for display onto the user interface. Within these functions, a sample button and menu have been added to the appropriate collections.
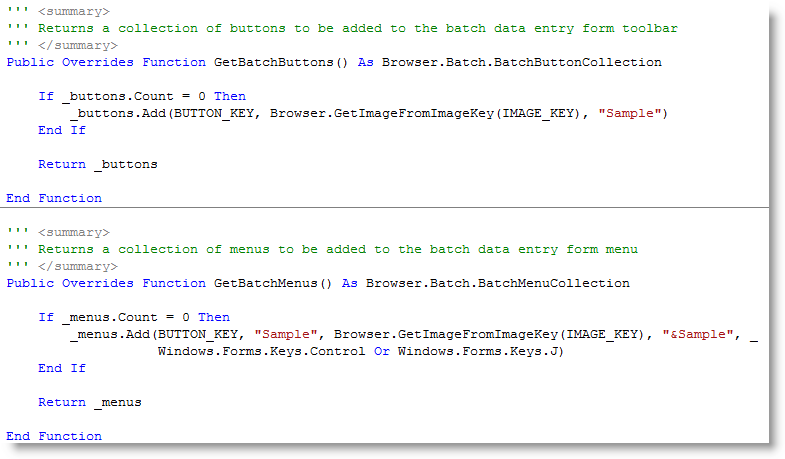
Figure: Batch buttons and menus can be added to the batch user interface.
Next, event handlers have been provided for the buttons and menus. Using the event arguments passed to the event handler, we can determine which buttons or menus were clicked and provide code to respond. In this case, we call a harmless message box to display the row number within the UI grid.
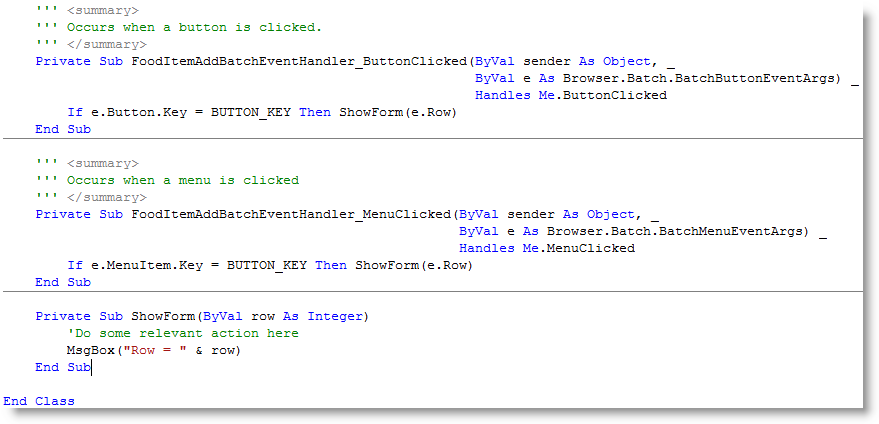
Figure: Event handlers for buttons and menus
Reference the Batch Event Handler within the BatchTypeSpec
Step 4 - Add the EventHandlers tag to the BatchTypeSpec.
To utilize our event handler, we need to add the appropriate metadata within the BatchTypeSpec in the form of EventHandlers tag and a child BatchEventHandler tag. Within the BatchEventHandler tag, we reference the client assembly and class name within the client assembly. Below, notice how the class name is fully qualified with the assembly name.
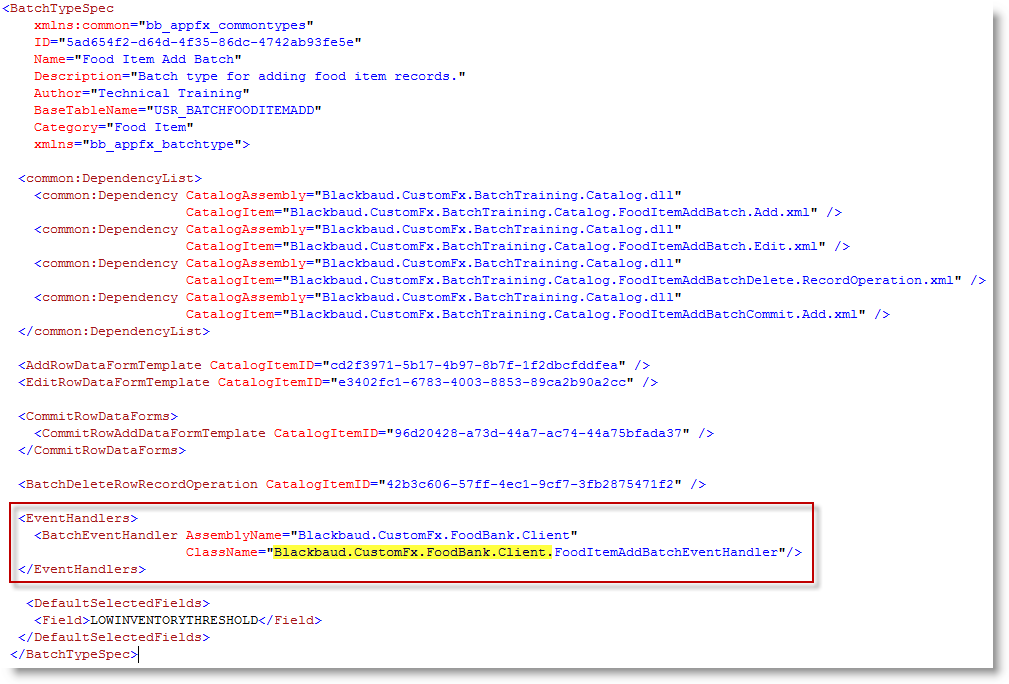
Figure: Reference the event handler within the BatchTypeSpec
Using the figure above as a guide, add the EventHandlers tag and BatchEventHandler child tag to the BatchTypeSpec. Be sure you prefix the ClassName attribute with the client assembly name along with the event handler class name.
Deploy the Batch Event Handler
To deploy our changes, we must build and deploy the Blackbaud.CustomFx.FoodBank.Client.dll assembly to the appropriate location on our Infinity web server.
Step 5 - Deploy the batch event handler.
-
Build the new Blackbaud.CustomFx.FoodBank.Client assembly.
-
With the Blackbaud.CustomFx.FoodBank.Client.dll built, copy the file into the Infinity application server's \bbappfx\vroot\browser\clientbin\custom folder.
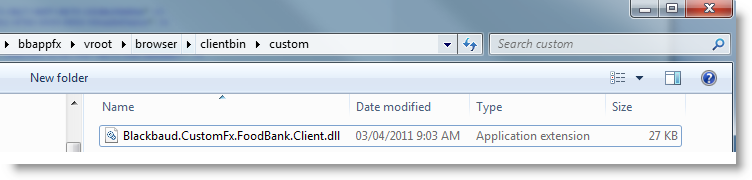
Figure: Deploy the assembly that contains our event handler code
-
Save and load the BatchTypeSpec to register the fact we would like our food item add batch to utilize the new client batch event handler.
-
From the Batch Entry page, open a batch and the button and new menu item become visible.
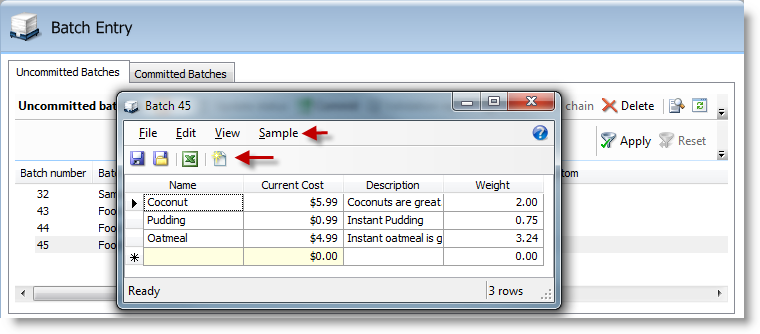
Figure: Our new menu and button are visible.
-
Select the sample button or menu to display the current row numbers. Row numbers are zero based; therefore, the first row is number 0, the second row is 1, third row is 2, etc.
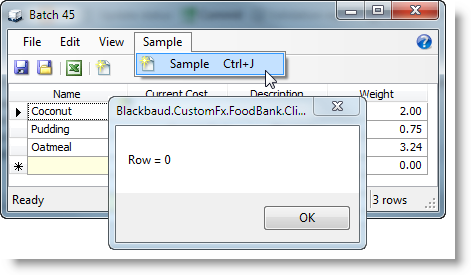
Figure: Sample menu code
Tip: After you change your code, you need to redeploy the code and restart the Infinity application for the changes to take effect.