Select your user interface:
Exercise 13: Commit a Simple Batch
Step 1 - Commit the batch.
Next, let's add and commit the Pistachios food item from the staging table to the production table. On the Batch Entry page, select the batch and click the Commit button.
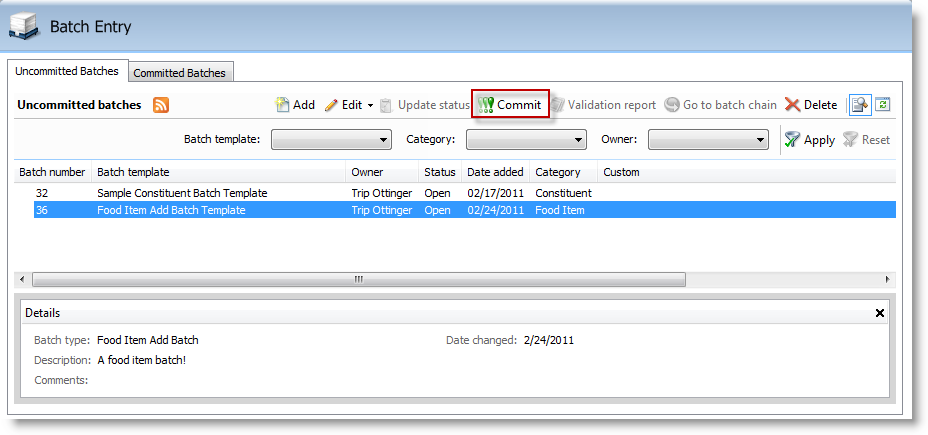
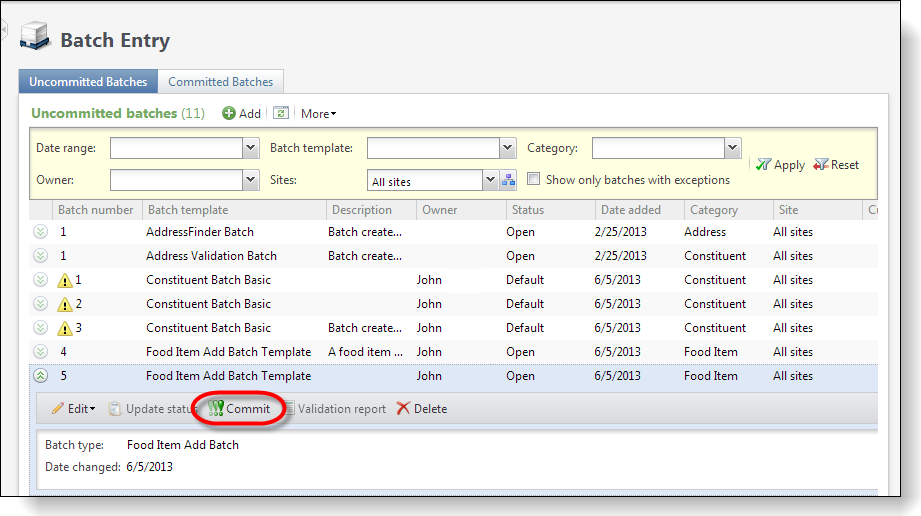
Figure: Add a food item and commit
Step 2 - Commit parameters.
Select the Commit action to open a data form where we can provide options for our commit parameters.
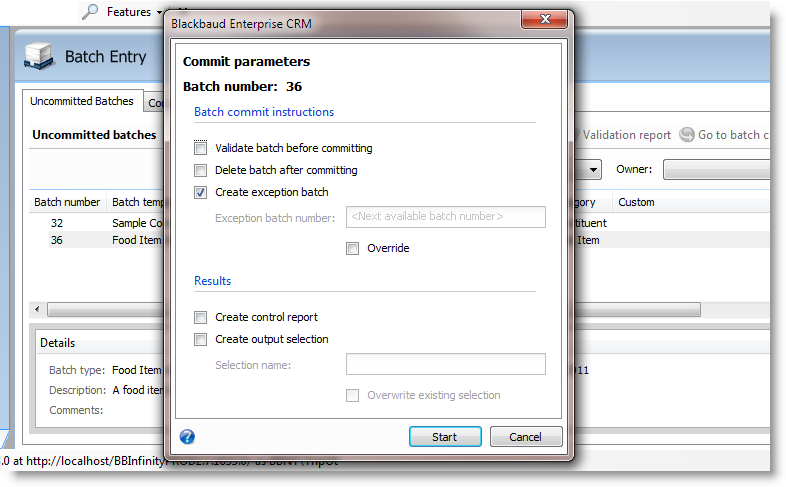
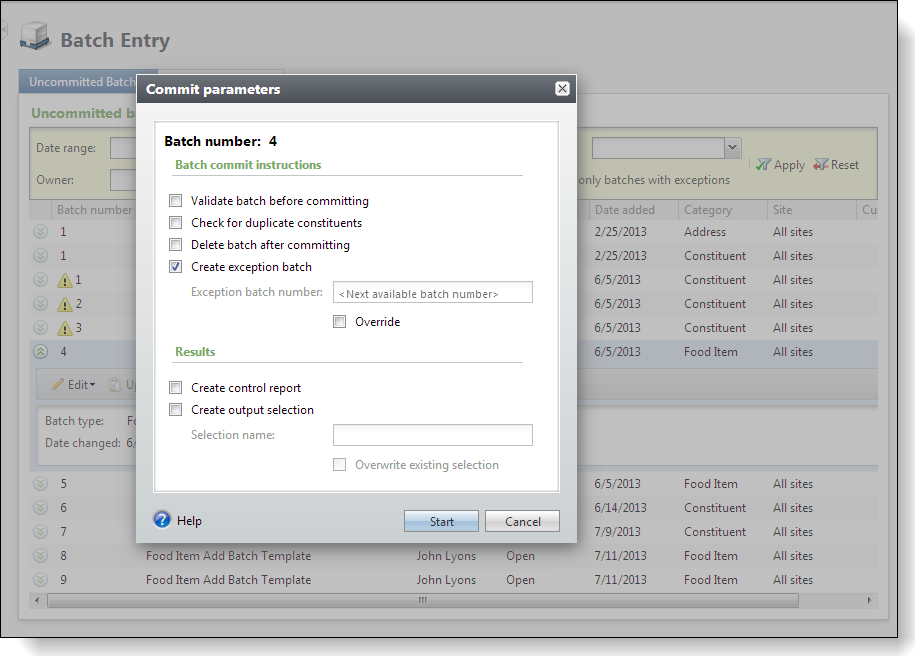
Figure: Commit parameters
After you click the Start button, the data within the batch is committed to the production table. This causes the logic within our Commit Add Form to be executed for each row saved to the production table. When a batch is committed, the program automatically generates a commit status page for the batch. When the batch is committed to the database, the commit status page records and displays the settings selected when you run the commit process. The Infinityplatform directs us to a page that details the commit process and status. Under Batch commit status, information about the committal process appears. This information includes the status of the commit process, the start and end times of the commit process, the user who ran the commit process, the total number of records processed, and how many of those records did and did not successfully commit to the database.
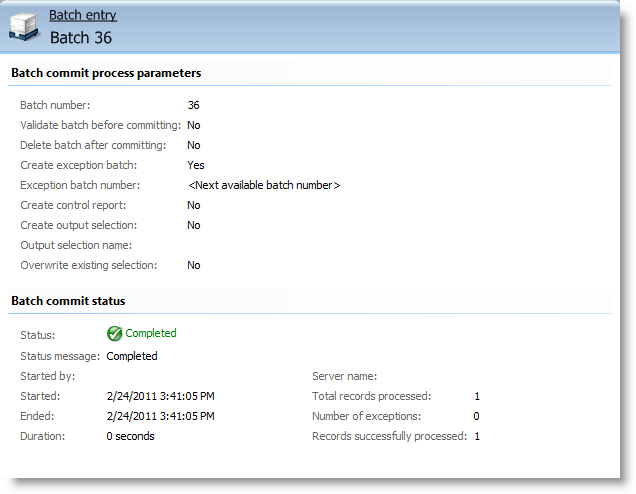
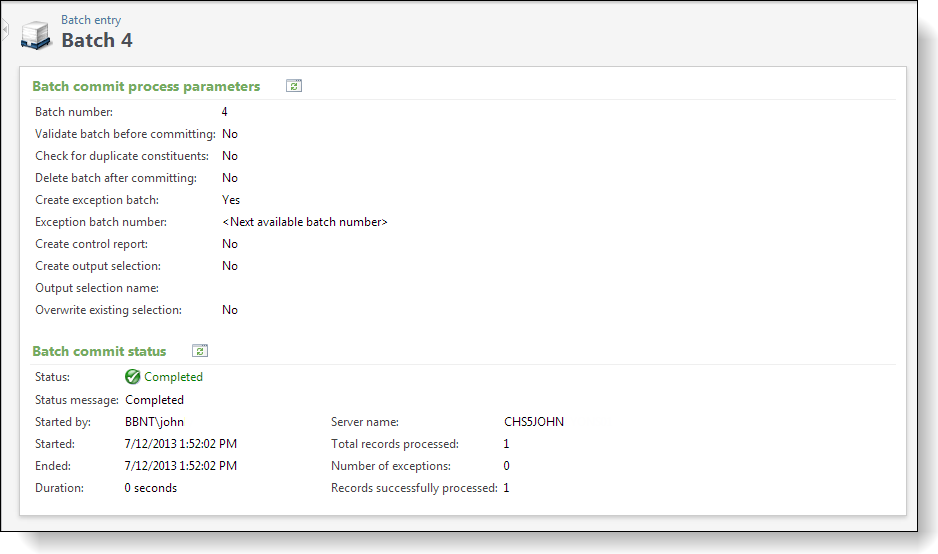
Figure: Batch commit status page
Step 3 - Review the new food item within the production table.
On the Food Bank page, look at the Food Items tab and review the data list that displays the food items from the production table (USR_FOODITEM). We can see the Pistachios record was successfully added.
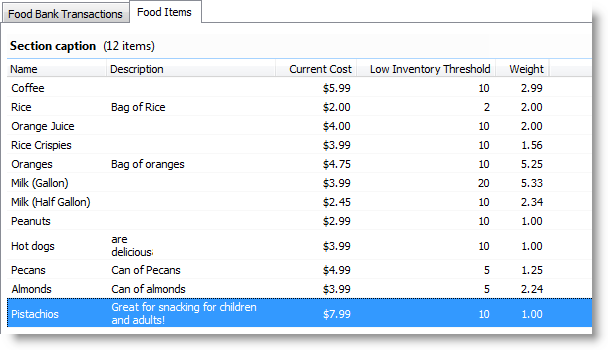
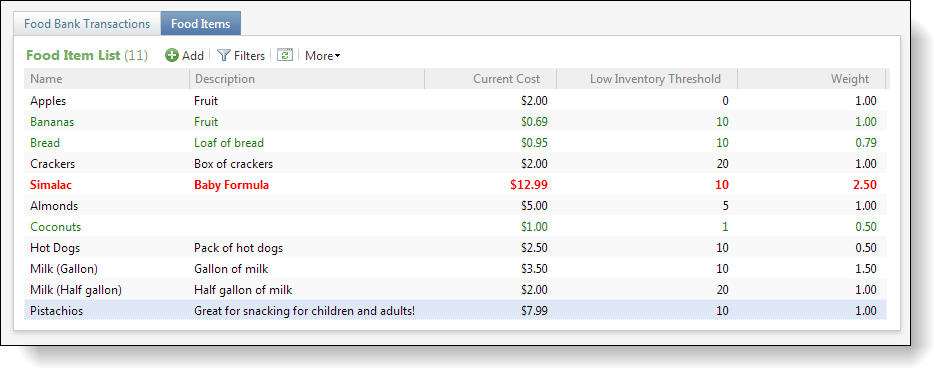
Figure: Review the food item data list on the food bank page
More Experiments with Batch Validation, Exception, and Commit Behavior
We will now conduct some experiments with our new batch by attempting to add rows into our batch, commit the batch, validate the batch and review the damage, um I mean, results.
Step 4 - Create a batch, commit it, and view exceptions.
-
Create a batch, add a food item that already exists within the USR_FOODITEMtable, and watch what happens when we try to commit the batch. For the example below, I added "Peanuts" for the name of a new food item to a new batch. You need to add your own duplicate food item.
-
Save and close the batch. It should save without issue. The row is added to the batch staging table and is waiting to be committed to the production table.
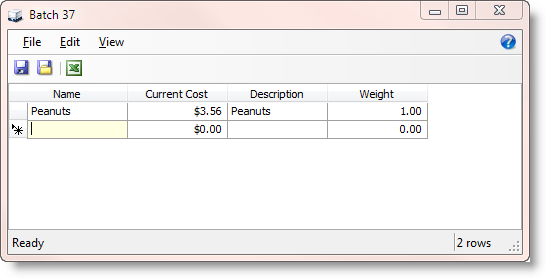
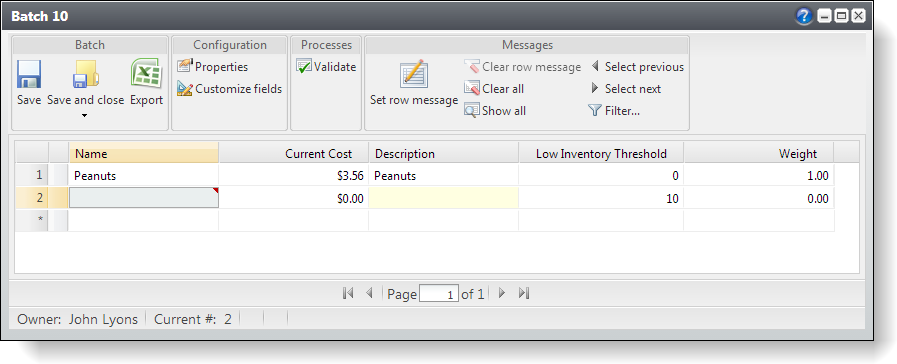
Figure: Create a new batch
Step 5 - Review the unique index.
A record with that food item name should already exist within the production table. If we look at the production table using SQL Server 2008 Management Studio, we see there is a unique non-clustered index named UC_USR_FOODITEM_NAME protecting the table from duplicate food item names.
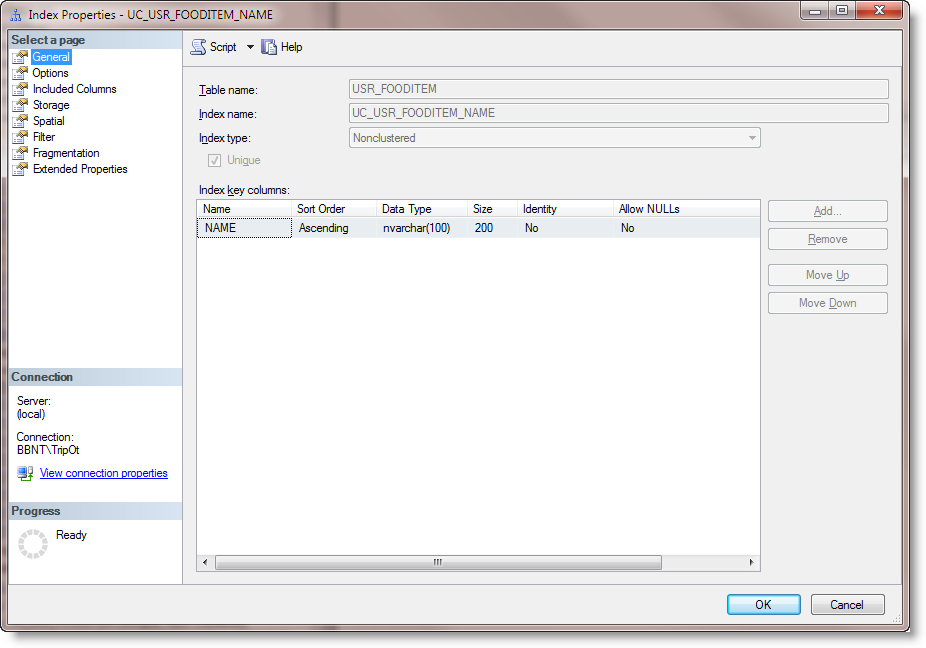
Figure: UC_USR_FOODITEM_NAME unique index prevents duplicate food items
This index was created when we loaded the Table Spec that created the USR_FOODITEM table. Below, you can see the first part of this Table Spec. Note the IsUnique attribute on the NAME text field. When the spec was loaded, the Infinity platform created the unique index on our behalf to enforce the IsUnique within the database.
<TableSpec
	xmlns="bb_appfx_table"
	xmlns:common="bb_appfx_commontypes"
	ID="735ca25d-a6bd-4a62-92e5-8090bf153573"
	Name="Food Item"
	Description="Food Item Table Spec"
	Author="Technical Training"
	IsCustomizable="true"
	Tablename="USR_FOODITEM"
	>

	<!-- define fields on the table -->
	<Fields>
		<TextField
			Name="NAME"
			Description="The name of the food item."
			Length="100"
			IsUnique="true"
			Required="true"
			/>

		<MemoField
		Name="DESCRIPTION"
		Description="A description for the food item"
			/>
		…
Note: For more information about how to use Table Specs to create database tables, see Data Model Definition Overview.
Fortunately, within our Commit Add Spec we can plan ahead for the possibility of bumping into the unique index on the Name field. We can expect to have this type of exception from the database. So, we have included the appropriate metadata within our ExpectedDBExceptions section of the Commit Add Spec.
<common:ExpectedDBExceptions>
<common:Constraints>
<common:Constraint Name="UC_USR_FOODITEM_NAME" Field="NAME"    Type="Unique" />
<common:Constraint Name="CK_USR_FOODITEM_NAME" Field="NAME" Type="Required" />
</common:Constraints>
</common:ExpectedDBExceptions>
Let's return to our uncommitted batch with our "Peanut" food item record ready to be committed.
Step 6 - Commit the batch.
-
Navigate to the Batch Entry page, select the Uncommitted Batches tab, select the batch, and select the Commit action button.
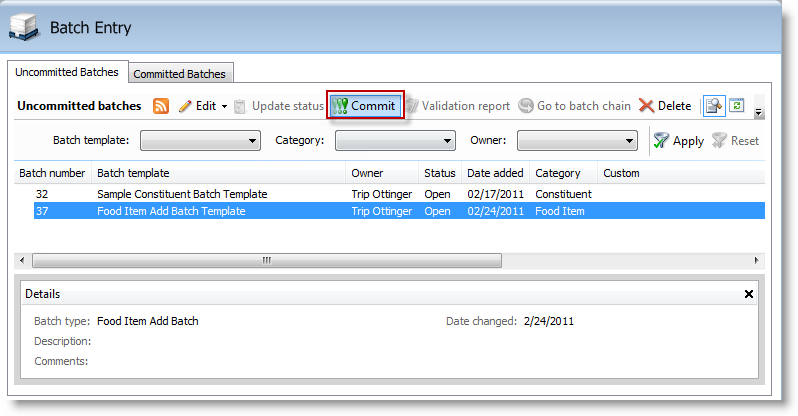
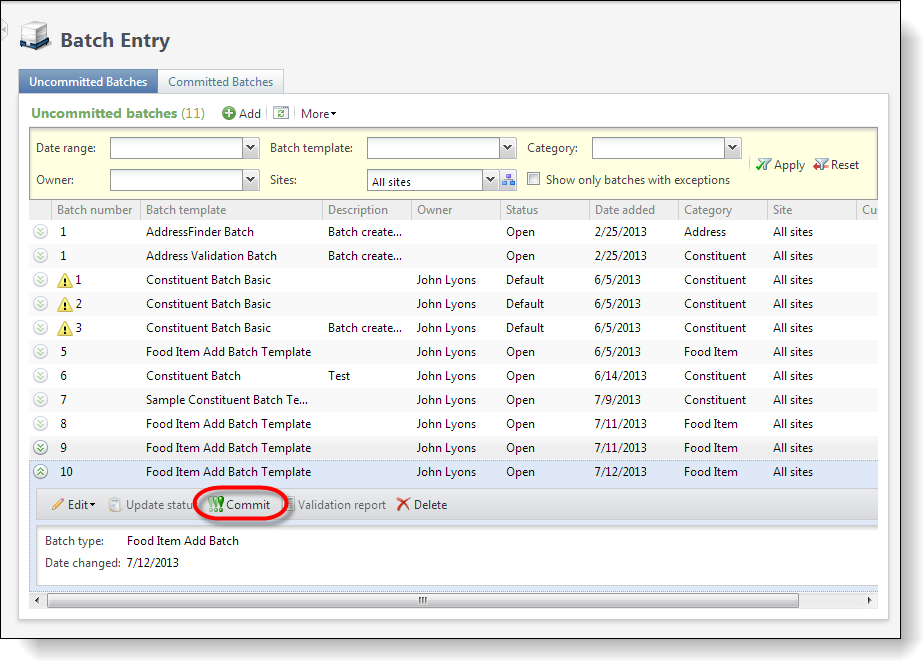
Figure: Commit the batch
-
You will be presented with the Commit parameters data form. Chosen to create an exception batch for the rows that will not commit to the production table.
-
Press the Start button to commit the batch.
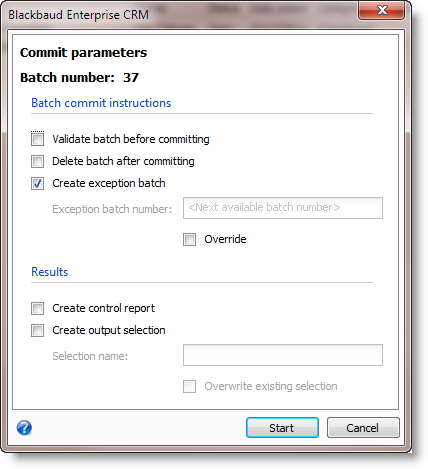
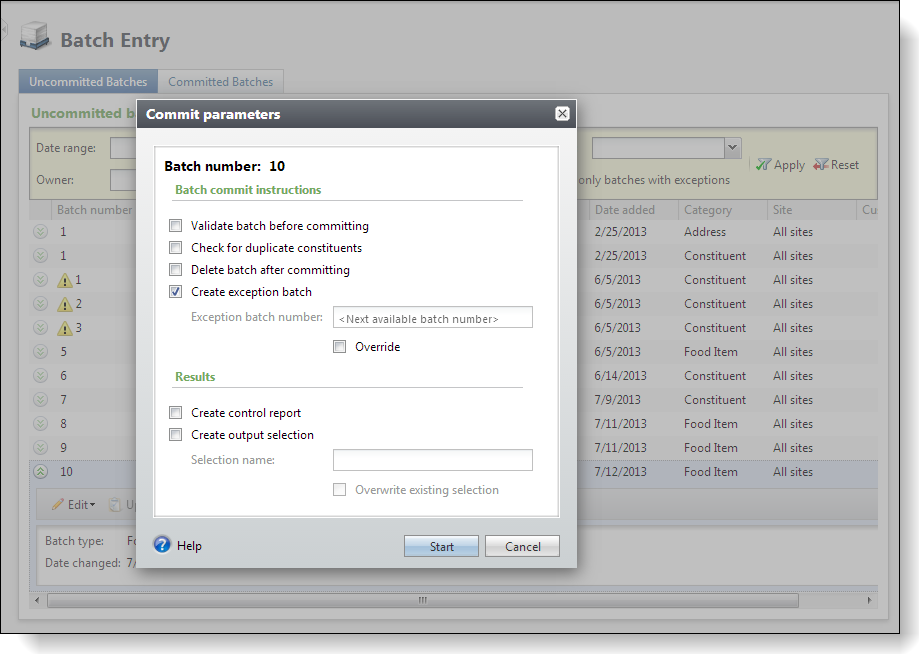
Figure: Commit parameters data form
-
We can see from the results that the batch did not commit.
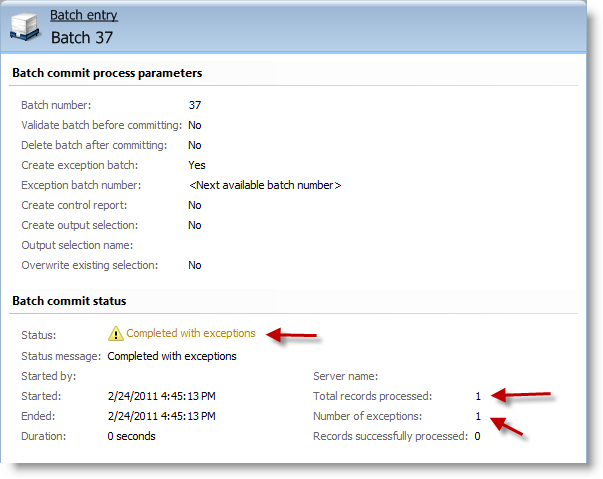
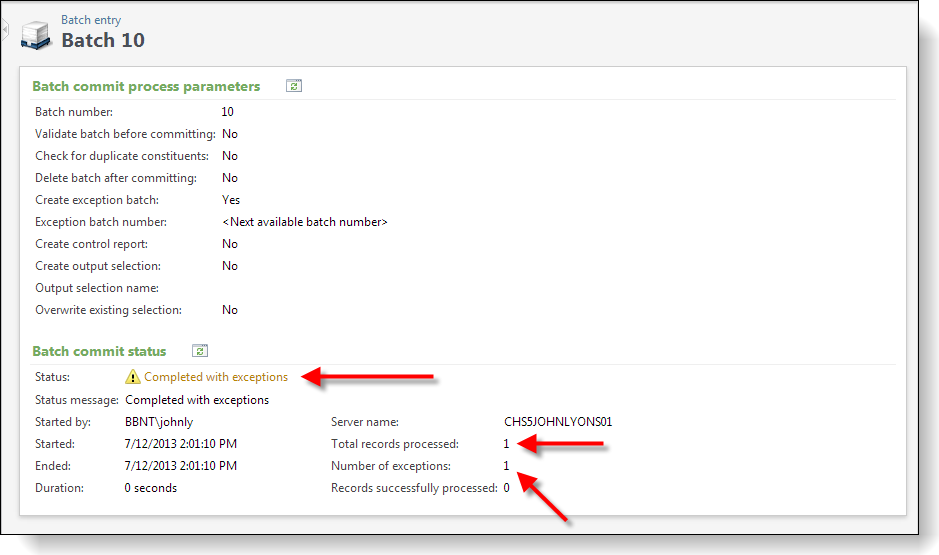
Figure: The batch contains errors
Step 7 - Review the Committed Batches tab.
Navigate back to the Batch Entry page and select the Committed Batches tab where you can see that the batch did commit and you can see the violation of the unique index as a message within the grid:
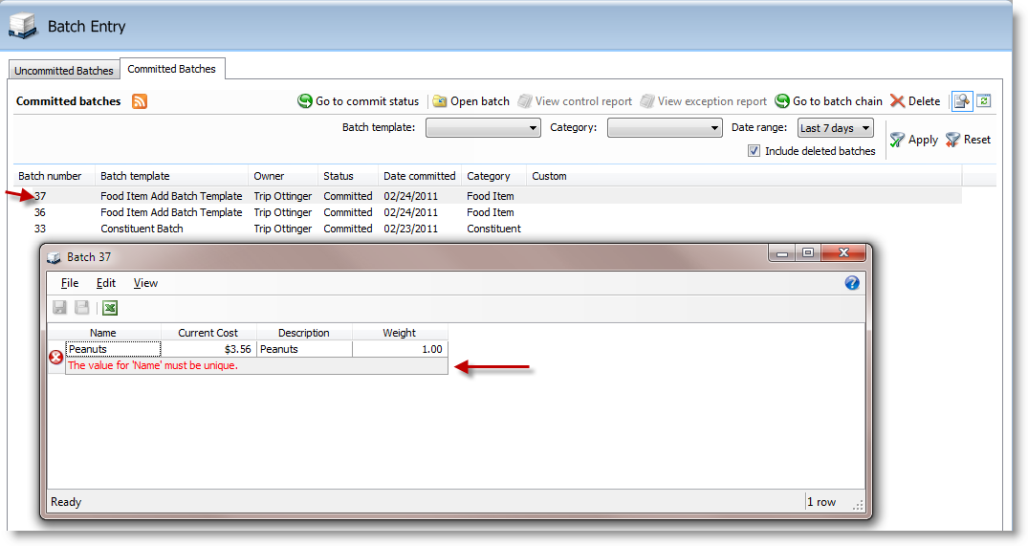
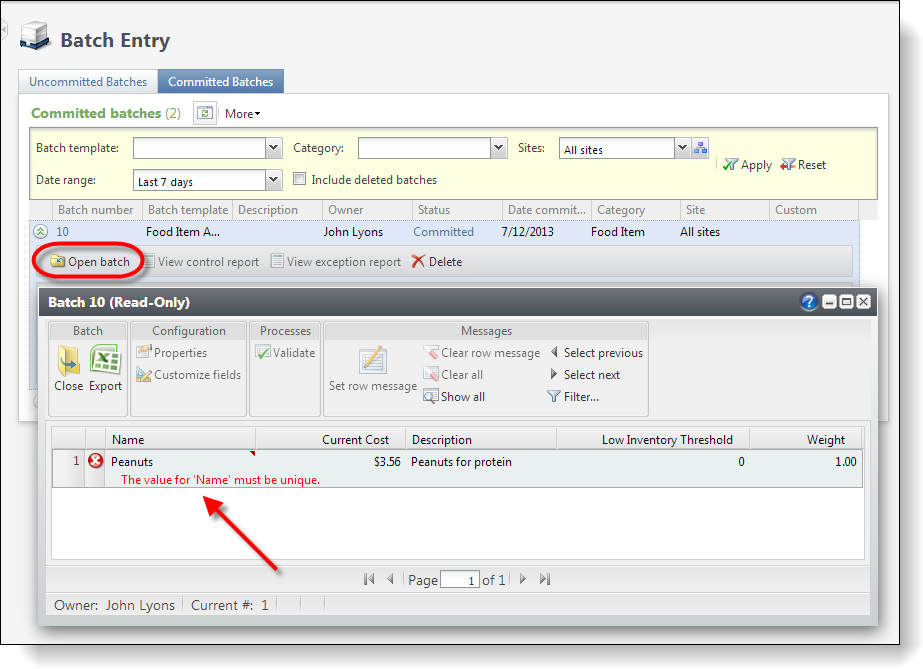
Figure: Our offending batch
Step 8 - Review the Uncommitted Batches tab.
Since we selected to create an exception batch earlier within our commit parameters, a new batch number was created when we attempted to commit the batch. This batch holds the exceptions from the previous batch.
Select the Uncommitted Batches tab on the Batch Entry page.
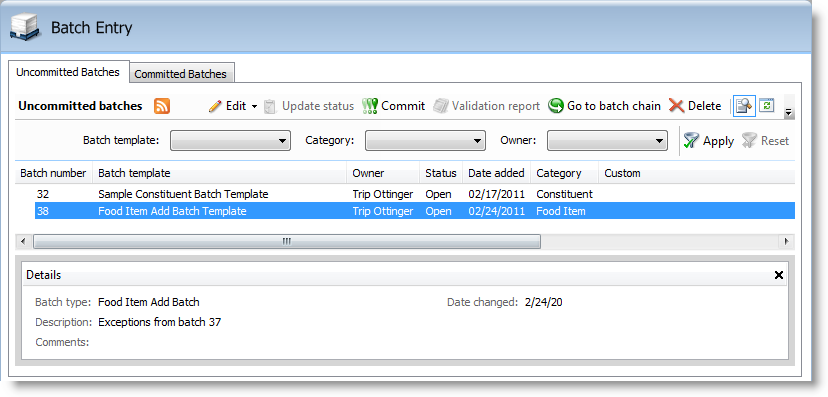

Figure: A new uncommitted batch contains the offending row.
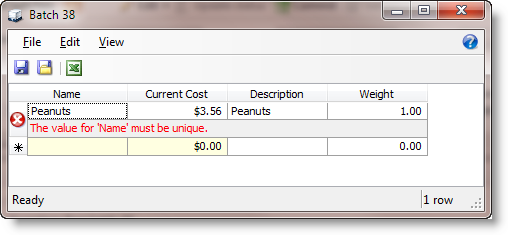
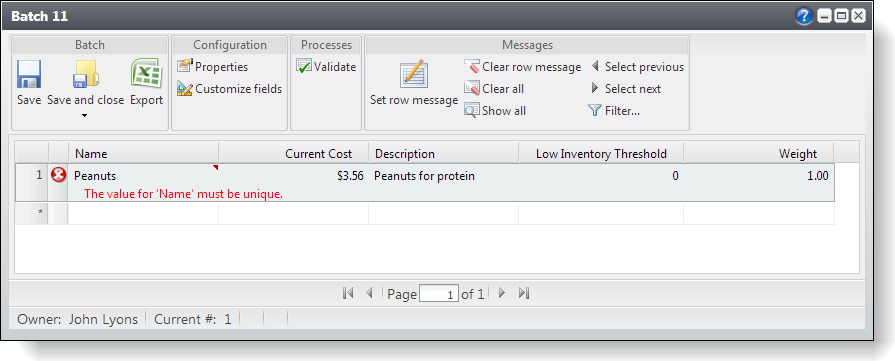
Figure: Duplicate row
Step 9 - Clear the error message and add new rows to the batch.
-
To clear the error messages from the batch, select Edit\Clear all messages from the batch grid window. Keep the existing "Peanuts" food item.
To clear the error messages from the batch, select Clear all under Messages in the batch grid window. Keep the existing "Peanuts" food item.
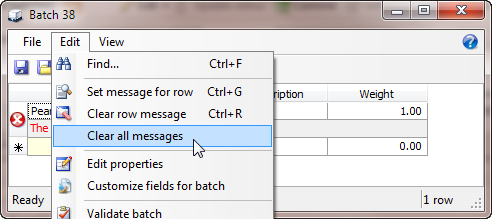
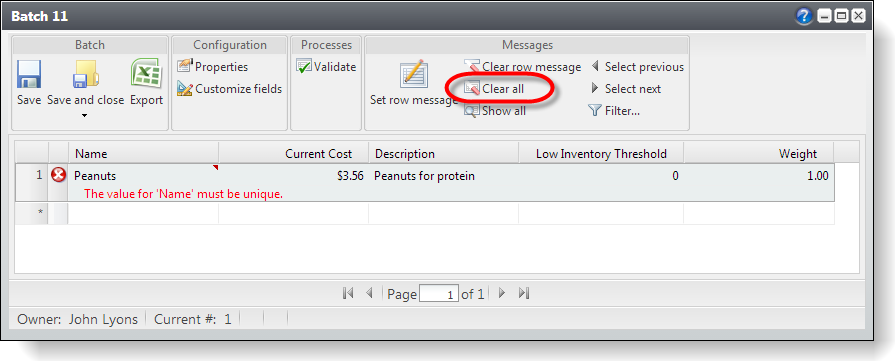
Figure: Clear all messages
Add another row with a unique food item name. Add the new row with a unique food item named "Salted Nuts" and keep the original "Peanuts" food item.
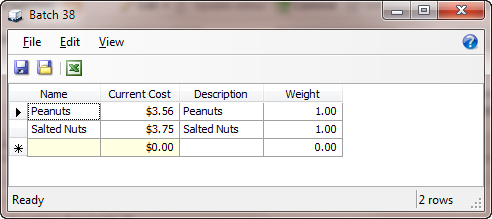

Figure: Add a new row
-
Save and close the batch window.
-
Commit the batch and elect to create an exception batch again.

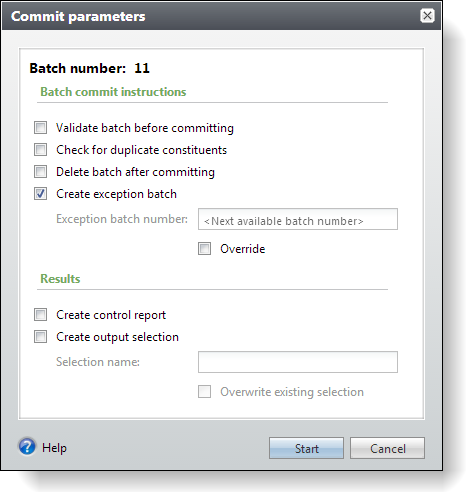
Figure: Commit parameters
In the results, we see that a total of 2 records were processed with 1 exception.
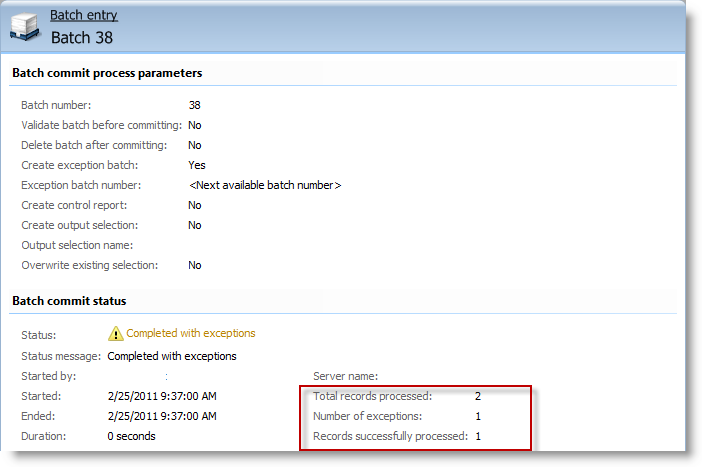
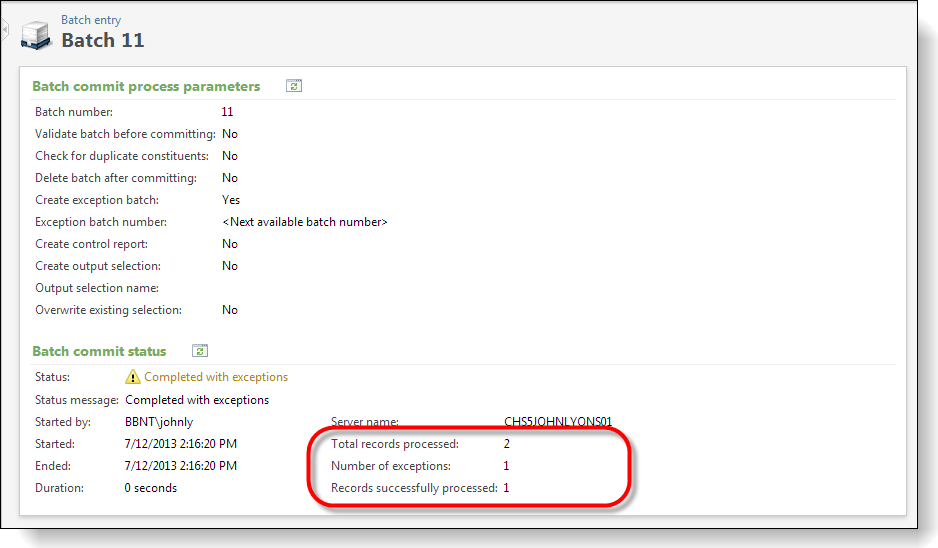
Figure: One row was committed the other was not committed
The net result was the following:
The "Salted Nuts" row within the batch was committed to the production table.
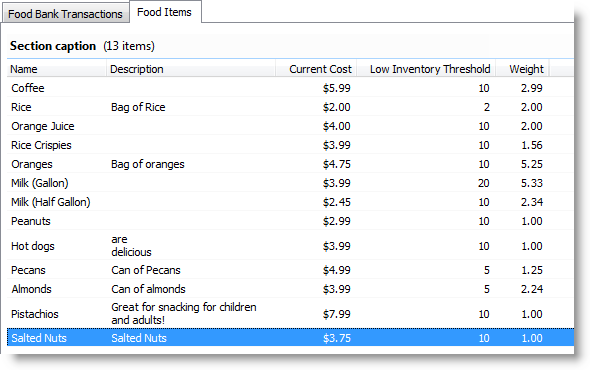
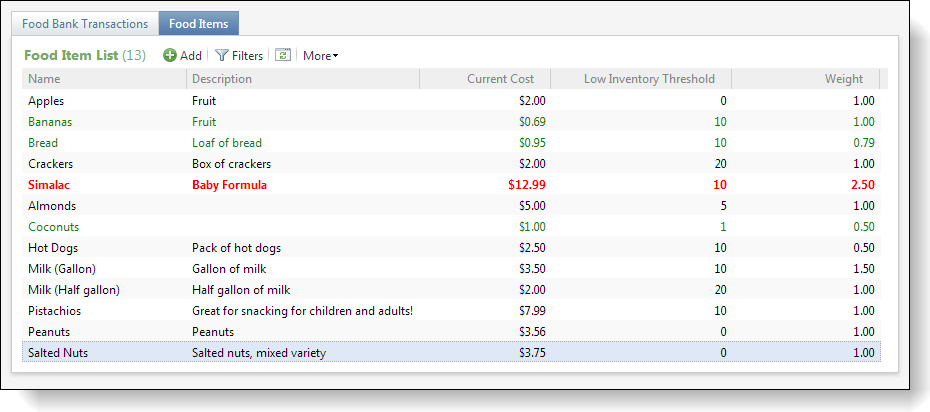
Figure: The committed row
The "Peanuts" row caused an exception yet again. As a result, a new exception batch was created containing our exception row. So we can conclude that when a batch containing multiple rows is committed, the exception rows will be not be committed while the non-exception rows will make their way to the production tables.
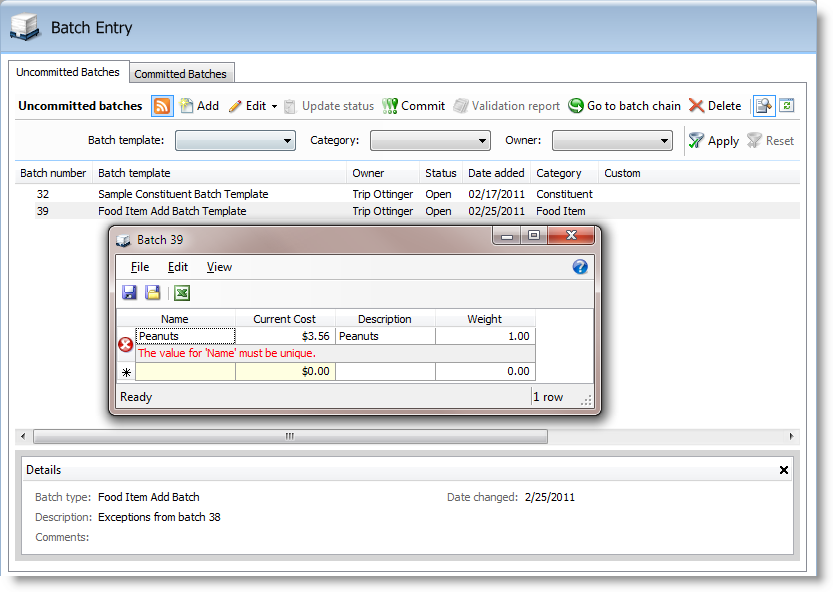
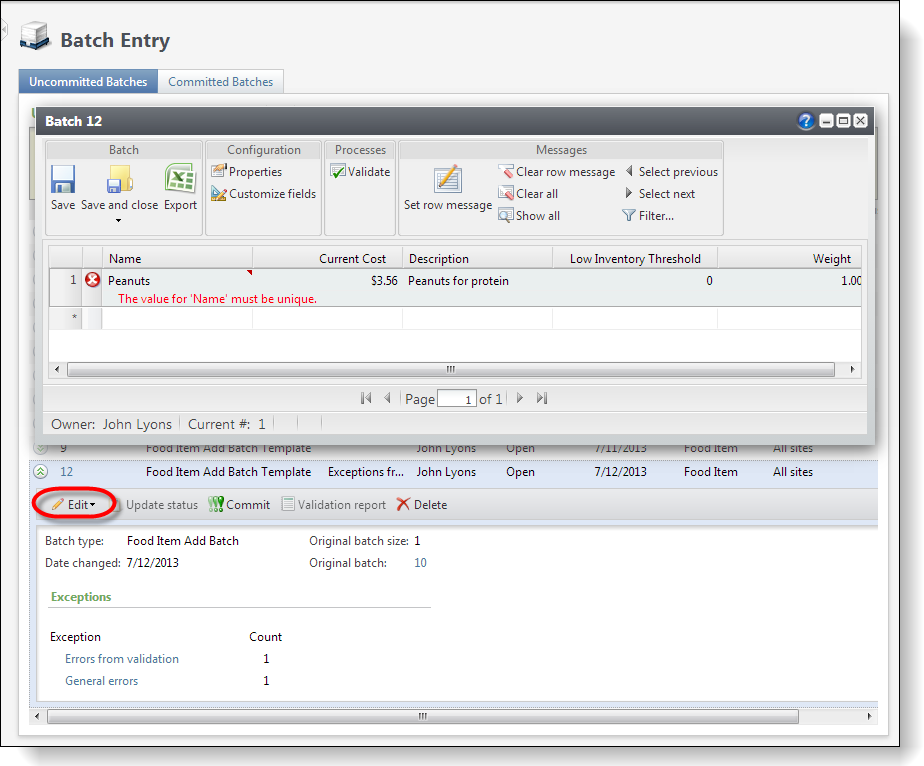
Figure: New uncommitted exception batch
Step 10 - Add multiple duplicate rows to the batch and two unique rows.
-
For the next experiment, modify your latest batch.
-
Add multiple rows are entered into the batch. Review your existing data within the food item table and then add three rows that will violate the unique index on the name column. In the screen shot below, I have added three rows (Peanuts, Coffee, and Orange Juice) that violate the unique index and two rows will not (Ice Cream (Gallon), Ice Cream (Pint)). Your data will vary. Please adjust your data entry accordingly.
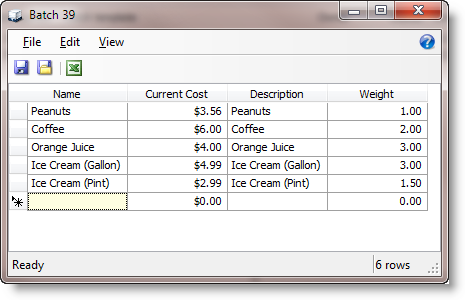
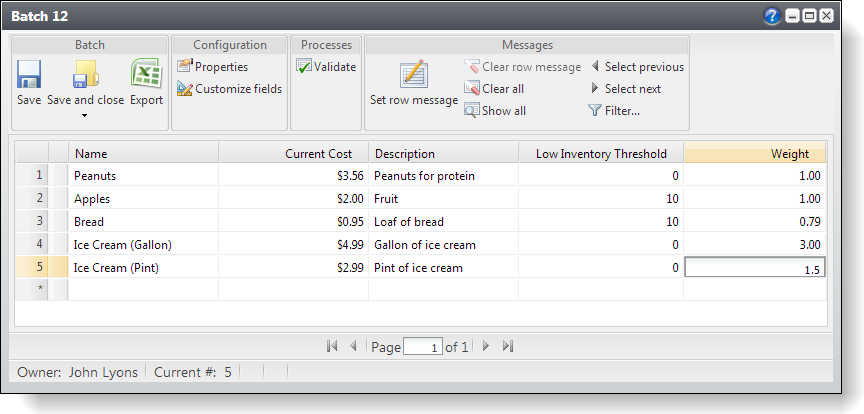
Figure: Attempt to commit duplicate records.
-
Commit the batch. Use the same commit parameters as before.
As expected, when the batch is committed, the ice cream rows are committed while the offending rows are not.
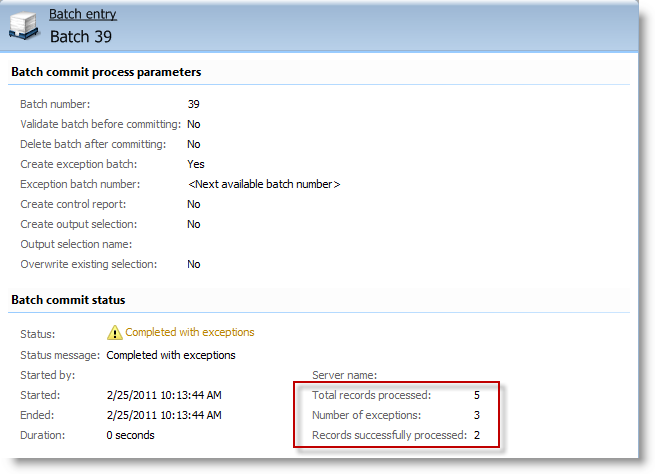
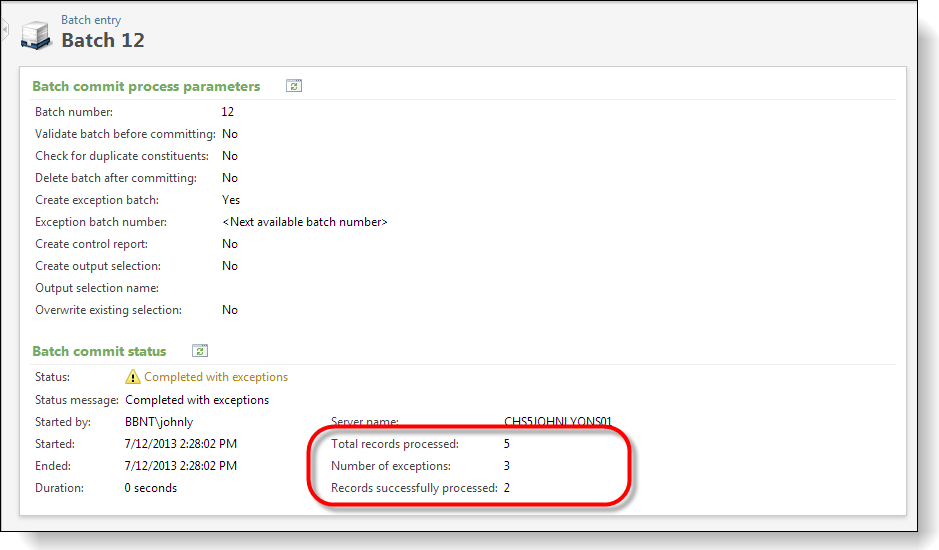
Figure: Exceptions occurred
Looking at the exception batch that was created, we see three messages, one for each offending row.
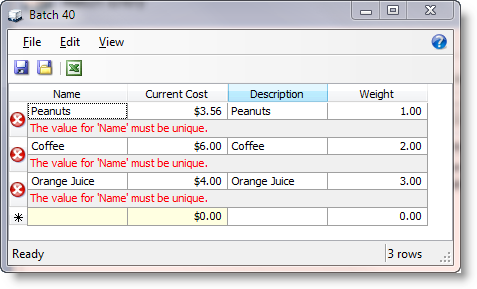
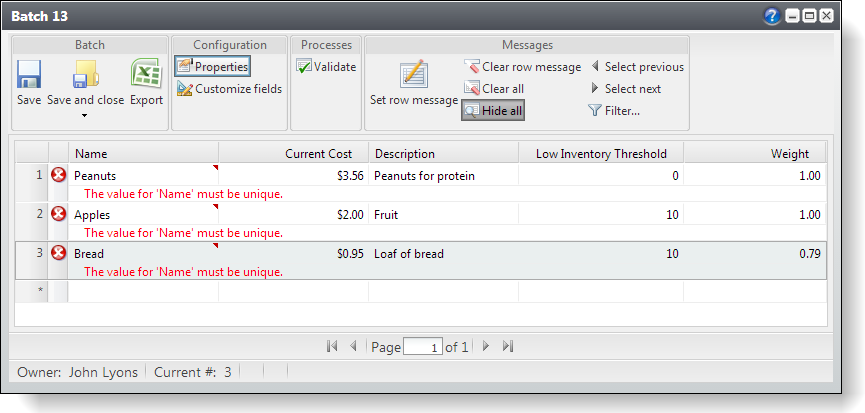
Figure: Three offending rows
Database Transactions and Exceptions on Commit
So, what can we deduce from these experiments? We know that for each row within the batch, an attempt was made by the Infinity platform to commit the row to the production table and that any rows that bumped up against a table constraint were not committed to the production table while non-offending rows were committed to the production table. How does the Infinity platform go about attempting to place each row from the batch into the production table? Do database transactions come into play, and if so, how granular on the set of batch rows are the transactions? Is a transaction placed around each row separately, or is the entire set of rows wrapped within a single transaction? What are the technical mechanics behind the scenes?
The answer is that on the commit, the platform takes each row within the batch, wraps each row within a database transaction, and attempts to commit each individual row. We can conclude that the entire set of batch rows are not placed within a single transaction, rather each individual row.