Select your user interface:
Exercise 9: Configure a New Batch and Save Data to the Batch
Now let's create a batch from our newly created Food Item Add Batch Template.
Step 1 - Add a new batch.
-
Navigate back to the Batch Entry page and click the Add button below the Uncommitted Batches tab.
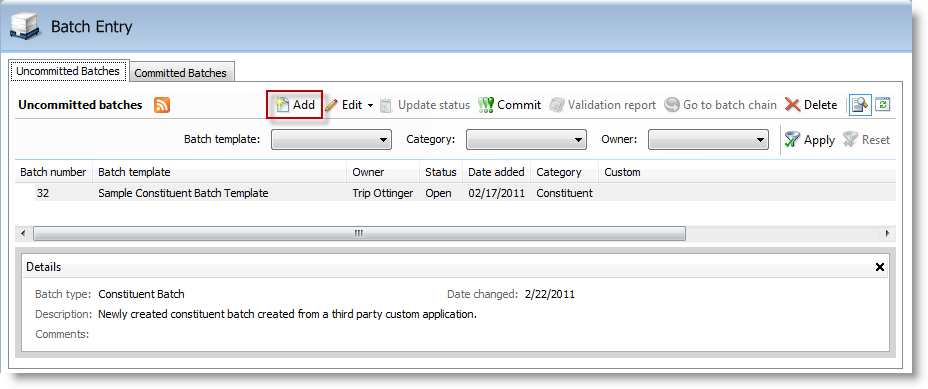
Figure: Add a new batch
-
Select the food item batch template we created previously, provide a description, and click Save to create a batch.
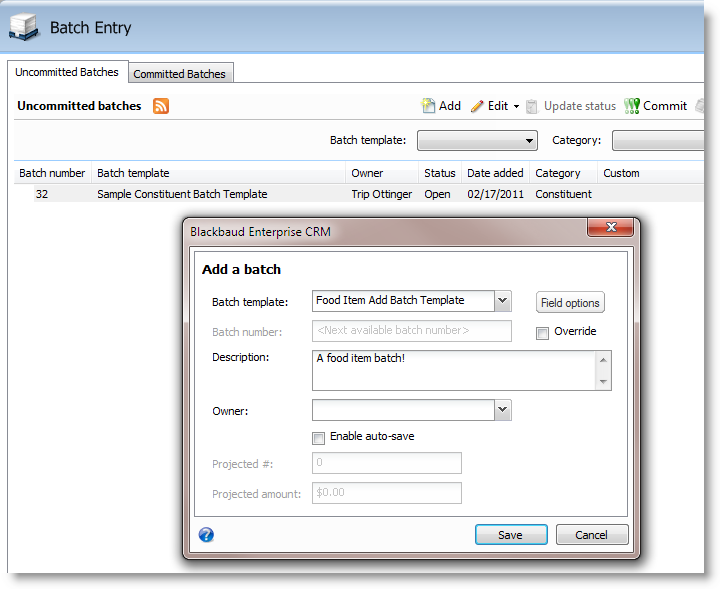
Figure: Add a batch
A new batch is created, and the end user is presented with a user interface grid to enter rows into the batch. After the batch is committed, these rows end up in our USR_BATCHFOODITEMADD staging table, provided that the batch is validated and no problems occur with the data in the batch.
Step 2 - Add a food Item into the batch grid.
Add a food item named "Pistachios" to the batch. Your batch number will vary.
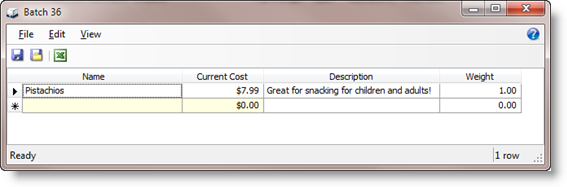
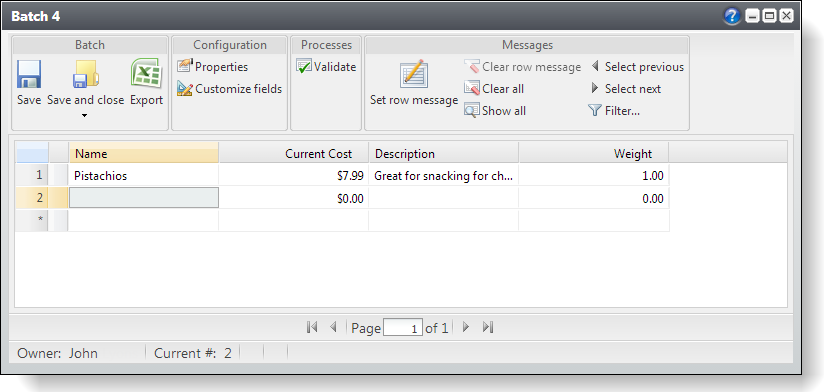
Figure: Add a food item into the user interface grid
Step 3 - Query the USR_BATCHFOODITEMADD and BATCH tables.
-
When the batch is saved, the row is saved to the USR_BATCHFOODITEMADD batch staging table. Write a query within SQL Server Management Studio to view the records within the USR_BATCHFOODITEMADD batch staging table. Include all the columns within the query.
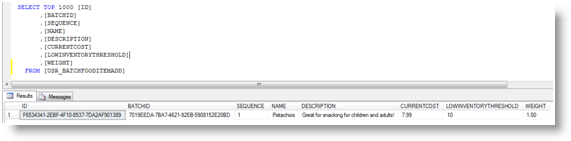
Figure: Query the staging table
-
Write a query to view the contents of the BATCH tableand use the value for BATCHID from the previous query to limit the results.
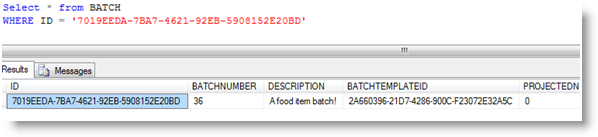
Figure: Query the BATCH table
-
Read though the Save Data within a Batch and Sources for Exceptions When You Save Data into a Batch sections below and continue onto Exercise 9 (Continued): Configure a New Batch and Save Data to the Batch.