Exercise: Add the Selections for the Food Bank Inventory Business Processes
In this exercise, we will create two ad-hoc queries to create two selections to use as options for the Selection parameter.
Data processing for a business process occurs within a .NET CLR class that exists within an assembly that is deployed on the Infinity web server. This code runs within the web services layer. Within this CLR class file, the parameter set values are retrieved and the processing on the data begins in earnest. How the processing occurs is up to you and the output data format is completely open. For more information, see Processing the Data and Business Process Logic.
Selections can be used as parameters to restrict the number or rows processed.
Often business processes require a reference to what's a known as a selection, which is a set of record IDs for a particular record type. Within the food bank inventory business process, the IDSETREGISTERID field points to a system table named IDSETREGISTER. Each row in the IDSETREGISTER table corresponds to a view or table-valued function that returns a list of Primary Key ID values of a particular record type (database table), such as Constituent or Revenue. Users can create selections with Blackbaud's query tool. First, they create an ad-hoc query or smart query, and then they save the query results as a selection. Selection can also be created by other processes. The IDSETREGISTER table is primarily populated through the saving of a selection from the query tool. A selection contains the IDs of the records to be used as input into and processed by a business process in order to restrict the number of rows processed.
Note: Users can create selections with Blackbaud's query tool. A selection can be an input parameter into a business process instance. A selection is a list of record IDs used within the business process .NET code to restrict the number of rows processed. Restriction of the rows typically occurs within the SQL statement in the .NET code with either a JOIN or WHERE clause.
For more information, see Business Process Overview.
Step 1 - Configure the "All Food Banks (Static)" ad-hoc query and the Static Selection for the selection parameter.
Before we can create the code for the business process, we must create some selections in Blackbaud CRM.
First, let's configure a static selection that contains at least one food bank organization. The number of rows will be a static snapshot of all the rows in the database. The selection will narrow the number of food bank organizations processed by the business process.
-
Navigate to the Analysis functional area.
-
Click the Query task.
Click the Information library task.
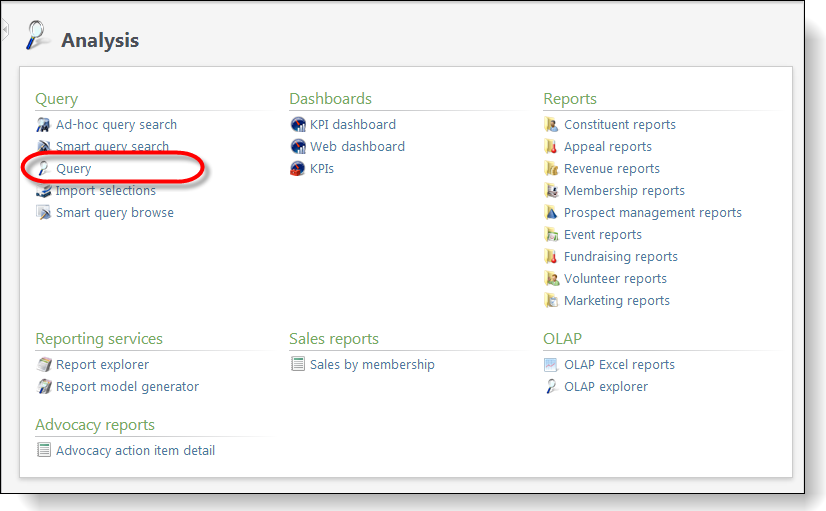
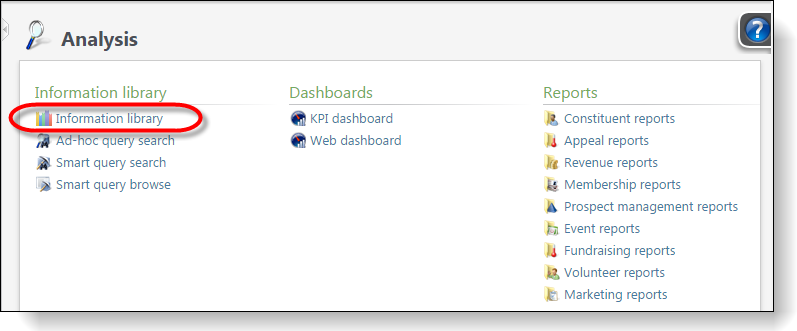
Figure: Navigate to the Query task
Figure: Navigate to the Information library task
-
On the Queries tab of the Query page, click the Add\Ad-hoc query action above the data list.
On the Queries tab of the Information Library page, click the Add an ad-hoc query action above the data list.
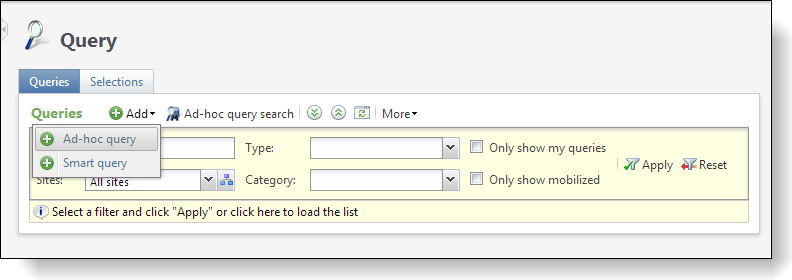
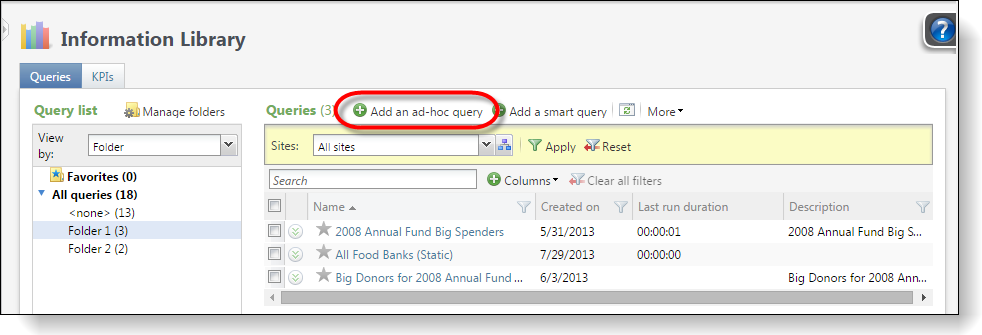
Figure: Add an ad-hoc query
-
On the screen that appears, select a source view. Filter by the "Constituent" record type and select the "Constituents" source view, then click OK.

Figure: Select a source view
For more information about query and selections, see the Query and Import Guide.
-
The New Ad-hoc Query screen appears. Select the Food Bank node under Browse for fields in on the left.
-
Note: The Food Bank node only appears if you loaded the appropriate food bank specs into the Infinity Catalog System. See prerequisites at the beginning of this exercise.
-
To limit the results to constituents that are also food banks, add the System record ID system field from the middle column to the Include records where pane.
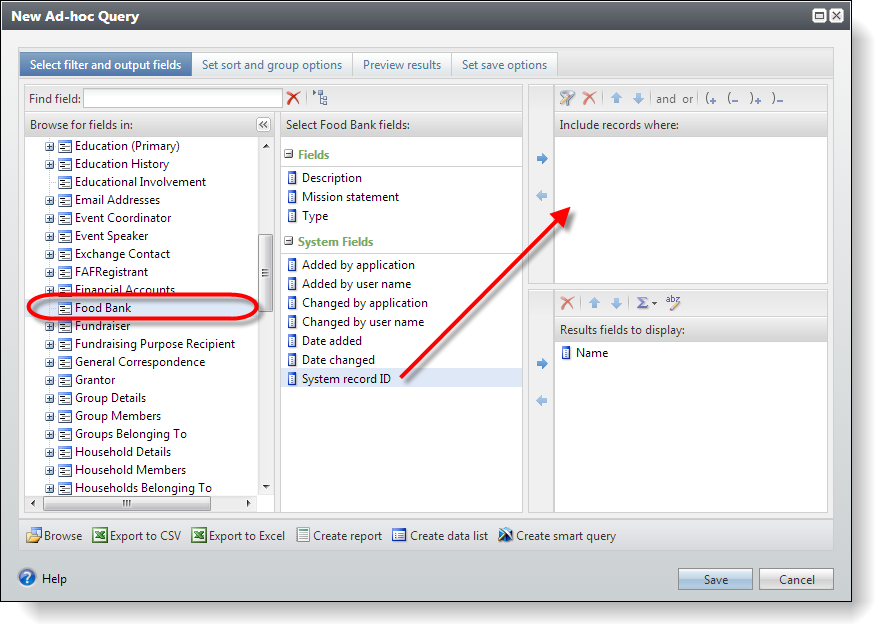
Figure: Filter by the food bank system record ID
-
The Apply Criteria screen appears. To filter the results of the query, select "Not Blank" from the drop-down list.
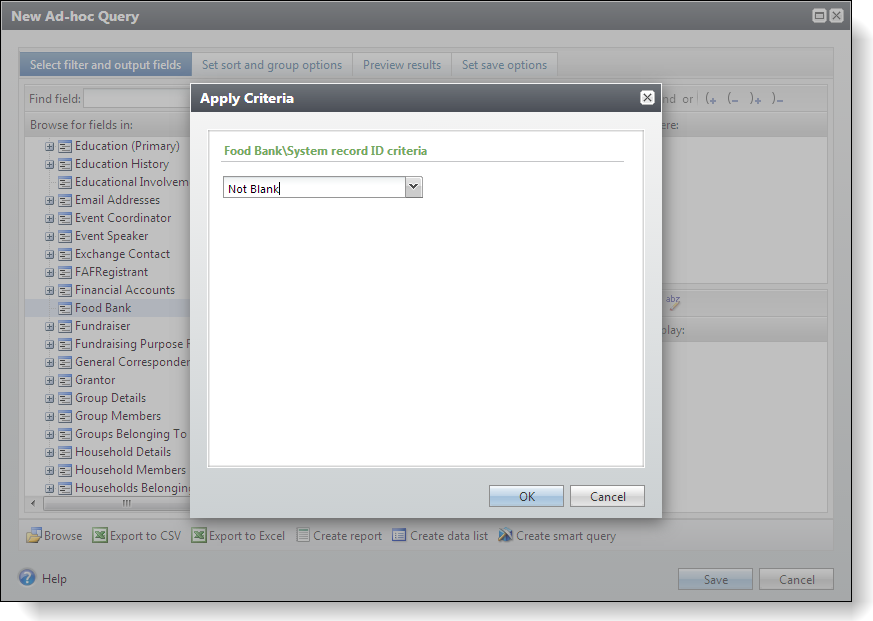
Figure: Only need to see the food banks.
-
Keep the constituent Name field in the Results fields to display pane.
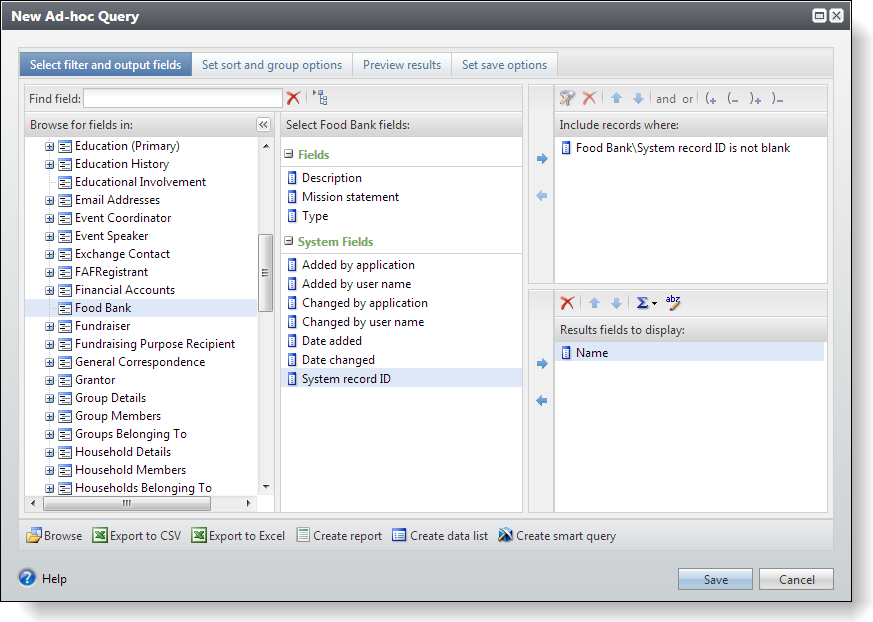
Figure: The completed ad-hoc query
-
To run the query and view the results, select the Preview results tab. Your results will depend on the number of food banks in your database. If you have no results, navigate to the Food Bank functional area and use the Add a Food Bank task to add food banks.
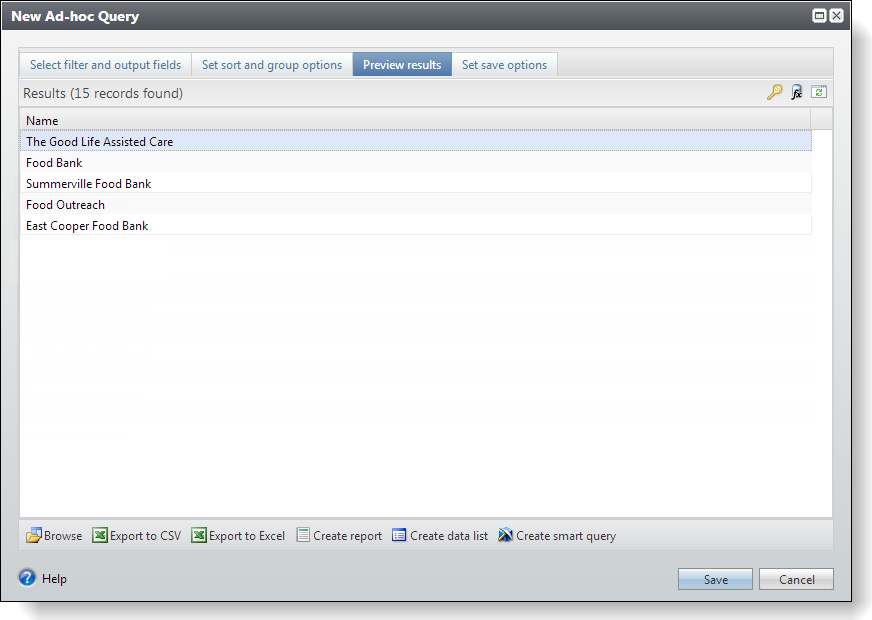
Figure: Query results
-
Select the Set save options tab and enter the following values. Make sure select to create a static selection

Figure: Set save options tab
-
Click Save to save the query and the selection.
-
On the Query page, verify that the new query appears on the Queries tab and that the new selection appears on the Selections tab.
On the Information Library page, verify that the new query appears on the Queries tab. Then return to the Analysis functional area and click View selections under Selections to verify that the new selection appears on the Selections page.
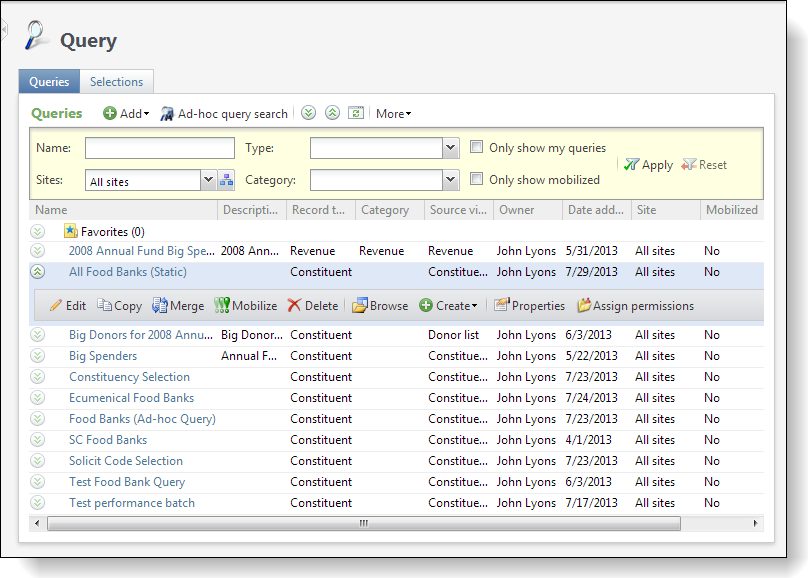
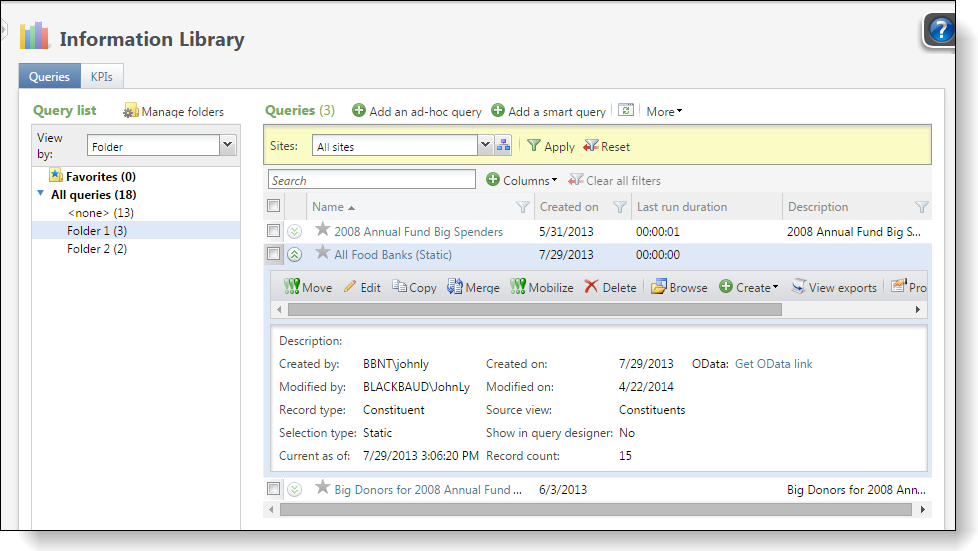
Figure: The Queries tab displays the new ad-hoc query that creates the static selection.
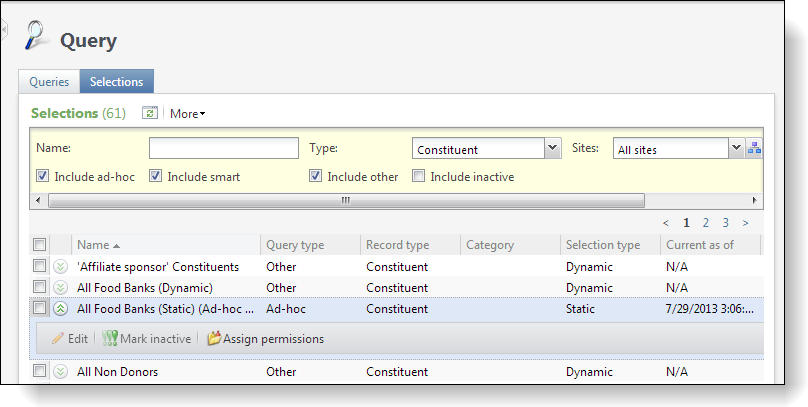

Figure: The Query page's Selections tab displays the new static selection that the ad-hoc query created.
Figure: The Selections page displays the new static selection that the ad-hoc query created.
Step 2 - Create a SQLFunctionSpec to generate a dynamic selection.
Selections can be created using queries as in the previous step, but you can also create a built-in selection by defining a SQLFunctionSpec. The SQLFunctionSpec defines a table-valued user-defined function. A child CreateSelection element within the SQLFunctionSpec element indicates that the function should be registered within the IDSETREGISTER table when the spec is loaded. The function defined within the SQLFunctionSpec element must return a single column named or aliased as ID.
-
Create a SQLFunctionSpec in the InventoryProcess folder.
-
Name the XML file USR_UFN_FOODBANKSELECTION.xml.
-
Review the XML for the SQLFunctionSpec below. Note the ID field being returned. Note the CreateSelection child tag. Replace the XML within the newly created SQL function spec with the XML below.
-
Save and load the SQLFunctionSpec.
<SQLFunctionSpec xmlns="bb_appfx_sqlfunction" xmlns:common="bb_appfx_commontypes" ID="b7be3134-cf13-4467-8315-2a064406aa32" Name="USR_UFN_FOODBANKSELECTION" Description="SQL function to return all food banks as a selection." Author="Technical Training" DBFunctionName="USR_UFN_FOODBANKSELECTION"> <!-- This is a built-in selection. Selections can be created using queries but you can also create a built-in one. The data pulled is dynamic. --> <CreateFunctionSQL> <![CDATA[ create function dbo.USR_UFN_FOODBANKSELECTION() returns table as return select CONSTITUENTID as ID from dbo.USR_FOODBANK ] ]> -
Let's view the new selection on the Query page. To navigate to the Query page go to the Analysis functional area followed by selecting the Query task. On the Query page, select the Selections tab.
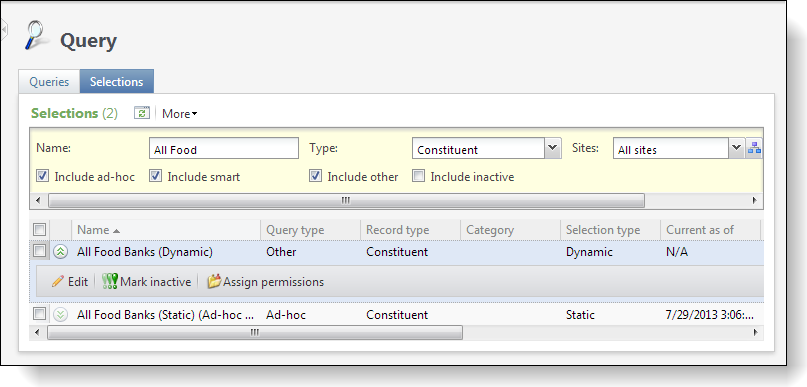
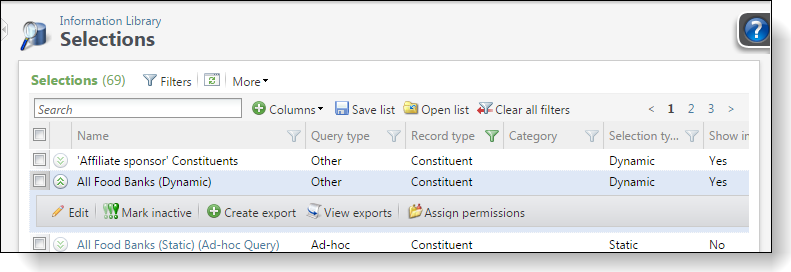
Figure: The selection created with the SQLFunctionSpec is visible on the Selections tab.
Figure: The selection created with the SQLFunctionSpec is visible on the Selections page.
Step 3 - Configure the "Ecumenical Food Banks" ad-hoc query and a selection.
Let's configure a third ad-hoc query and associated selection that narrows the food banks to those of a specific food bank type such as "Ecumenical." This step is similar to step 2 above.
-
Navigate to the Analysis functional area and click the Query task to open the Query page.
-
On the Queries tab, click the Add/Ad-hoc query action. This begins the process of adding another ad-hoc query.
-
Base the ad-hoc query off of the Constituents source view as we did in the previous step.
-
On the New Ad-hoc Query screen, select the Food Bank node under Browse for fields in.
-
To limit the results to food banks with a specific type, add the System record ID system field from the middle column to the Include records where pane and select a food bank type such as "Ecumenical."
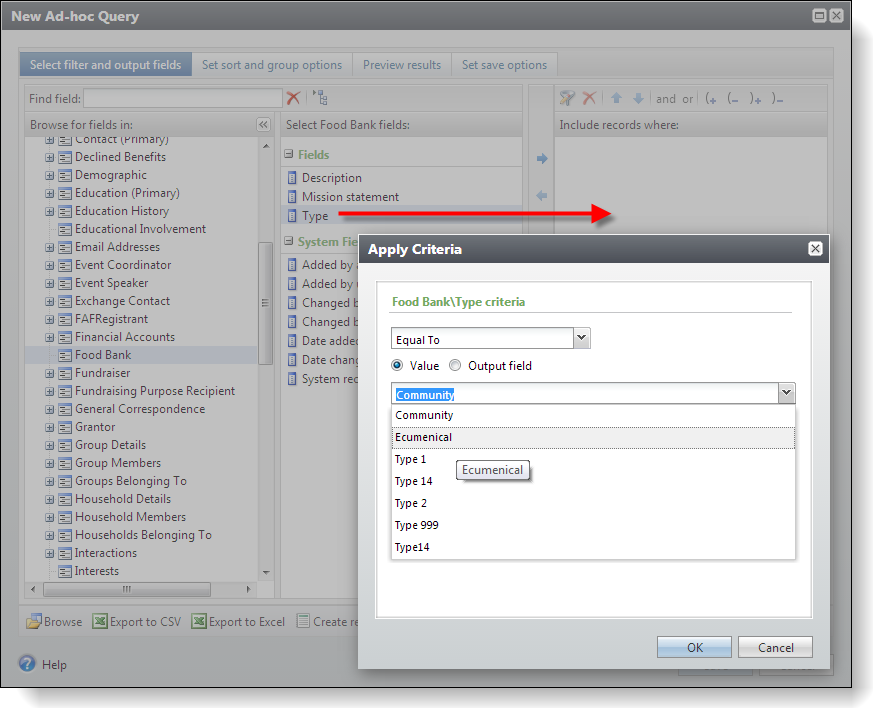
Figure: Limit the second ad-hoc query to just those food bank records of a specific food bank type
-
To run the query after the filter is defined and ensure that rows are returned in the results, select the Preview results tab.
-
To save the query and create a selection, select the Set save options tab.
Figure: Set save options tab