Select your user interface:
Exercise: Build the Business Process Parameter Set Page
The following describes the process to build a simple business process parameter set page. This page contains a single tab with a single section that contains a data list to hold the parameter sets that the current user has permission to view and manage.
Within the section containing the data list are section actions that enable the following.
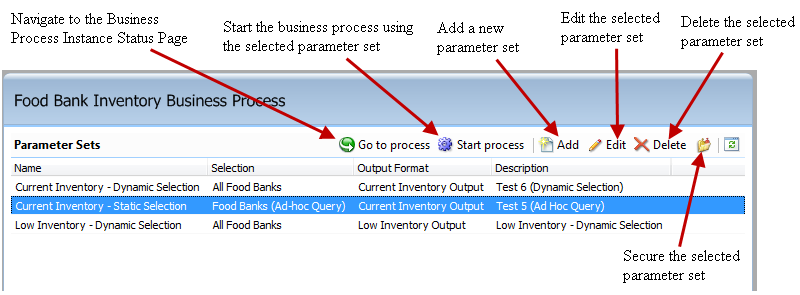
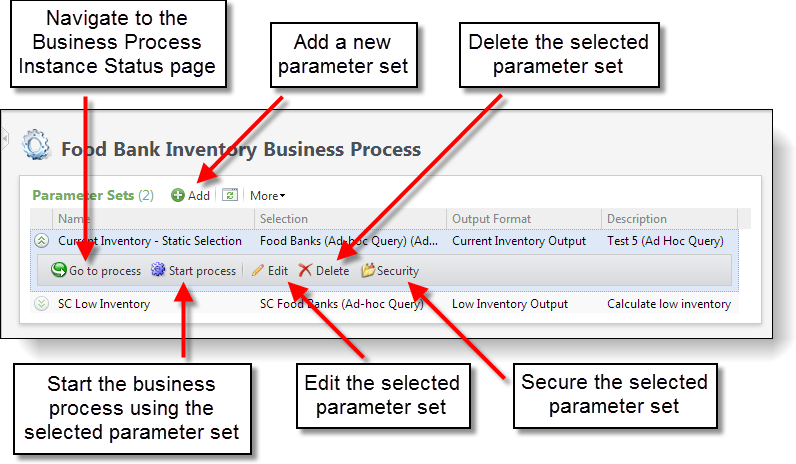
In this exercise, we will build the page to host the data list and corresponding actions to manage parameter sets for the food bank inventory business process.
Step 1 - Create a page.
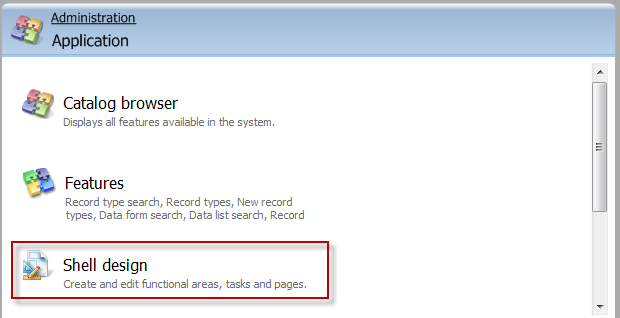
Navigate to Administration > Application > Shell Designpage.
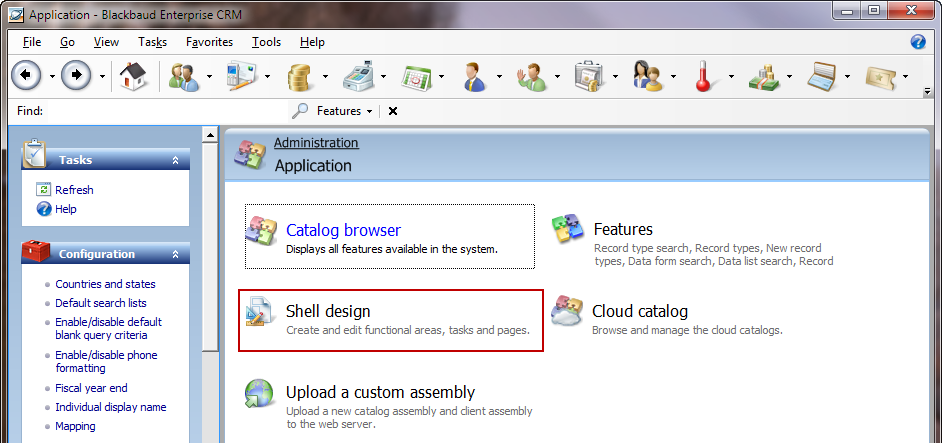
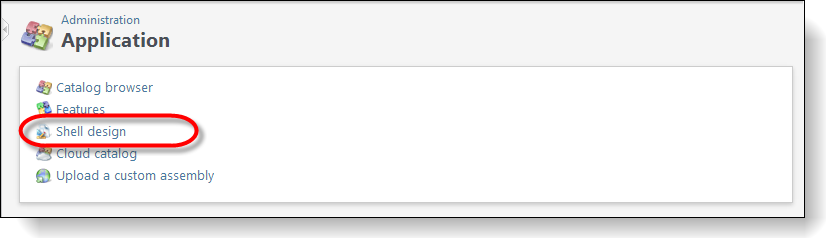
Figure: Navigate to the Shell design task
Select the Pages tab.
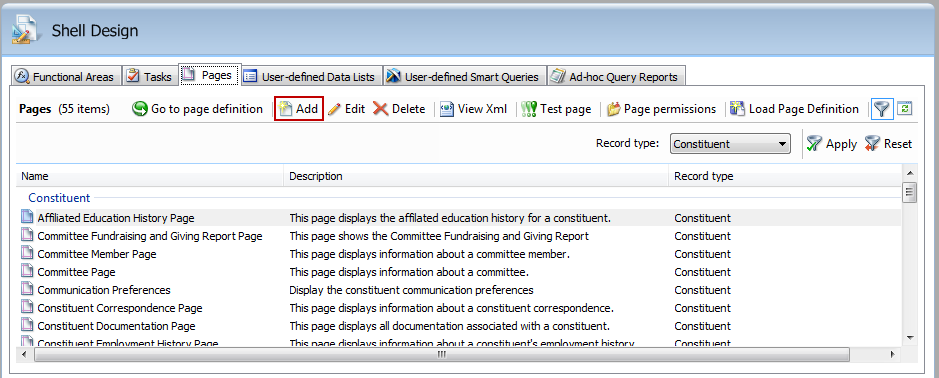
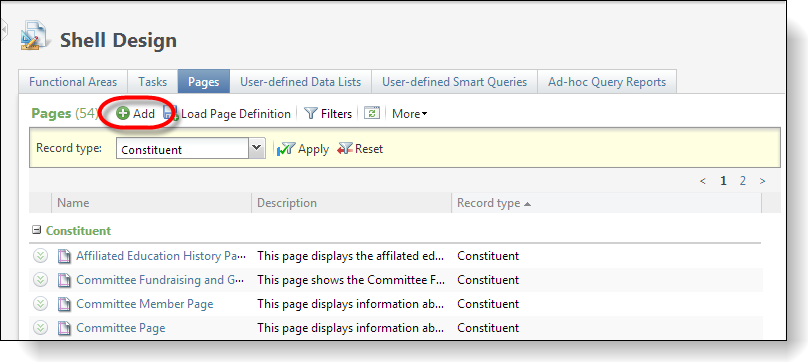
Figure: Add a new page
Click the Add action above the Pages data list to open the property sheet to create a page.
Use the screen shot as a guide to provide properties for the new page.
Note: On the page we are building, the RecordType property has no value. The RecordType property declares the record type of the context for the page, if any. When it comes time to configure a task or an action to navigate to the page, we will not need to provide any context to the page.
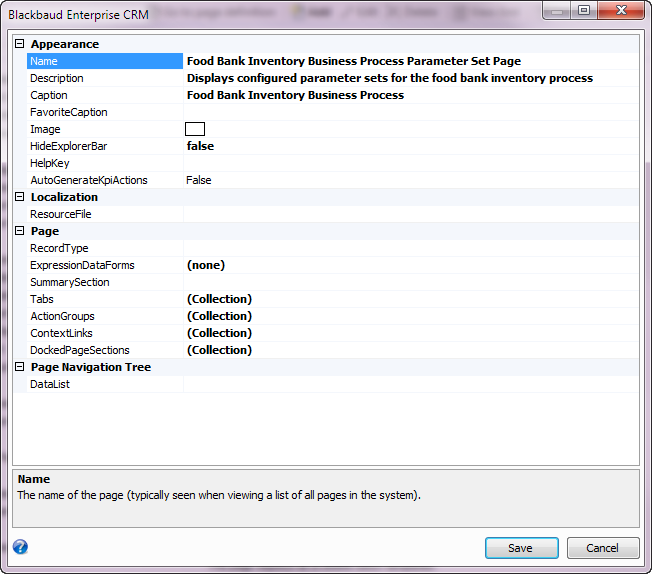
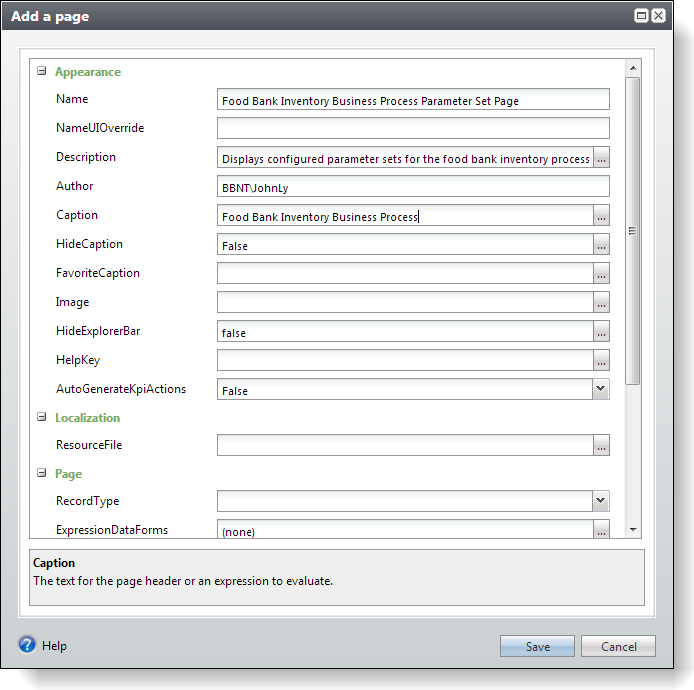
Figure: New page property sheet without a RecordType property value. This page will not require any context prior to its display.
Step 2 - Add a new tab.
Click the ellipsis button for the Tabs property. This opens a new property sheet that enables you to add tabs to the page.
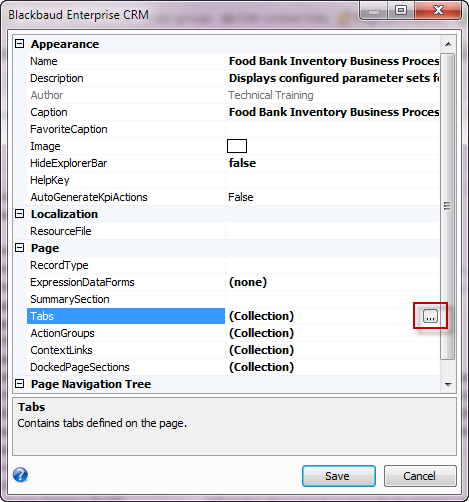
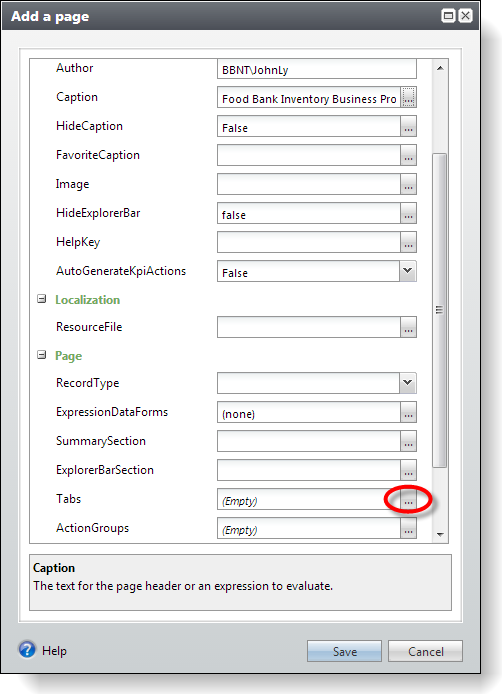
Figure: Click the ellipsis button to add a tab to the page
On the Tabs property sheet, click the Add button. Use the screen shot as a guide to provide properties for the tab.
Note: With only one tab, the tab is not visible within the user interface, but its future contents will be visible.
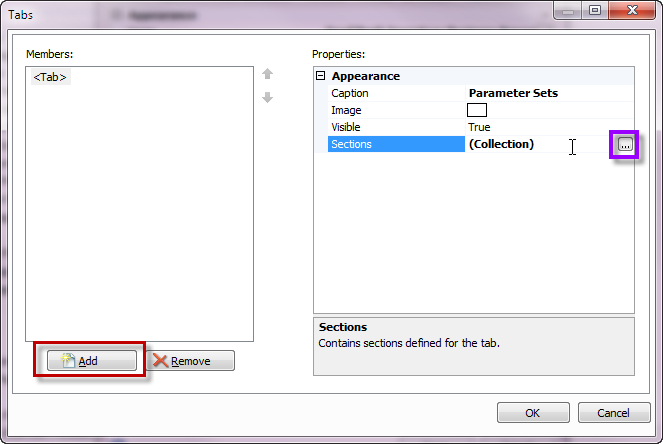
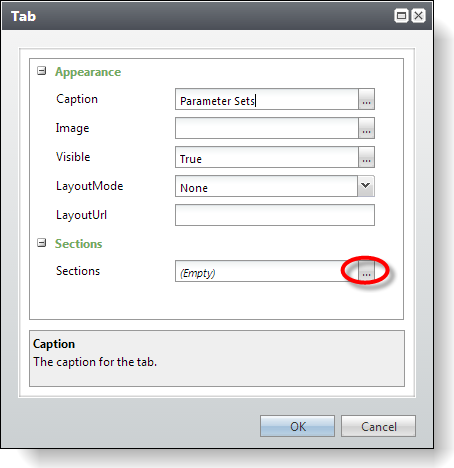
Figure: Add the properties for the tab
Step 3 - Add a new section with data list within the tab.
In this step, we will add a data list to display the different business process instances for our business process. The data list is populated by a stored procedure that pulls the parameter sets from the USR_INVENTORYPROCESS table. The list is filtered based on security permissions for the current application user. In other words, if the current user does not have rights to view a parameter set for the business process, then the corresponding row is not displayed in the data list.
A tab can contain many sections, and a section contains a reference to a single feature such as a data list. On the Tabs property sheet, click the ellipsis button for the Sections property to add a new section.
On the Sections property sheet, click the Add button to add a section to the tab. The section ultimately contains a reference to the data list that we created in the prior exercise. See the figure below.
The section displays the data list named "Inventory Process Business List" that we created in the previous exercise.
Use the screen shot below as a guide to add a reference to the data list within the new section.
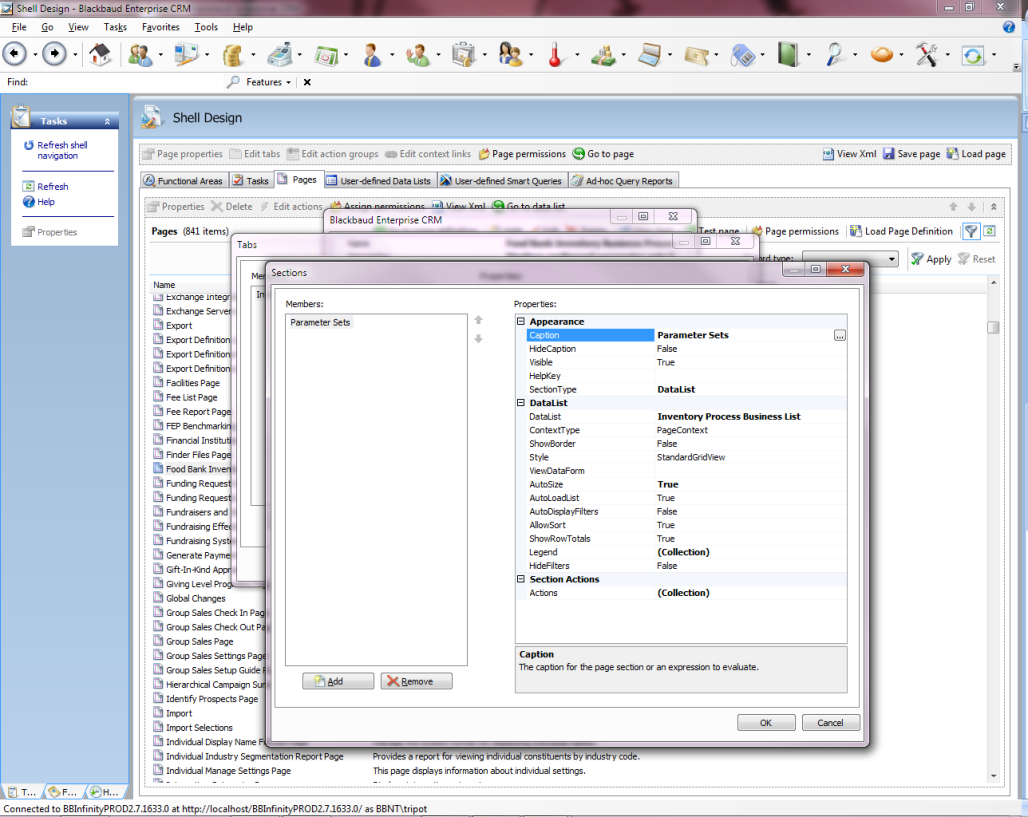
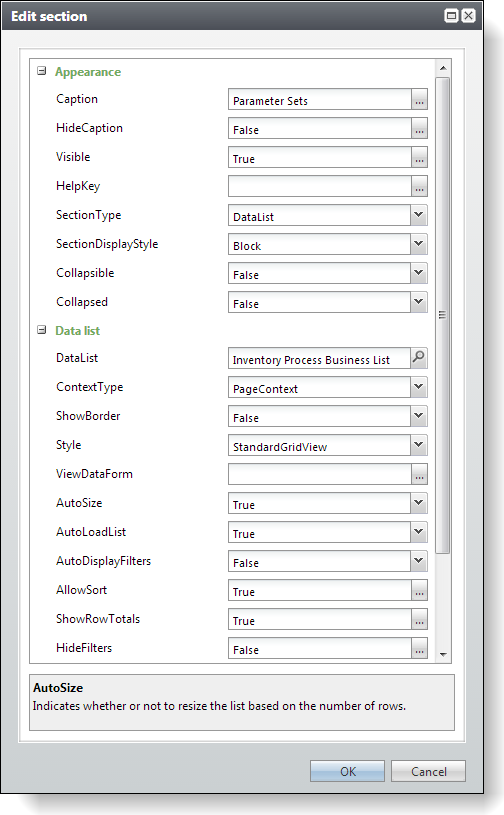
Figure: Add the Parameter Sets section to the tab
Click OK on the Sections and Tabs property sheets, and then click the Save button for the page property sheet.
Click OK on the Edit section, Sections, Tab, and Tabs screens, and then click the Save button on the Add a page property sheet.
Navigate to the Shell Design page via Administration > Application > Shell design. Locate your newly created Food Bank Inventory Business Process Parameter Set Page on the Shell Design page.
Step 4 - Test the page.
After you locate the page, click the Test page action to open the page.

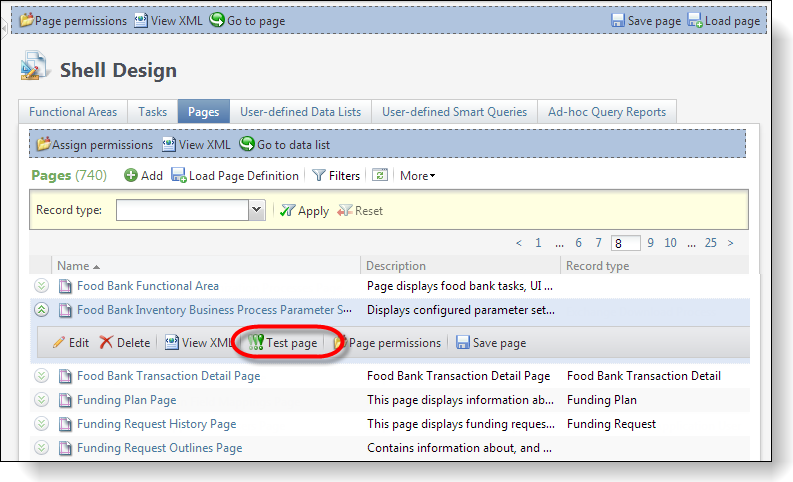
Figure: Test the page within Shell Design
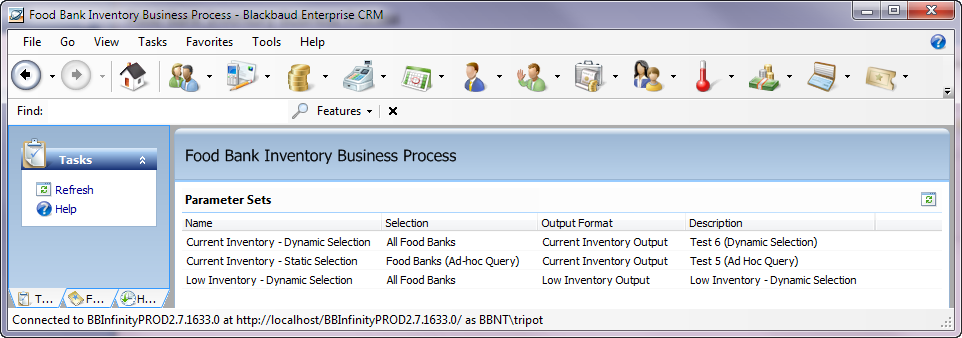
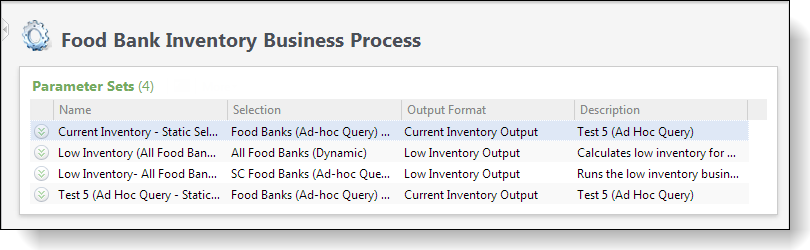
The number of parameter sets in your data list on the page may vary from the figure below. At this point, you probably do not have any parameter set record in the database for this business process. In the next step, we will add an action button above the data list to allow the opening of a data form to add a parameter set to the database.
To place the page into Design Mode, select Tools > Design Mode from the main menu.
To place the page into Design Mode, click the Toggle design mode on button near the top right of the web browser.
Step 5 - Add a parameter set.
With the shell in Design Mode, click the Edit actions button within the section that holds the Parameter Sets data list.
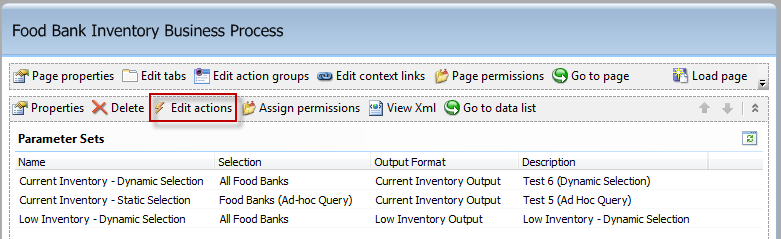
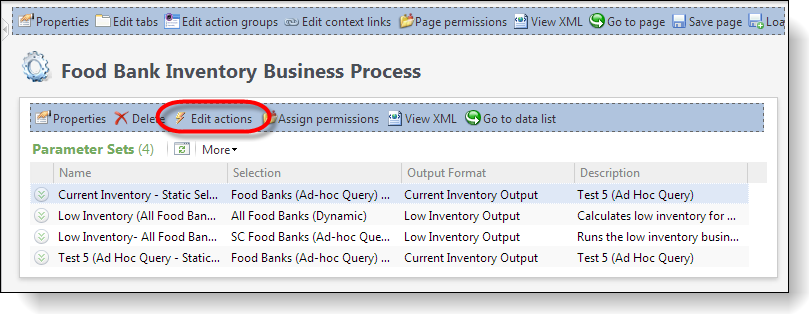
Figure: Add a new action
On the dialog window, click the Add button to add the new action. Use the screen shot as a guide to provide the properties for the action that opens the "Inventory Process Business Process Add Form" to add a parameter set for the business process.
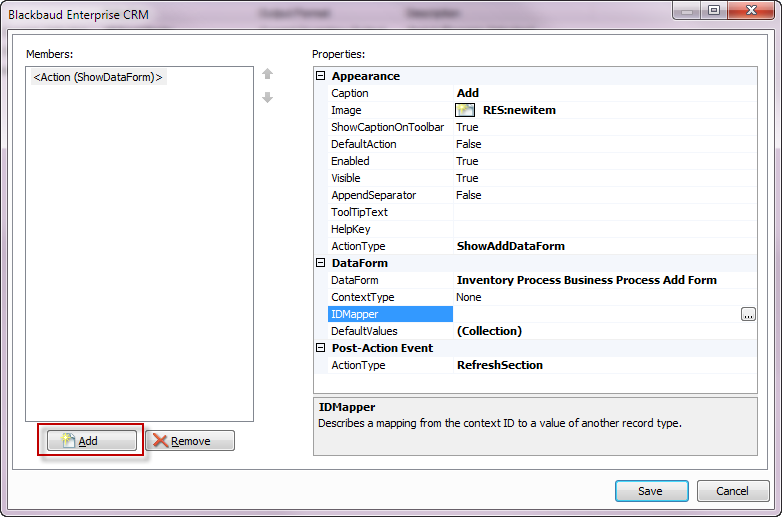
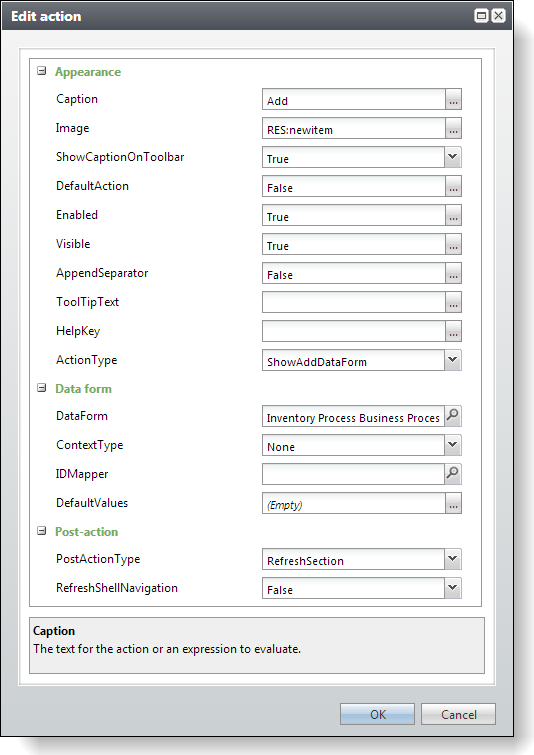
Figure: Add an section action to call the Inventory Process Business Process Add Form
Let's test the new action. Within the section on the page, click the new Add button and try out the Add Data Form by adding a new parameter set. Provide a name, description, select the "All Food banks" selection created in a previous exercise. Finally, select one of the output formats created earlier, as well.
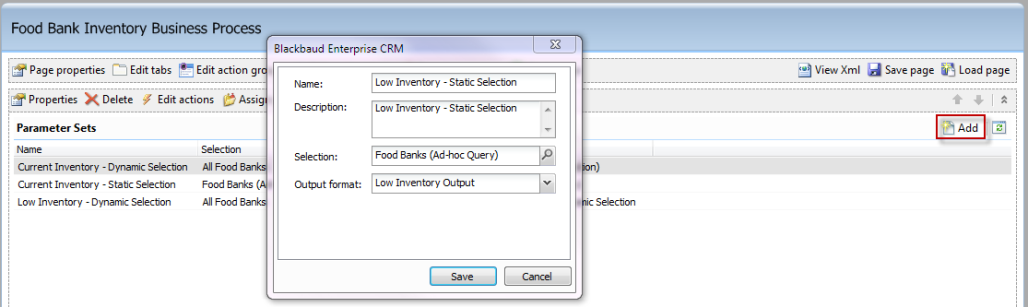
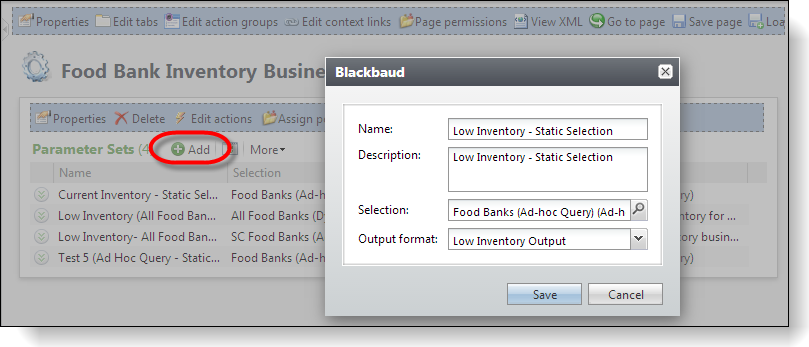
Figure: Test the Add action
Step 6 - Edit and delete the parameter sets.
Use the previous step as a guide and add two new actions, one to edit the parameter set and the other to delete the parameter set. For details, see the tables below.
Edit Action Button Properties
| Property | Value |
|---|---|
| Caption | Edit |
| Image | RES:edit |
| ActionType | ShowDataForm |
| DataForm | Inventory Process Business Process Edit Form |
| ContextType | SectionField |
| SectionField | ID |
| Post-Action Event ActionType | RefreshSection |
Delete Action Button Properties
| Property | Value |
|---|---|
| Caption | Delete |
| Image | RES:delete |
| ActionType | ExecuteRecordOperation |
| RecordOperation | Inventory Process Business: Delete |
| ContextType | SectionField |
| SectionField | ID |
| Post-Action Event ActionType | RefreshSection |
After you add the two actions, test each action on the page. Ensure you can an edit and delete existing parameter sets.
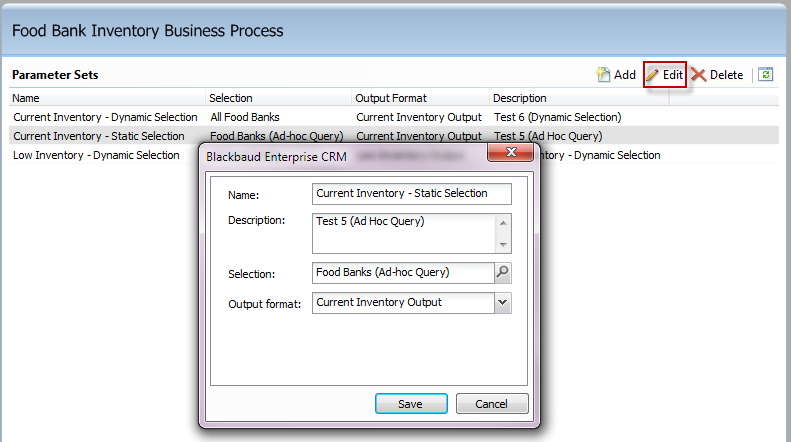
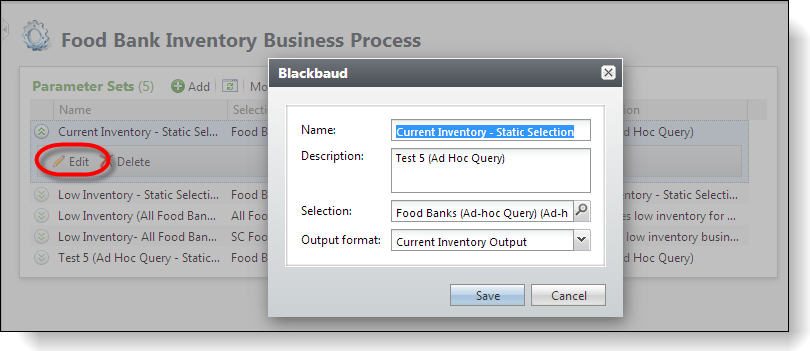
Figure: Test the Edit action
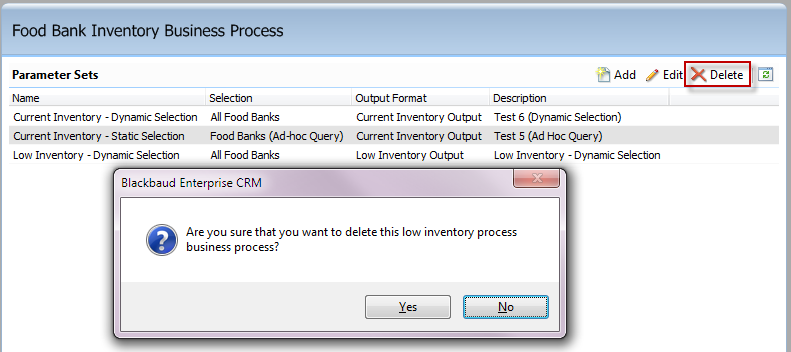
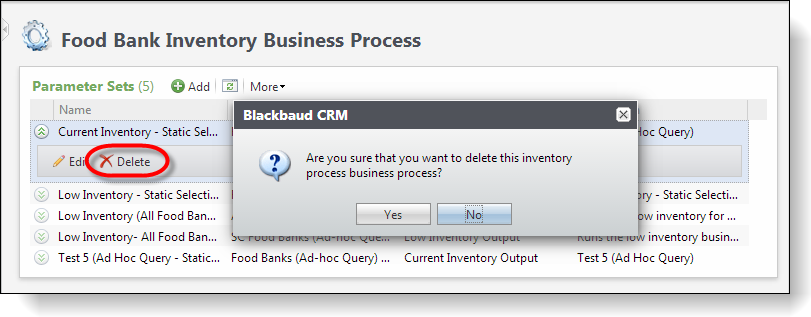
Figure: Test the Delete record operation
Step 7 - Start the business process with a selected parameter set.
In this step, we will start the business process and then navigate to our status page to view the results. This step assumes that the Business Process Spec was completed and loaded into the Infinity catalog/database. This step also assumes the CLR code that forms the logic for the business process was compiled within the catalog assembly and the assembly deployed to the Infinity web server. It also assumes the Inventory Process Business Process Instance Status Page was completed. We will create an action button to start the business process given a selected parameter set within the data list. After the business process starts, we will navigate to the page via the StatusPage property within the action.
Click the Edit action button to configure a new action to start our food bank inventory business process.
Figure: Add a new action
The ActionType property should be set to StartBusinessProcess and the business process name will be the Inventory Process Business Process as defined within our Business Process Spec. Configure the action to navigate to the Inventory Process Business Process Instance Status Page after the business process starts. Provide the ID of the currently selected row within the data list as the context to the business process. This provides the business process with the primary key value of the parameter set to run with the business process. Use the screen shot below as a guide. This new action button should appear before the Add, Edit, and Delete actions. Note the value for the AppendSeparator property.
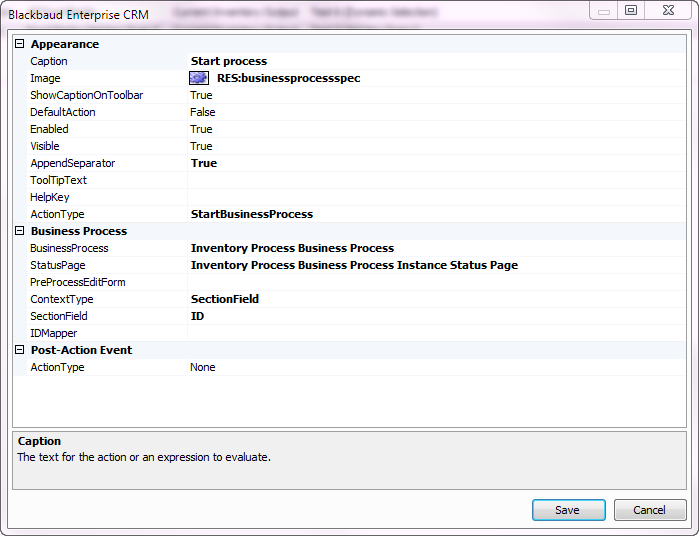
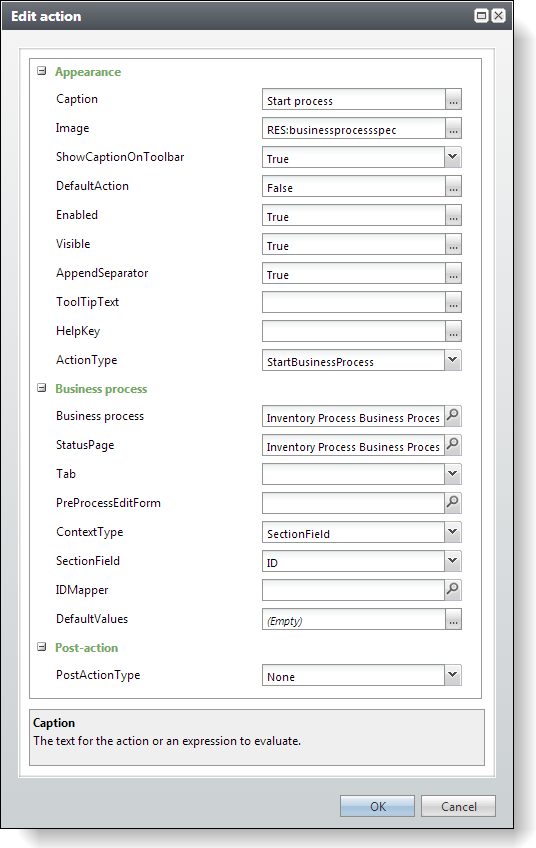
Figure: Configure the Start process action button
Your action buttons should now look like the screen shot below.
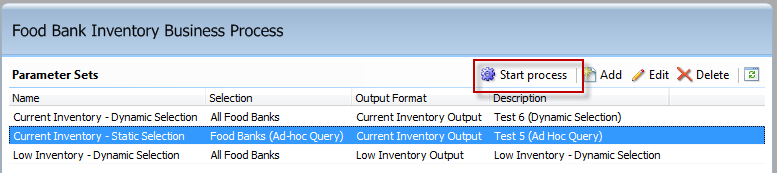
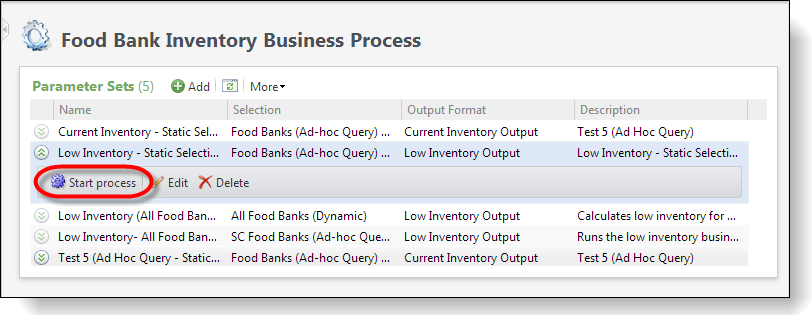
Figure: The Start process action button
Click the new Start process button to try out the business process. You may have to debug the code with the business process and status page after kicking of the process. Good luck! If all goes well, the action button should direct you to the status page.

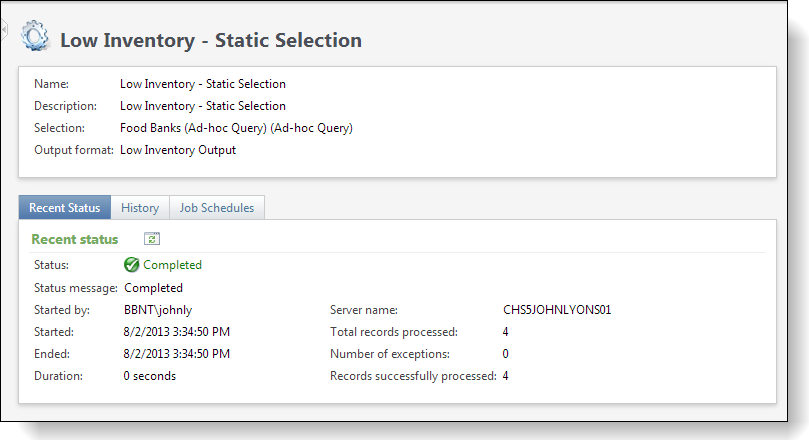
Figure: Status page
Step 8 - Go to the business process status page.
Click the Edit actions button again to configure another new action to navigate to our status page. The ActionType property should be set to "ShowPage," and the page name is Inventory Process Business Process Instance Status Page. Provide the ID of the currently selected row within the data list as the context to the page. Use the screen shot below as a guide. This action button should appear before the Start process action button.
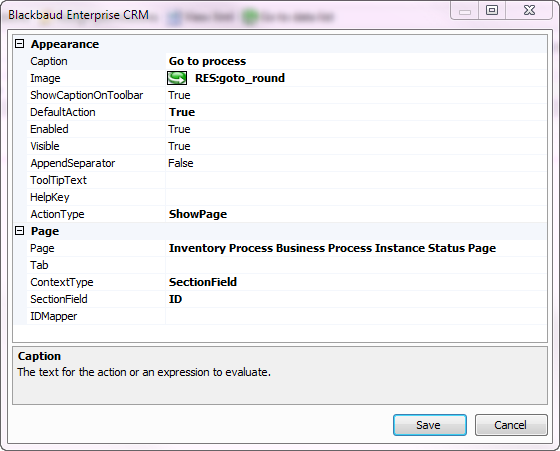
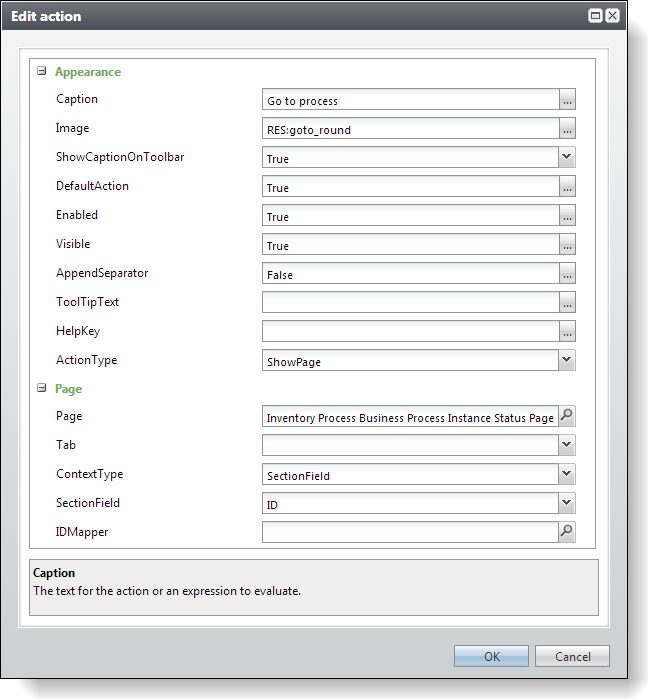
Figure: Add the action button that navigates to the business process status page
At this point, the page should look like the following screen shot. Note the two new action buttons to start the business process and to navigate the status page.
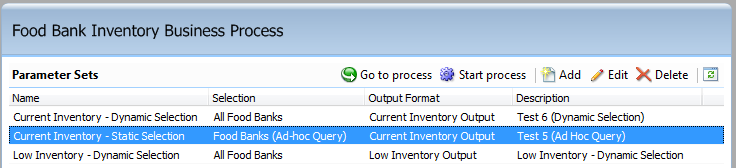
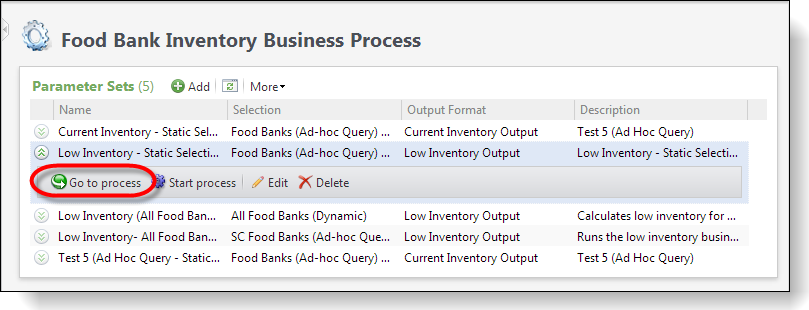
Figure: Our new Go to process action button
Step 9 - Secure the parameter set for the business process.
Next, let's secure certain users from starting a business process using a specific parameter set. In this step, we will create an action button to open the "Edit Business Process Instance Permissions With Site" data form that allows users to edit permissions for a parameter set associated with a given business process. This data form is as an out-of-the-box feature of Blackbaud CRM. This data form has a very interesting behavior. When a parameter set is selected and the data form is loaded, a stored procedure named "USP_DATAFORMTEMPLATE_EDITLOAD_BUSINESSPROCESSINSTANCEWITHSITE_PERMISSIONS" adds a row to the BusinessProcessInstance table. The BusinessProcessInstance table supports the securing of a parameter set for a business process to a particular site and/or selected security roles. By default, the inserted row grants permission to all system roles to execute the business process for the selected parameter set. This default behavior may be altered using the "Edit Business Process Instance Permissions With Site" data form.
With our parameter set page in Design Mode, click the Edit actions button one last time to configure another new action to secure a parameter set for a given site and/or security role. We will use a data form named "Edit Business Process Instance Permissions With Site" to edit permissions for a given business process. This action button should only be enabled if the current user is a system administrator or the current user is the owner of the business process. This action button should be placed to the right of the existing action buttonsThe ActionType property should be set to "ShowDataForm," and the data form name is "Edit Business Process Instance Permissions With Site." Provide the ID of the currently selected row within the data list as the context for the data form. Use the screen shot below as a guide. Notice the expression used for the Enabled property. The expression evaluates to either "True" or "False." The expression checks to see if the current application user is a system administrator or if the current application user is the owner of the parameter set. Note the Fields!OwnerID macro field, which looks for the value of an OWNERID field that may optionally be an output field within the data list. This OWNERID field refers to the field within the BUSINESSPROCESSINSTANCE table. If you want to populate the BUSINESSPROCESSINSTANCE.OWNERID field for your future business processes, then you need to create the appropriate Infinity feature to manage this data. Otherwise, the application user needs to be a system administrator to select this action.
Expression value:
= Globals.CurrentAppUserIsSysAdmin() OrElse (Globals.CurrentAppUserID = new System.Guid(CStr(Fields!OwnerID)))
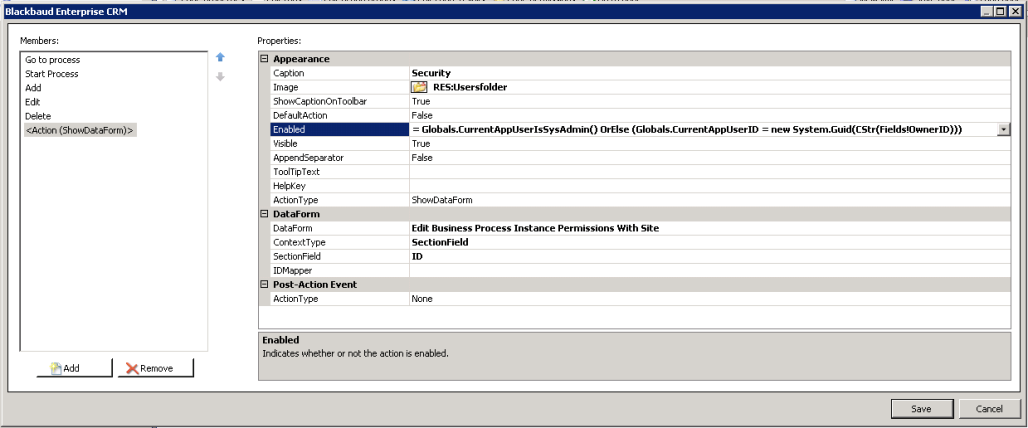
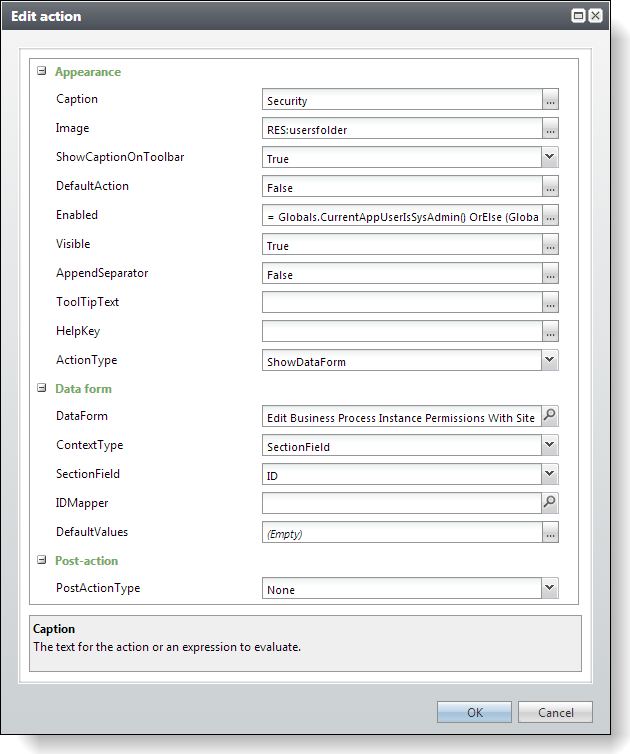
Figure: Configure the action to display the permission data form
Step 10 - Create a task to open the parameter set page.
In this step, we will create a task within the Food Bank functional area to open the parameter set page.
Navigate to Administration > Application > Shell Design page.
Figure: The Shell design task
Select the Tasks tab and click the Add action button. Use the screen shot as a guide to create a new task within the Food Bank functional area to open our new parameter set page.
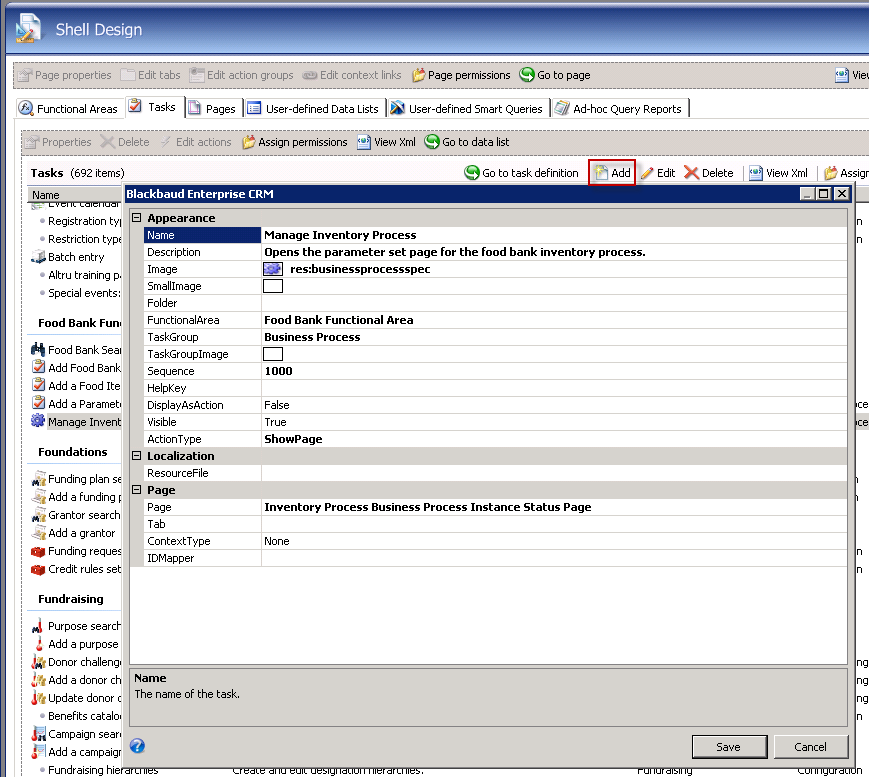
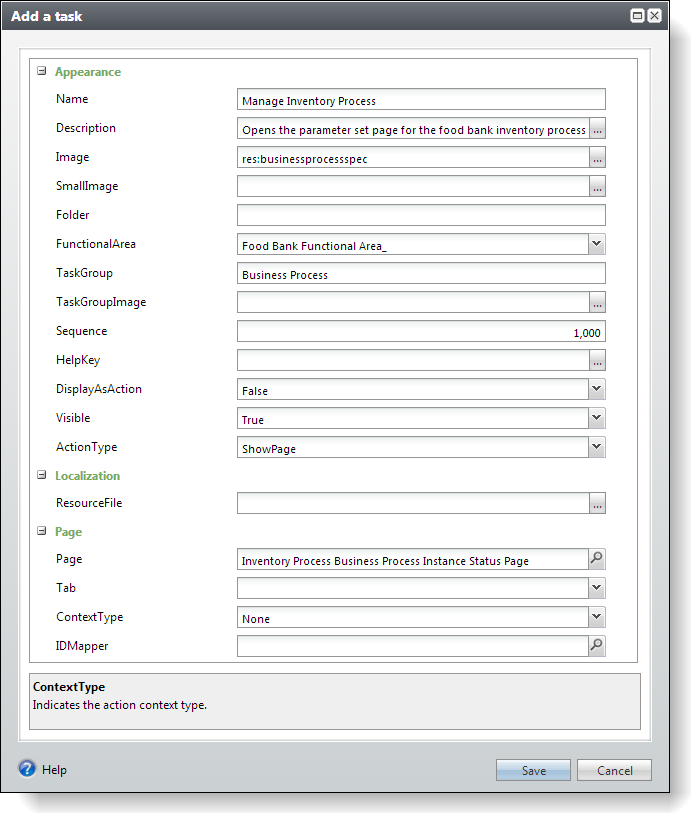
After the task is created, refresh shell navigation to view the task in the Food Bank functional area.
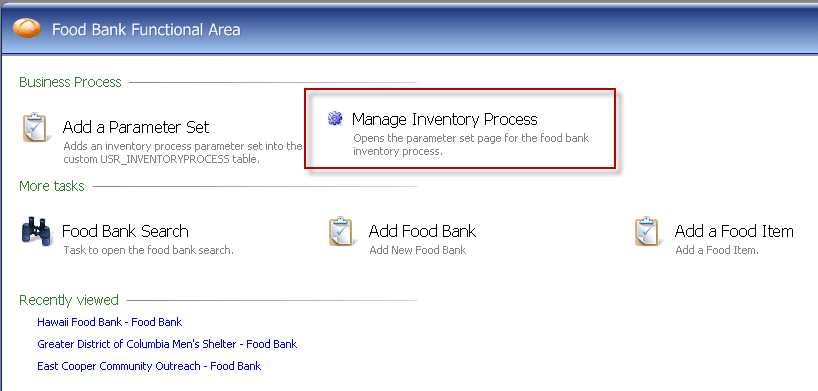
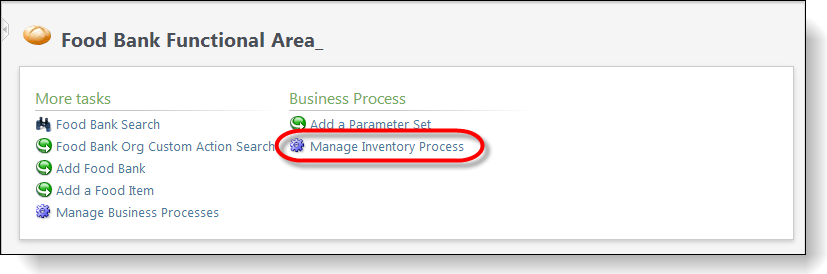
Figure: Click the new task to open the page