Exercise: Create a Smart Query from the Donor List Smart Query Template
The Donor List smart query enables you to browse a list of constituents who gave a gift. You can base this smart query on a specific designation, campaign, appeal, or constituent selection. You can also specify a time period or gift amount. To limit the results, you can include only the top number or percentage of donors. After you process this query, the Results tab displays the constituent records that meet the criteria. You can save the results as a selection to use in other processes such as generating correspondence.
Step 1 - Open the Query page and create a smart query.
From the Analysis functional area, click the Query task to open the Query page. To add a smart query, click Add a smart query under Tasks at the top left.
From the Analysis functional area, click the Information library task to open the Information Library page. To add a smart query, click Add a smart query click the Add a smart query action above the data list.
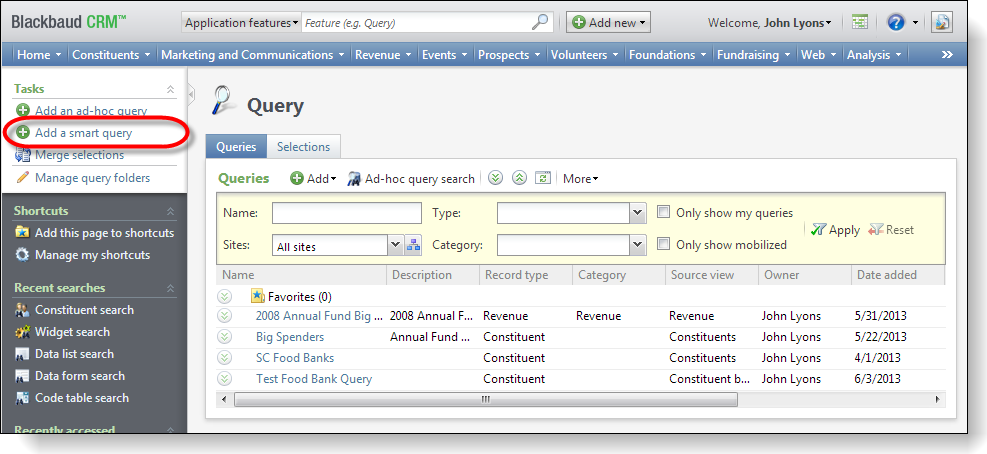

Figure: Add a smart query
Step 2 - Select a smart query definition.
On the Select a Smart Query Definition screen, select the Donor List smart query definition as the basis for the new smart query and click OK. Smart queries are associated with record types to determine how the queries are used throughout the system, and the Donor List smart query definition returns a collection of donors who gave a specific amount during a specific time period.
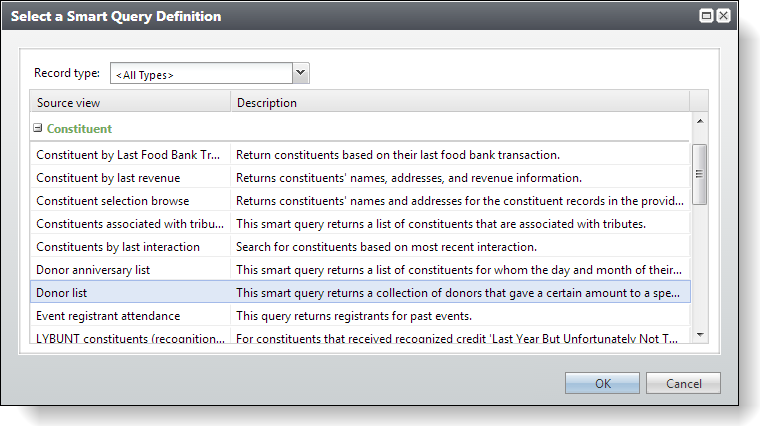
Figure: Select a smart query definition
Step 3 - Parameters tab.
On the Parameters tab of the New Smart Query screen, you select the parameters for the smart query. For this exercise, select a designation such as the 2008 Annual Fund with a total amount such as $100,000.00 during the course of a year.
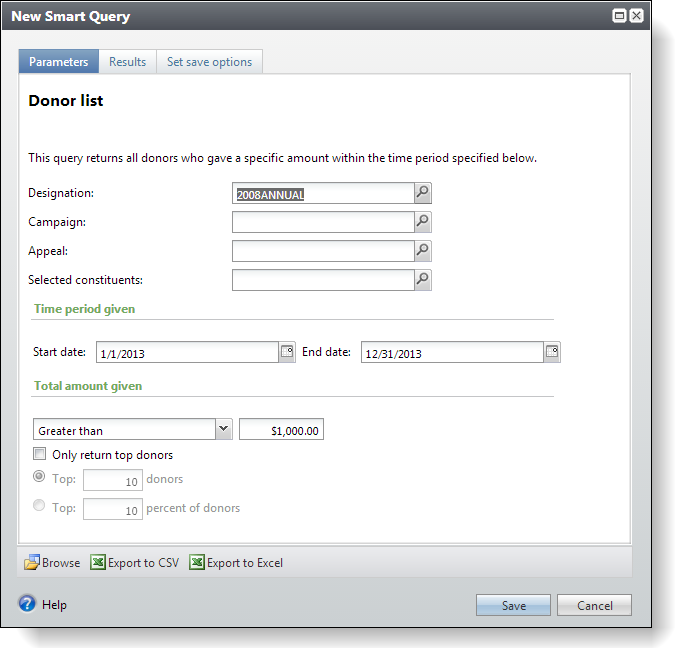
Figure: The New Smart Query screen
Step 4 - Results tab.
Select the Results tab to process the results.
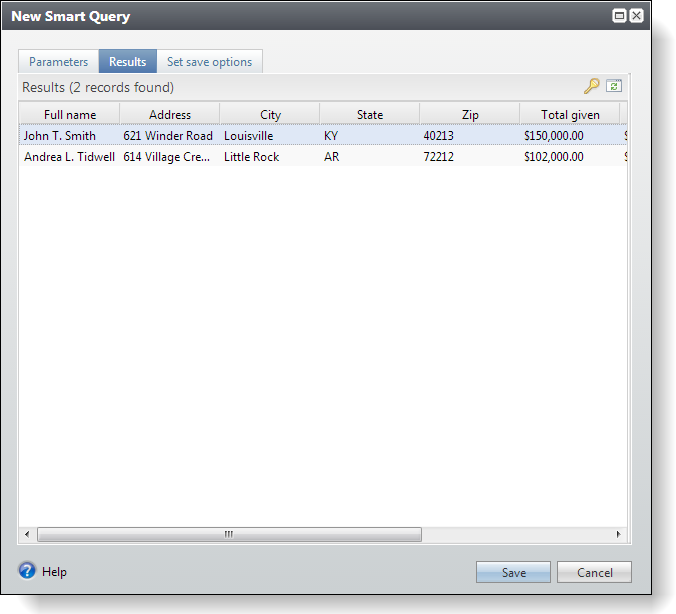
Figure: Smart query results
From here, you can browse the results with a page that accepts a record type of constituent. You can also create a selection from the smart query. We will do that in the next step.
Step 5 - Create a selection.
On the Set save options tab, enter a name and description for the smart query. Then select Create a selection?, Create a static selection, and Show this selection in the Query Designer. To save and close the smart query, click Save.
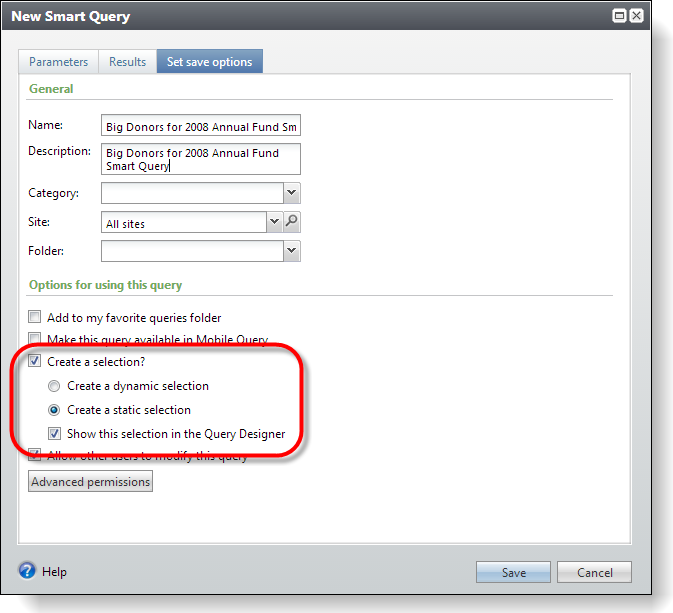
Figure: Create a selection
Step 6 - View the selection.
On the Query page, select the Selections tab and select "Constituent" in the Type field to filter the list and click Apply. The selection appears in the data list. In the next step, we will use the selection as part of an ad-hoc query.
Return to the Analysis functional area and click View selections under Selections. In the Record type column, select Constituent to filter the list and click Apply. You should see the selection within the data list. In the next step, we will use the selection as part of an ad-hoc query.
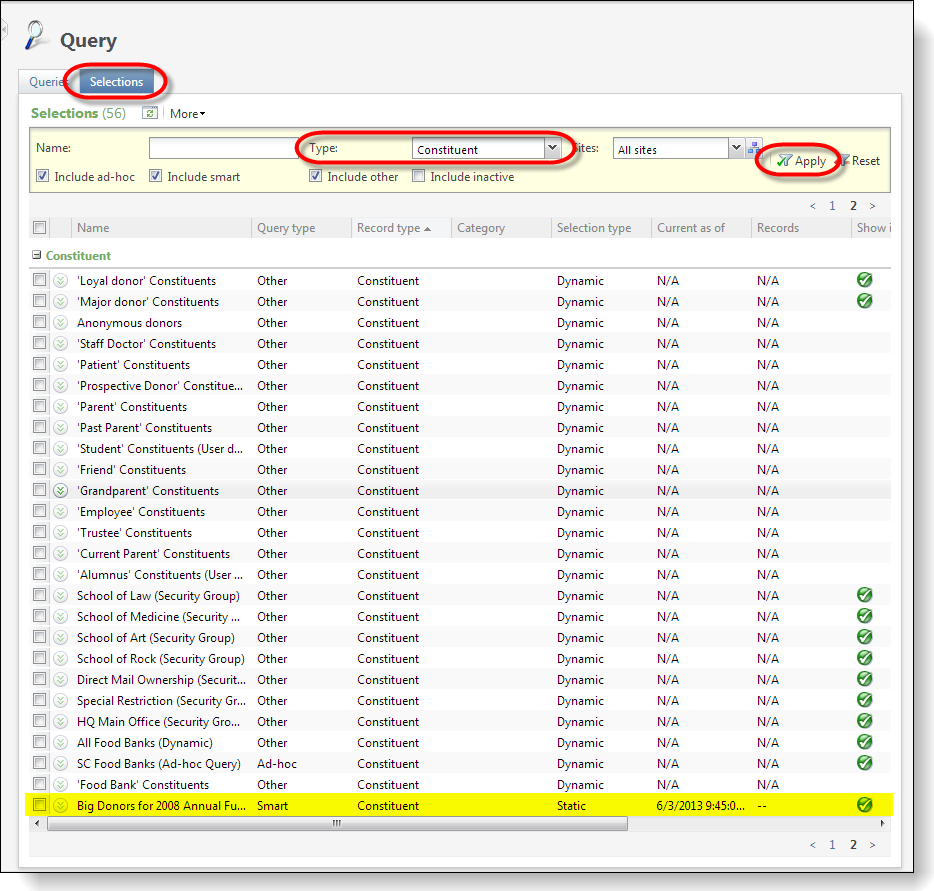
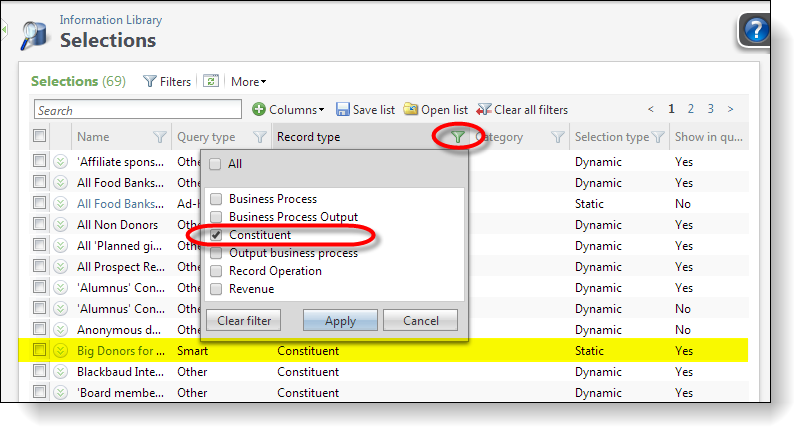
Figure: The Selections tab
Step 7 - Utilize the selection in an ad-hoc query.
Select the Queries tab and click the Add action and select Ad-hoc query to create an ad-hoc query. We will use the selection we created in this exercise to limit the rows returned by the query. Utilizing a selection within an ad-hoc query essentially creates an EXISTS clause in the underlying query.
To create an ad-hoc query, return to the Information Library page and click Add an ad-hoc query above the data list on the Queries tab. We will use the selection we created in this exercise to limit the rows returned by the query. Utilizing a selection within an ad-hoc query essentially creates an EXISTS clause in the underlying query.
On the Select a Source View screen, select the Prospects source view.
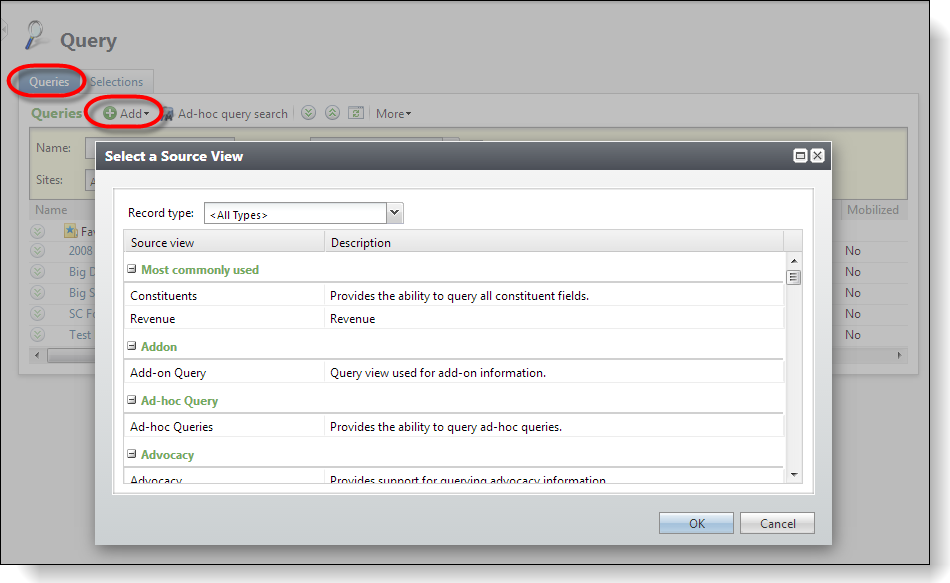
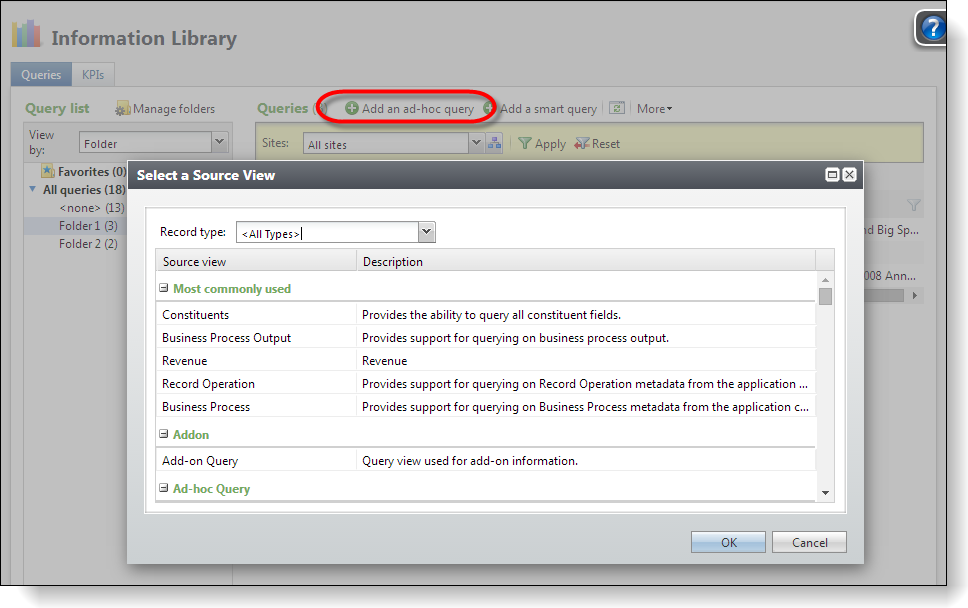
Figure: Create an ad-hoc query
Step 8 - Utilize the selection in an ad-hoc query.
Under Brows for fields in, select the Selections folder (yellow highlight) to see a list of selections under Select Selections fields. Double-click the Exists in “Big Donors for 2008 Annual Fund Smart Query (Smart Query)” selections (green highlight). The Apply Criteria screen appears.
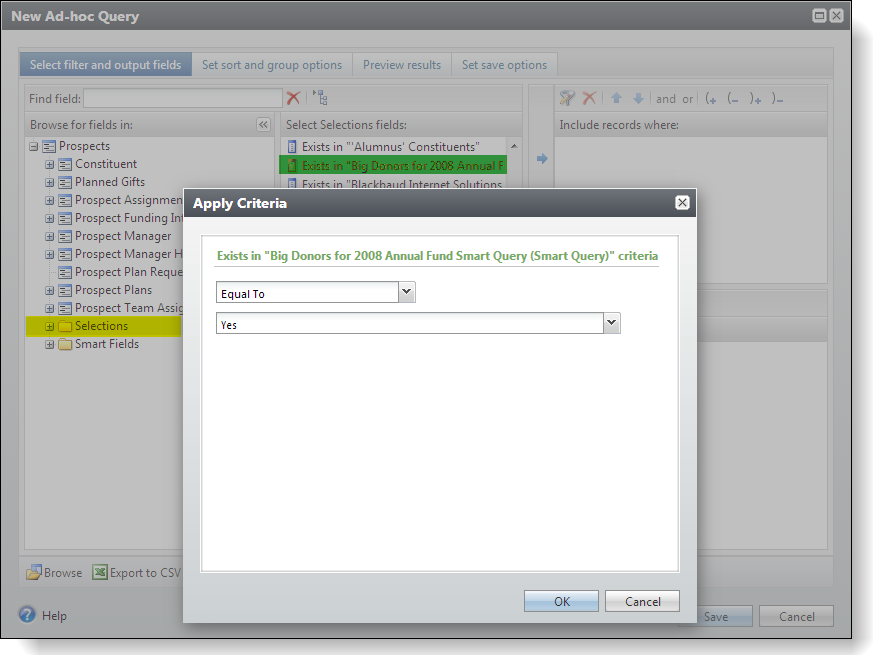
Figure: Select the selection
Accept the default values for both drop-down list boxes, and click OK. A new filter appears under Include records where to limits the result set to the donors who meet the criteria of our static selection.
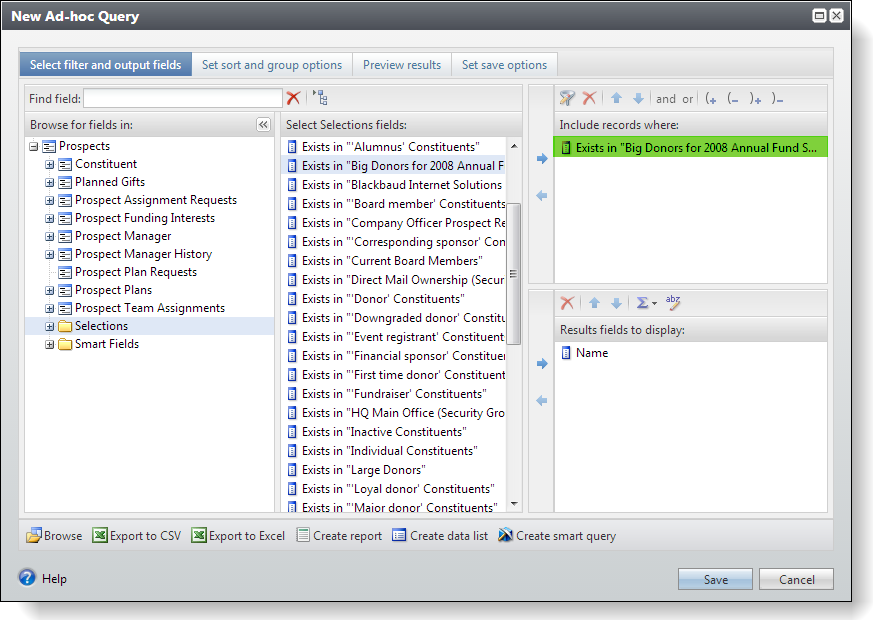
Figure: The new filter to restrict the result set
Select the Preview results tab to view the constituents who meet the selection criteria.