Select your user interface:
Use a Data List (CLR) to Display Data returned from a SOAP Web Service
Overview
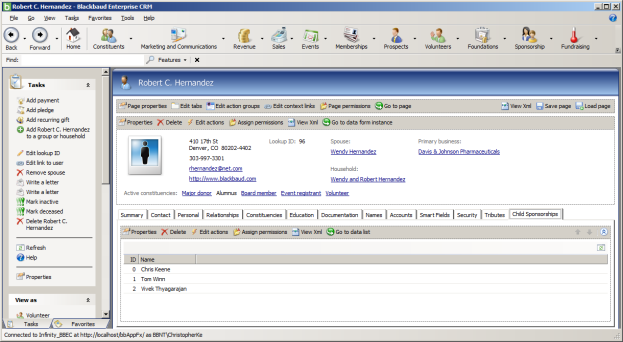
A DataList should be a very familiar component for Blackbaud CRM developers. What was not documented was how to use a CLRDataList to consume an external web service and display data. This exercise will address that. The exercise creates an add-on tab on constituent records to display child sponsorships for a human-relief organization.
Create Test Web Service
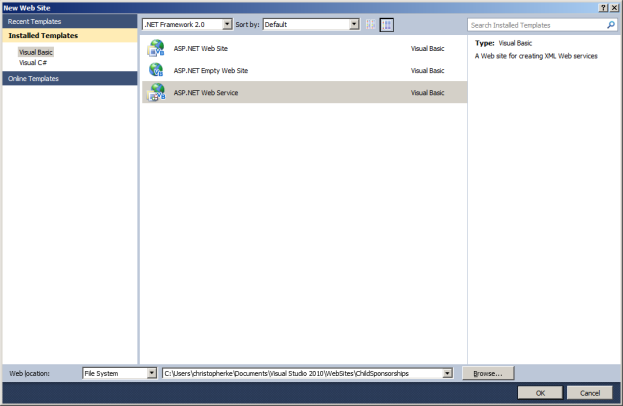
First, we create a simple web service. In this example, we use old-style SOAP services. To do that, open Visual Studio 2010 and create a new website. If you select 2.0 as the target framework, you can create a SOAP service.
Name your service "ChildSponsorships" and create the project.
Open Service.vb and replace the HelloWorld() function with the following:
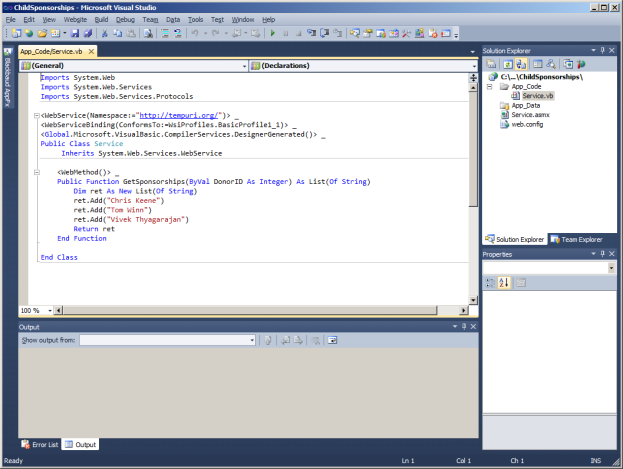
The real work of this function is to return a list of sponsored children for a specific donor ID. For this simplified example, we will just throw away the argument and return a hard-coded list of names.
That's all we need for the web service. Save everything and select Build\Build Website in the main menu.
Deploy to IIS
Visual Studio allows you to run a web service project alongside a consumer. Although that's essentially what we want to do here, we are actually writing an Infinity spec, which means:
-
Our ability to step-thru debug is limited.
-
The DataList (CLR) we write (more on that later) needs to reference a real-life IIS service, so it makes sense to add it to IIS.
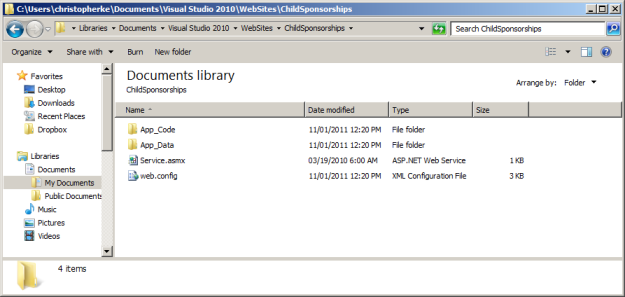
Copy the contents of your child sponsorship build (see below) to C:\inetpub\wwwroot\ChildSponsorships\.
Go into IIS and under Default Web Site, right-click and select Add Application.
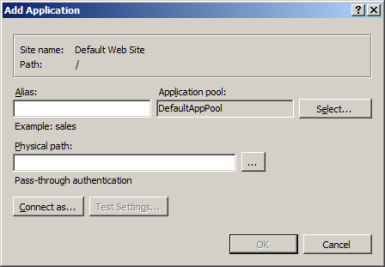
In the Physical path field, click the button to locate the …\inetpub\wwwroot\ChildSponsorship folder you just added.
In the Alias field, enter "ChildSponsorships."

Click OK and close out of IIS Management Console.
Note: To test, open a web browser and navigate to http://localhost/ChildSponsorships/service.asmx.
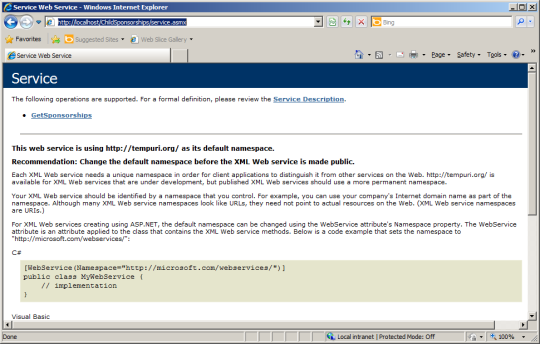
You can click GetSponsorships and invoke the service to test.
Create Data List (CLR) Spec
Now that we created a really simple web service, let's look at the DataList (CLR) spec…
If it's still open, close the web service project in Visual Studio 2010 and open a new project named Blackbaud.CustomFx.ChildSponsorships.

Make sure the target framework is restored to 4.0.
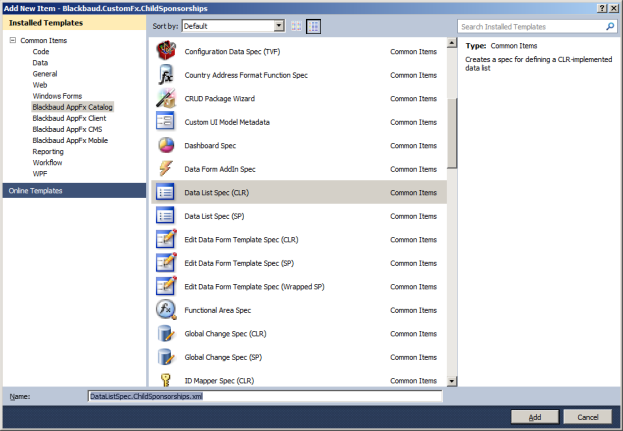
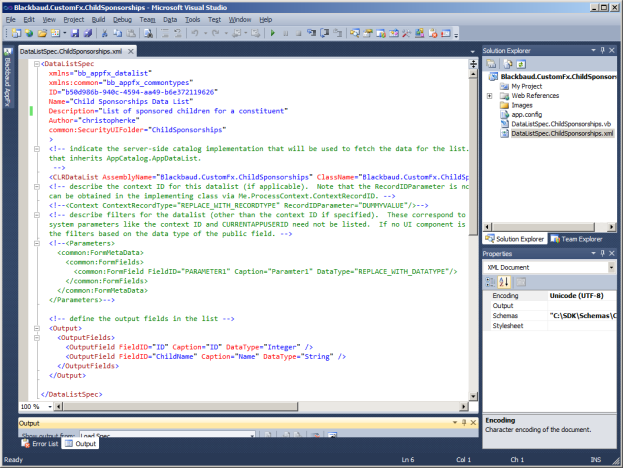
In Solution Explorer, add a new item and select Data List Spec (CLR). Name it DataListSpec.ChildSponsorships.xml.
Edit XML File
Go into the XML file and make the adjustments to the header info as you normally would. Under OutputFields, make sure ID has a new data type of "integer" (we will make up values for this later, but I just want to create an example with multiple columns).
Make the second FieldID "ChildName" and the data type "string."
Add a Web Reference
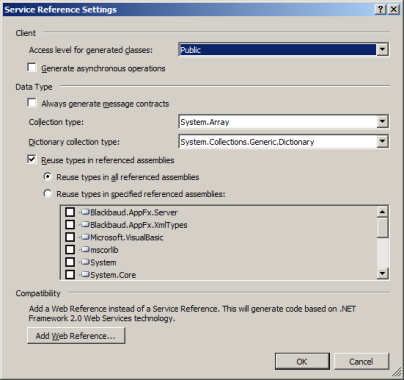
Now add a Web Reference. Note that in Visual Studio 2010 you may only be able to select "Add Service Reference," so just do that and then click Advanced in the lower left.
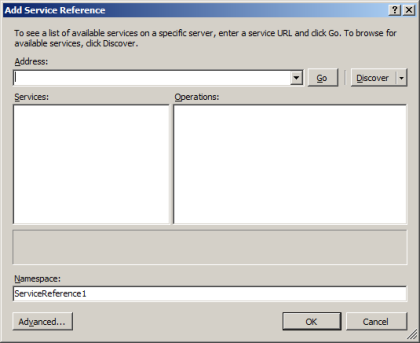
On the next screen, click Add Web Reference.
Enter "http://localhost/ChildSponsorships/service.asmx" in the URL field and click the green arrow.
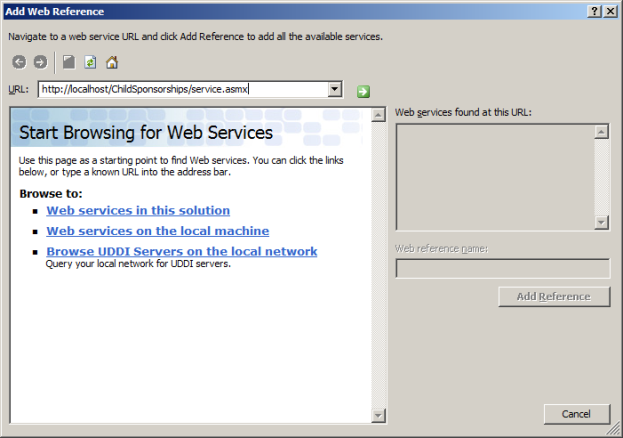
Enter "ChildSponsorships" in the Web reference name text box (which should now be active) and click Add Reference.
Edit .vb File
Close the XML file and open the .vb file. Make the changes to the file as shown here:
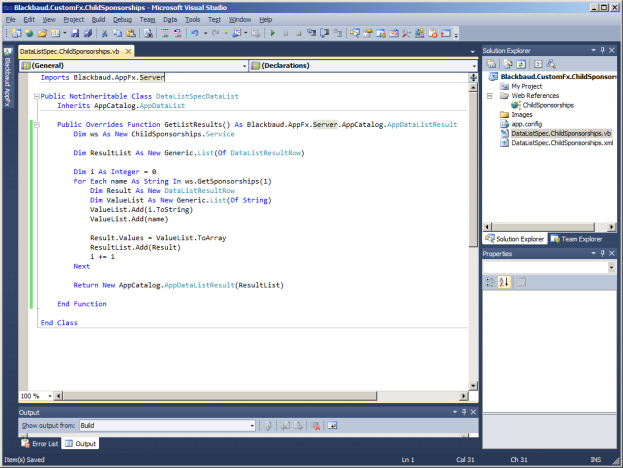
What's happening here? First we create an instance of the ChildSponsorships web service named ws. At that point, we call GetSponsorships, passing in a hard coded Donor ID of "1" (again, the service isn't really using this) and get back a List of names, which we iterate.
The idea here is to populate an AppDataListResult object, which is equivalent to a collection of data rows. Each "row" is specifically a DataListResultRow object, whose Values property is a string array of column values.
You may have noticed in the XML document that the output fields have a FieldID attribute. This can refer to named columns in a SQL Reader or other DB library structure. In this examplem we don't have ordinal names as part of our data structure, so be sure the positions of fields in the XML correspond to the ValueList.Add operations in the Visual Basic code.
Run a build (make sure your target framework is 4.0) and copy the DLL to your vroot\bin folder in Blackbaud CRM.
Add the New Data List to the CRM User Interface
To install the spec, just run Tools>Load Spec.
Now let's get this into Blackbaud CRM.
In Blackbaud CRM, go to a constituent record and click Edit tabs.
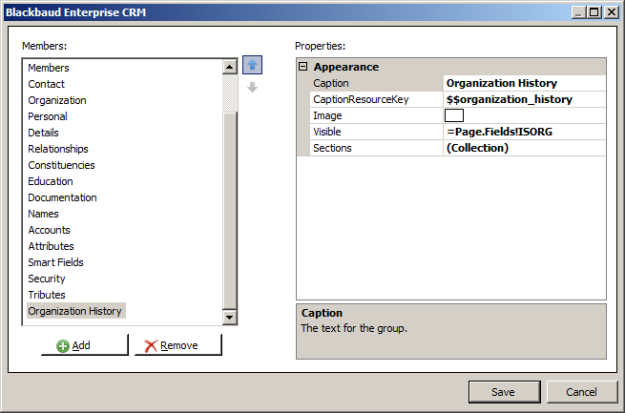
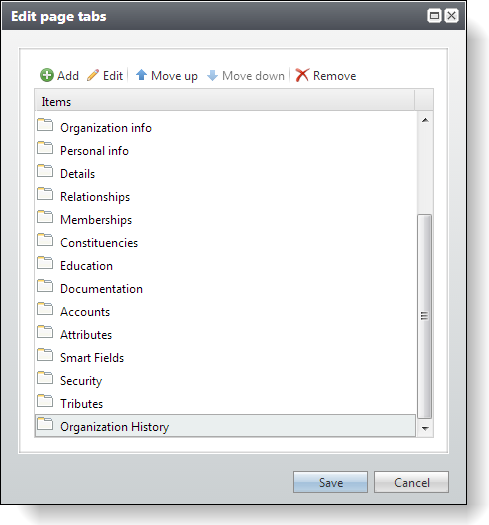
Add a new tab.
Caption = "Child Sponsorships"
In the Sections field, click the ellipsis button.
Click Add under the Members list.
Click Add on the Sections screen.
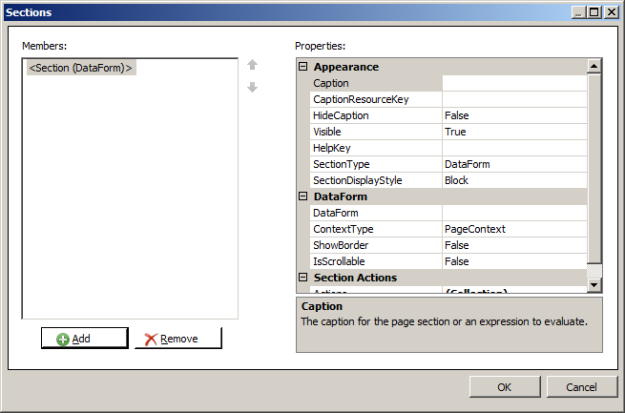

In the Appearance section, change the SectionType field from "DataForm" to "DataList." The DataForm section below changes accordingly.
In the DataList field, click the button to search for the new data list.
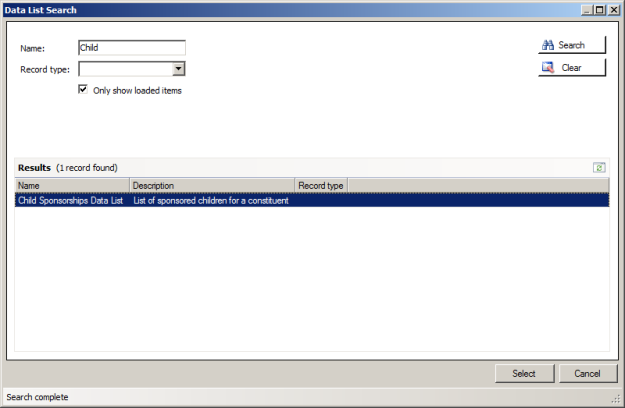
After you find it, click Select.
Click OK to exit the Sections screen, and then click Save to exit the Tab Editor.
Click OK to exit the Edit section screen, and click OK to exit the Sections screen. Then click OK to exit the Tab screen and click Save to exit the Edit page tabs screen.
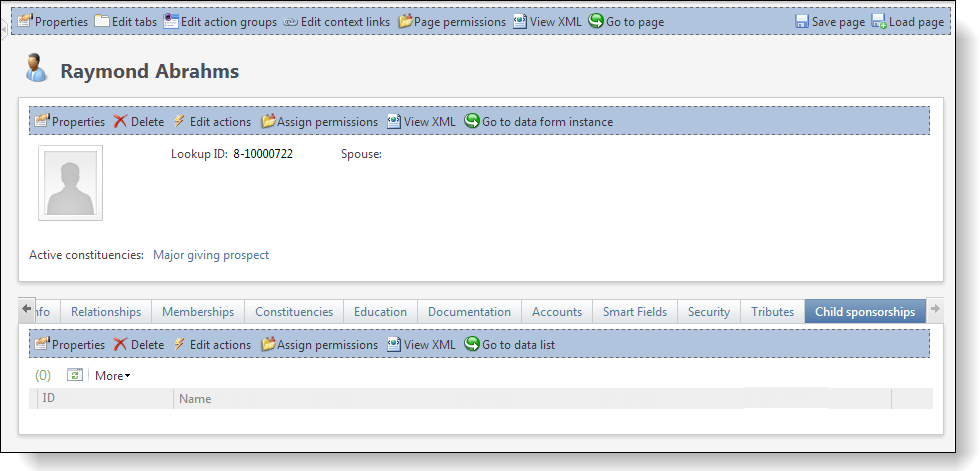
Just by adding the DLL to the bin, I was able to see the results below. (If you have issues here, you may need to go to the Catalog Browser, locate your new DLL, and explicitly load it.)