Select your user interface:
Add Features to Infinity System Role
Access to Infinity Features from the Outside Needs to Be Secured
Infinity features can be automated from one of our web service APIs or from a Workflow Activity. Workflow Activities that are utilized within a workflow and Infinity features accessed from one of our APIs will run under the context of an Infinity system role. A key step in designing an integration to an Infinity based application from a third party is to identify the features that need to be automated and secured. Whether you are using a web service API or workflow, each step that manipulates the Infinity application will utilize a feature. Each feature will need to be secured. The most common technique to secure a features is place the feature within a system role. Placing a feature within a system role sets the stage for utilizing the feature as an activity within the workflow designer in Visual Studio 2010 or manipulating the features through an API.
Note: This step assumes your overall solution design has documented the existing and new Infinity system roles into which existing and any new Infinity features will be added.
Locate a Feature
Blackbaud CRM has the ability to navigate through the feature catalog and search for catalog items/features such as a data list or a data form. Within the Administration functional area you will find the Application\Features folder, which contains list of task that allow you to search for an item and go to page to see details about that item. This feature is especially handy when attempting to access the security permissions for the feature, such as granting permission for a data form into a system role. For more information, see Feature Metadata, Application Features, and Use "Go To" to View Metadata for a Feature.
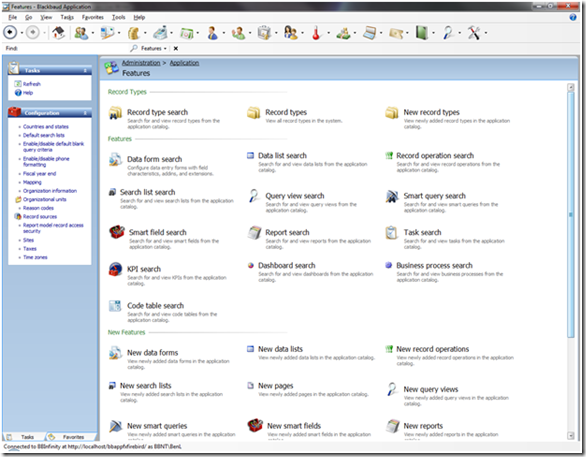
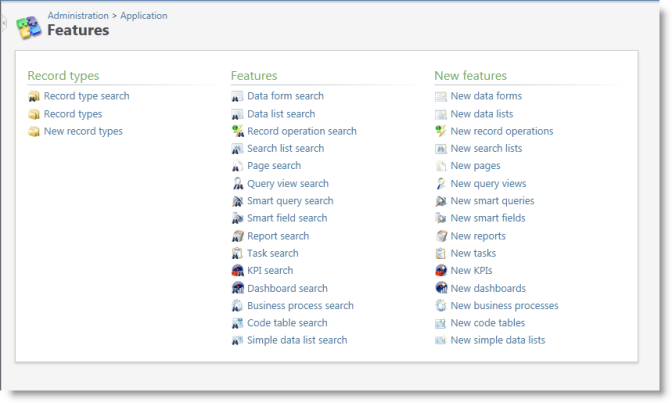
The tasks in the Features group let you search for the most popular types of features in the system. When you search for and select a feature (not all spec types are represented currently), you’ll see a page with detailed information about the feature itself.
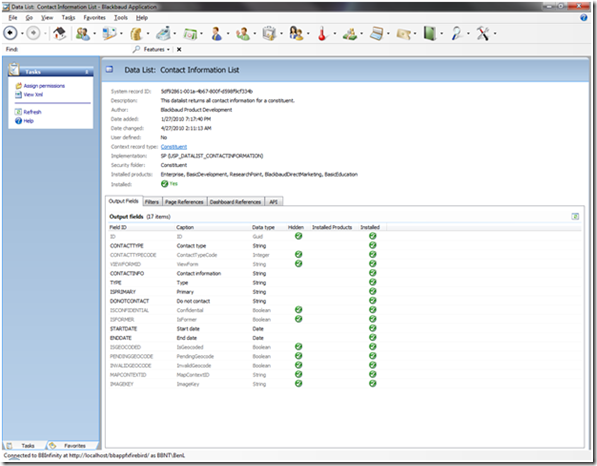
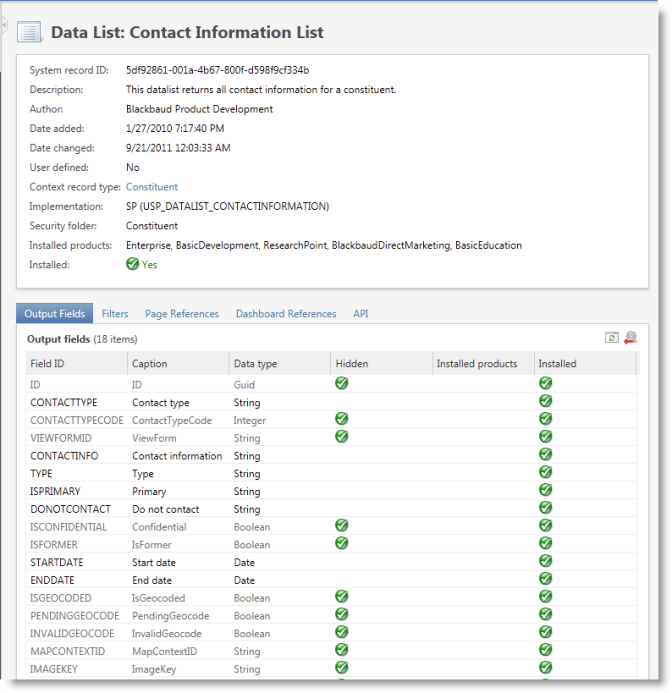
As an example, if you use the Data List Search task and search for the "Contact Information List," its Data List page displays the most relevant metadata about the list, including the ID, record type, implementation details, and whether or not the feature is installed. You can also see the output fields and filters, and view which pages and dashboards make use of this list (VERY handy!).
Use "Go To" to View Metadata for a Feature
Note: Prior to version 3.0, Design Mode only worked in the ClickOnce shell. To view a Feature Metadata page from the Web Shell in a version prior to 3.0, use the feature searches on the Features page (Administration > Application > Features).
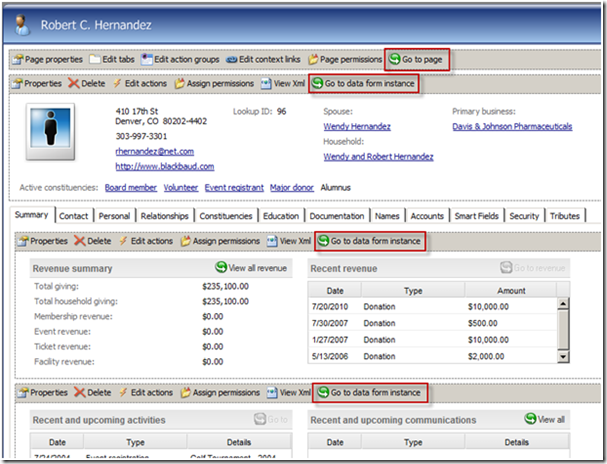
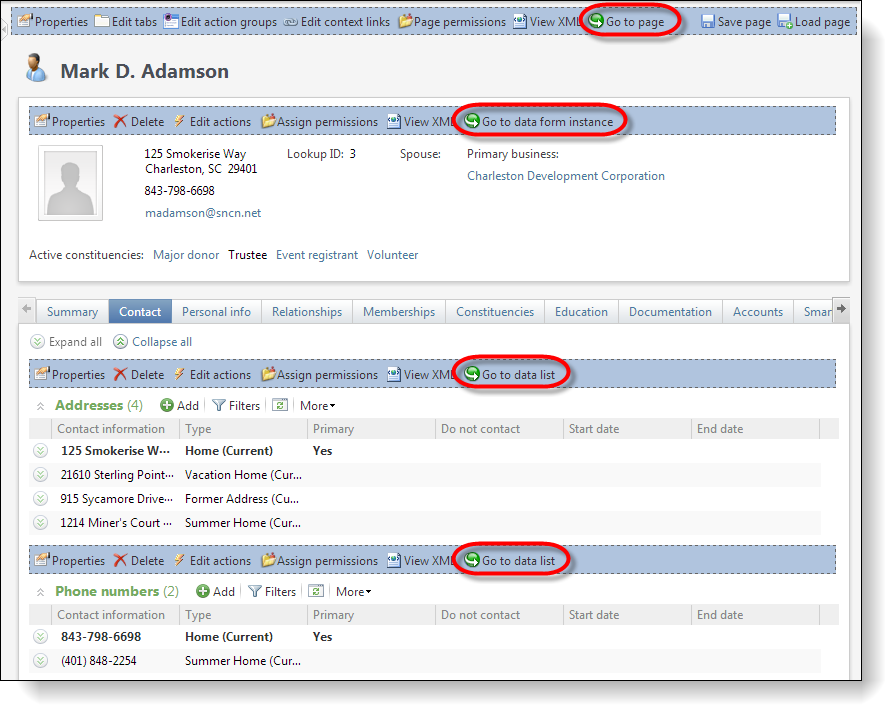
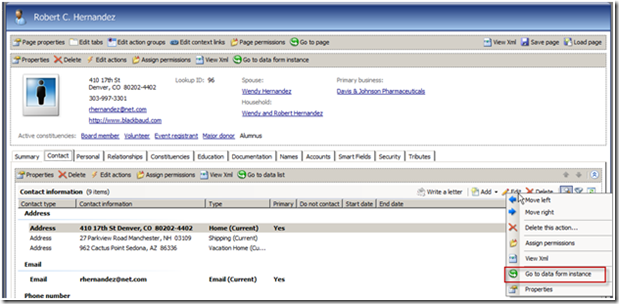
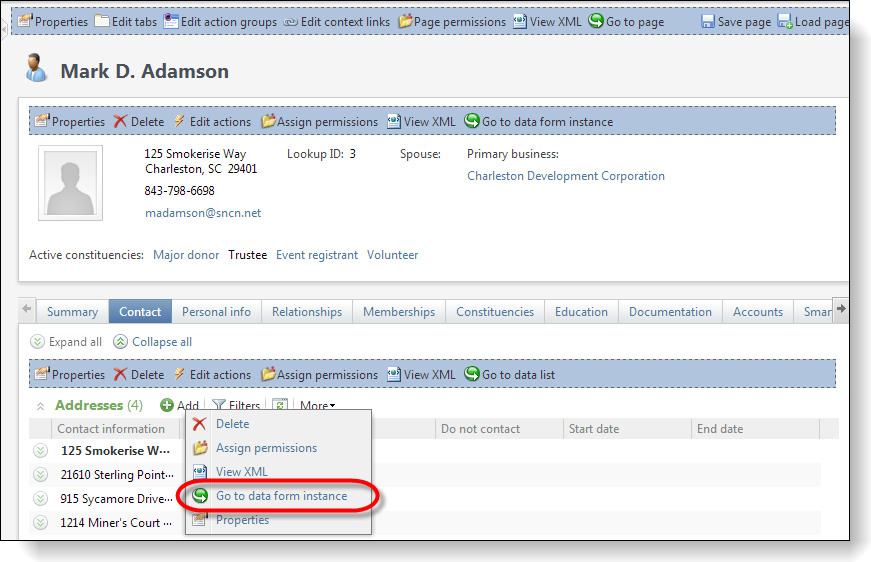
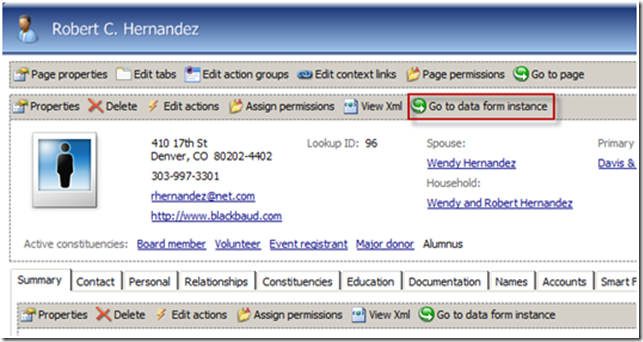
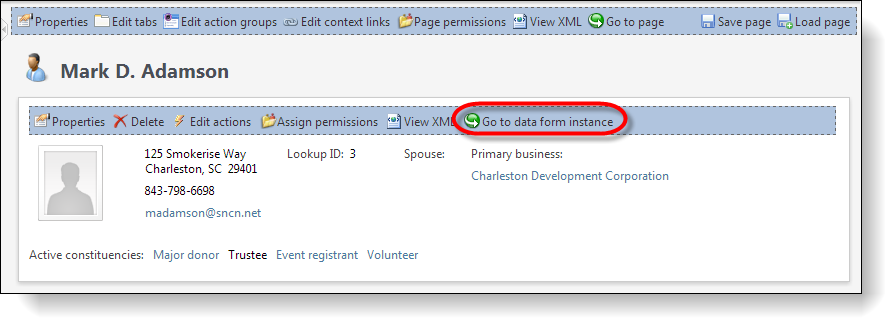
A very handy way to view the catalog information on a specific feature is to place the Infinity shell into Design Mode and look for a button or menu item prefixed with Go to associated with the feature. For example, on the Constituent page, select Go to page to navigate to the metadata for the page. Or select Go to data form instance above the summary view form to navigate to metadata for the data form.
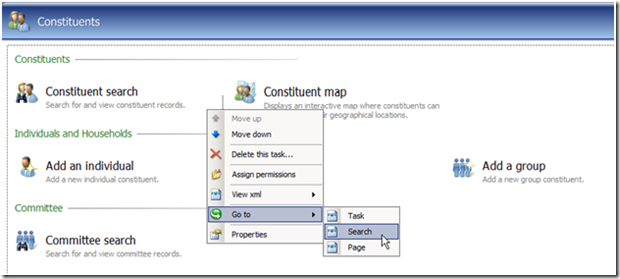
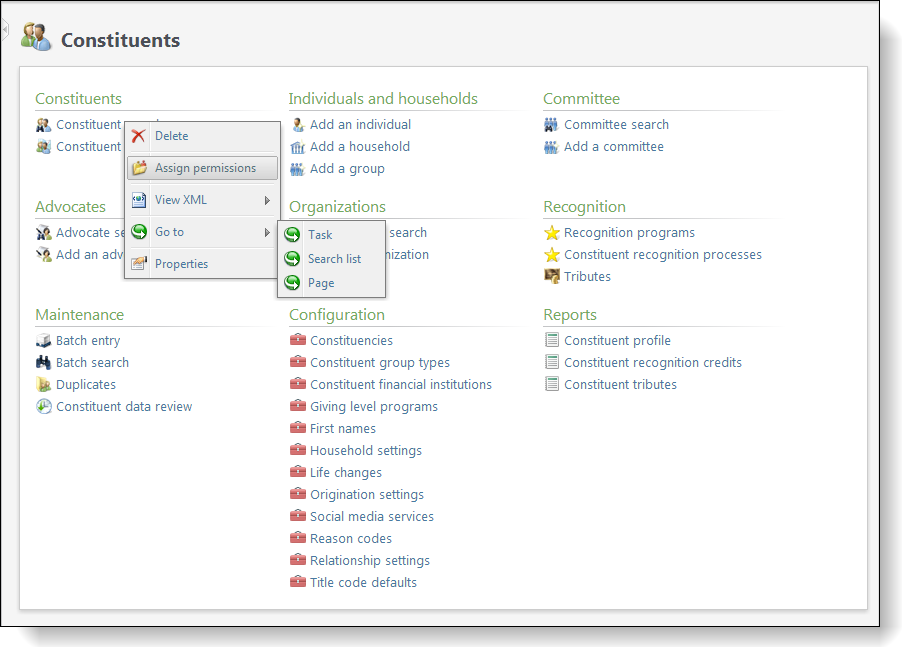
You can also right-click actions on a page and tasks in a functional area in Design Mode to reveal a popup menu with a Go to menu item.
Create and Fill Your Shopping Bag
Note: Prior to version 3.0, Design Mode only worked in the ClickOnce shell. To view a Feature Metadata page from the Web Shell in a version prior to 3.0, use the feature searches on the Features page (Administration > Application > Features).
The pattern for including an Infinity feature as a workflow activity is to create a system role for the workflow followed by adding features to the system role. The system role is the shopping bag that you place your features into. The same holds true for third-party integration with an Infinity application via a web service API.
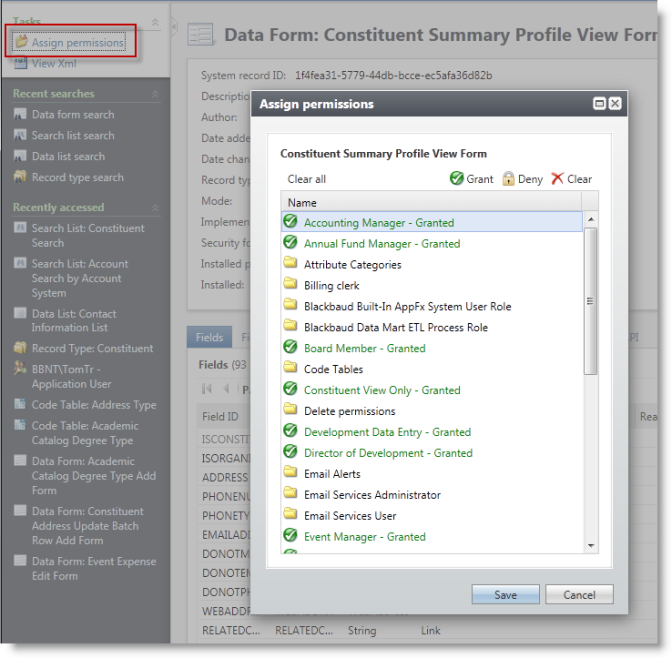
After you locate the feature that you want to use, you can add the feature into the system role. Let’s say I want to use the Constituent Summary Profile View Form that you typically see on the Constituent page. First we will create a system role to support the workflow. We will call the system role Test Workflow System Role. In Design Mode, we can select Go to data form instance to navigate to the feature page.
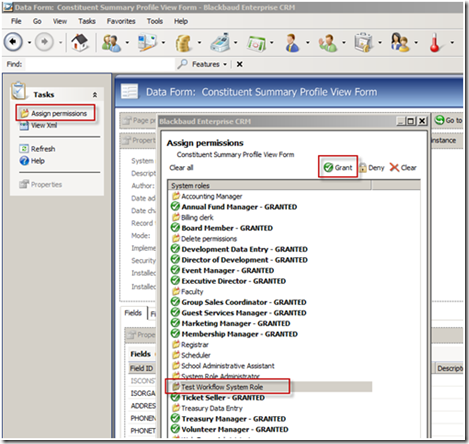
Assign Permissions
Next we can click the Assign permission action on the left hand side of the page and grant permission to the feature into the Test Workflow System Role.