Set Up Connect Raiser's Edge
After you contact Blackbaud Support and have this integration installed, a user with the integration manager role can set up Connect Raiser's Edge.
-
Install the plug-in.
-
If your Raiser’s Edge database is hosted, Blackbaud will install the plug-in.
-
Otherwise, log out of Raiser’s Edge and use Internet Explorer to download the plugin. Then double click the executable file to begin the installation wizard.
-
Note: Users must have supervisor rights within The Raiser's Edge. In addition, only one user will be able to access the Connect Raiser's Edge plug-in at a time.
-
-
Tell the plug-in how to access data from your Education Management products.
-
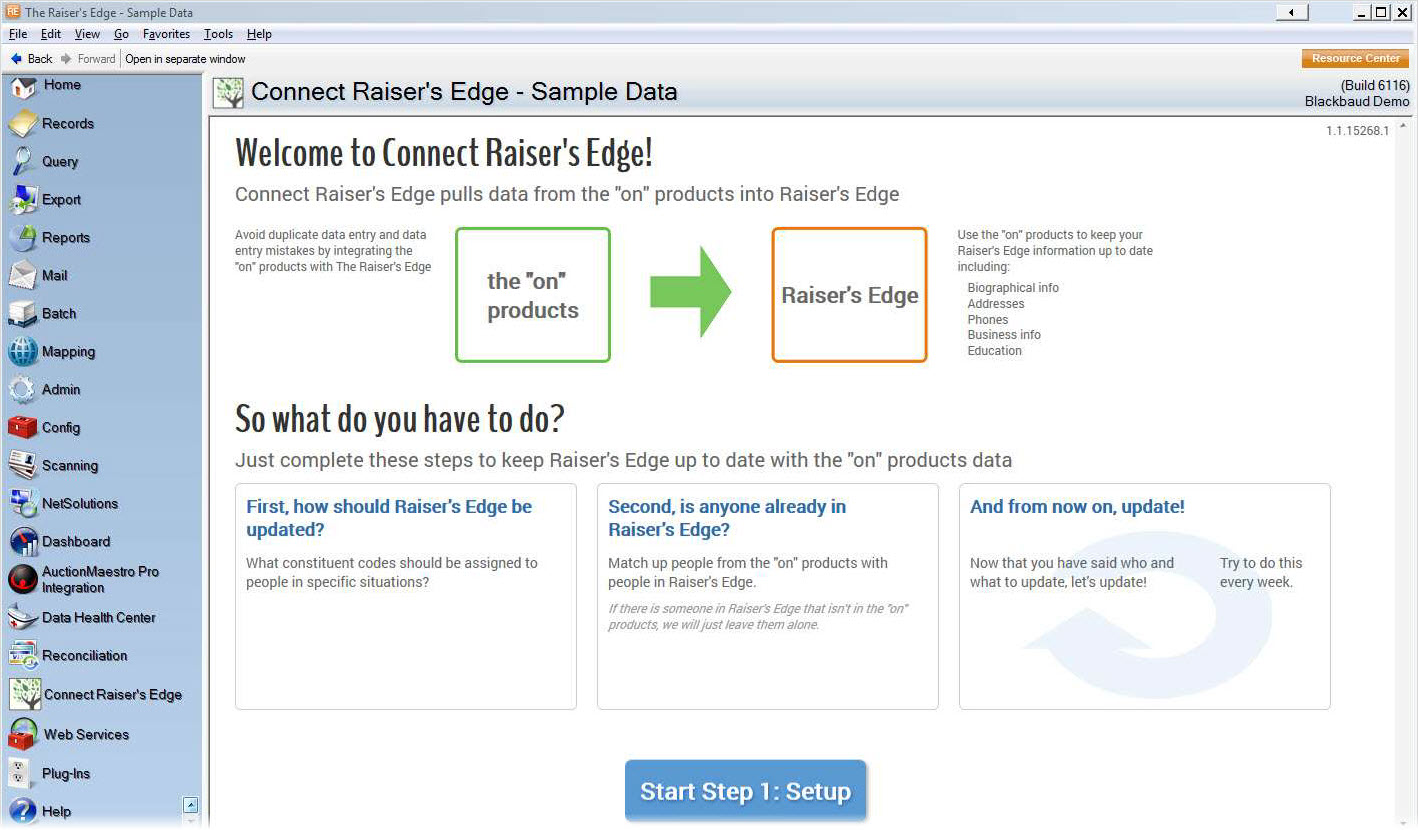
Log in to the Raiser’s Edge and choose Plug-Ins.
-
Select Connect Raiser's Edge.
-
Select Start Step 1: Setup.
-
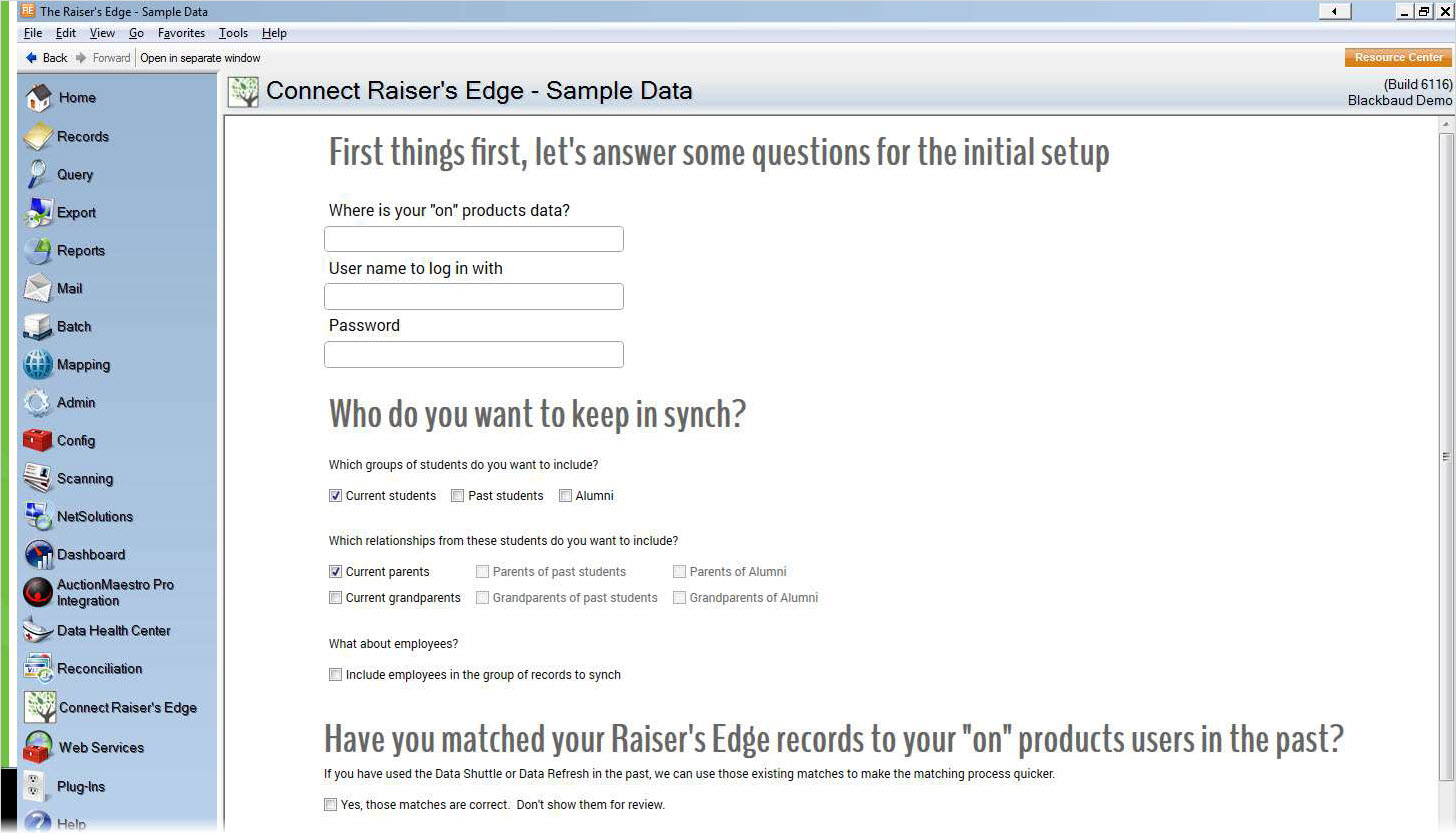
Under Where is your 'Blackbaud's Education Management' products data? enter the URL of your site.
Warning: In Edit Setup (Settings
 ) for the plugin, the integration manager or Connect RE manager gives the plugin info about where the data is. Replace the values for "legacy" Username and Password with an authentication token (Key and Secret). A user with the ON API Access Manager role generates authentication tokens in Blackbaud Education Management. See ON API authentication token.
 -
Enter your Education Management products user name and password.
-
-
Under Who do you want to keep in sync?, select the groups of people and which of their relationships you want to be updated.
-
If you used the data shuttle, select Yes, those matches are correct. Don’t show them for review. This reduces the number of matches you’ll need to manually review and confirm.
-
Select Match my records!
-
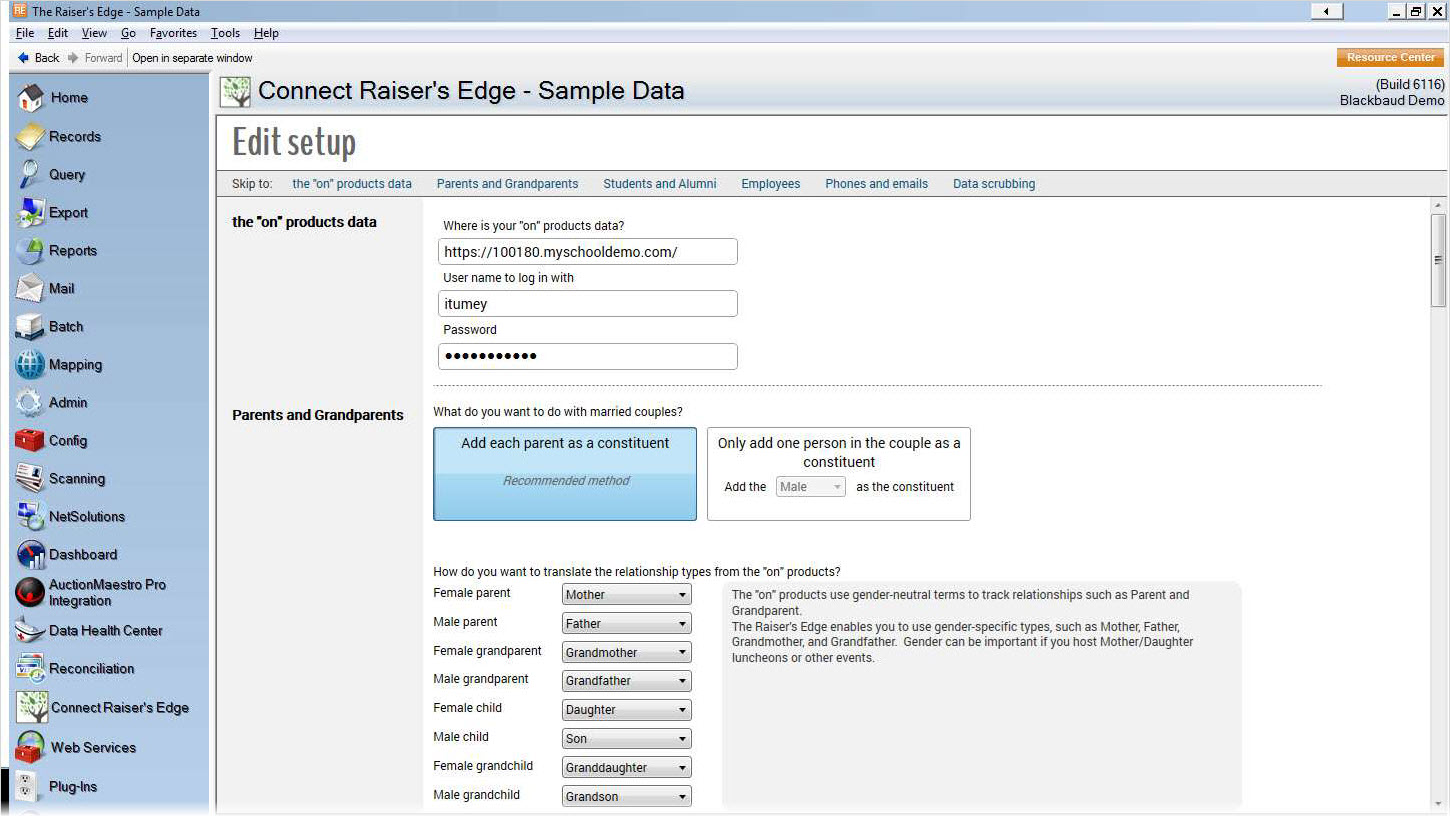
Determine how the Raiser’s Edge should handle data for parents (and grandparents).
Warning: In Edit Setup (Settings
 ) for the plugin, the integration manager or Connect RE manager gives the plugin info about where the data is. Replace the values for "legacy" Username and Password with an authentication token (Key and Secret). A user with the ON API Access Manager role generates authentication tokens in Blackbaud Education Management. See ON API authentication token.
-
Under What do you want to do with married couples?, select whether both people should be constituents.
If only one person should be a constituent, select the gender for that person.
-
If a household has a single parent or single grandparent, that parent/grandparent will be the constituent regardless of gender.
-
If both spouses have the same gender, the first one will be the constituent.
-
-
For each relationship type from the Education Management products , select the corresponding relationship type for the Raiser’s Edge.
-
For each event in a student’s life, select how you want to update consistent codes for parents and grandparents.
-
Select Next Step.
-
-
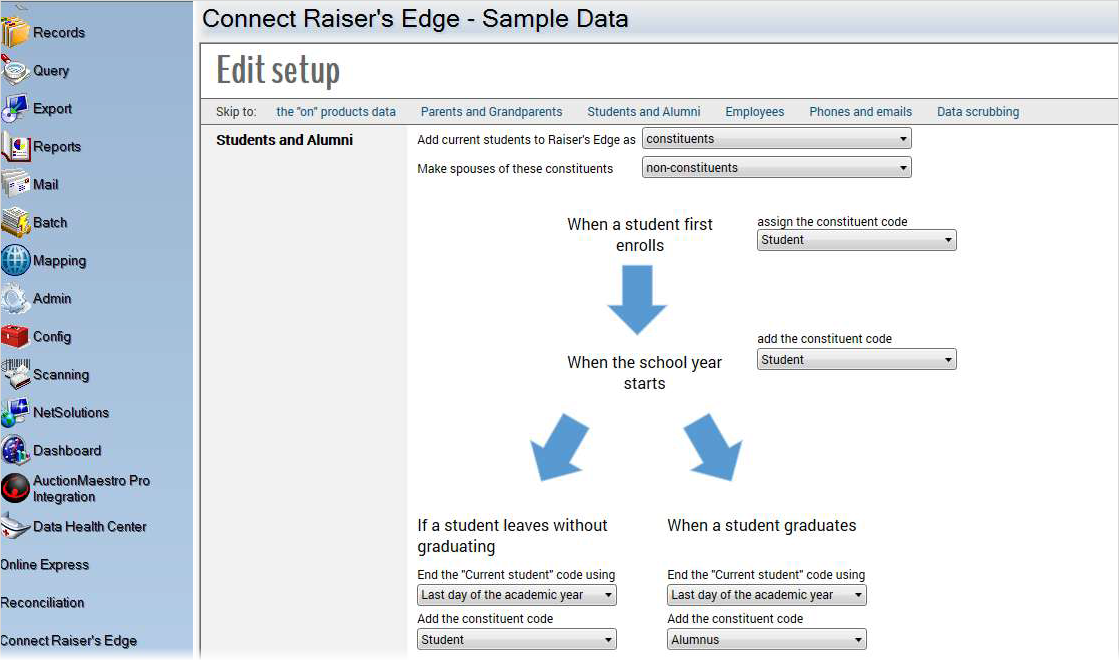
Determine how the Raiser’s Edge should handle data for students.
-
Select whether current students should be constituents.
-
Select how you want to update consistent codes for each event in a student’s life.
For example, you may want students to be non-constituents initially and become constituents when they graduate.
-
Select Next Step.
-
-
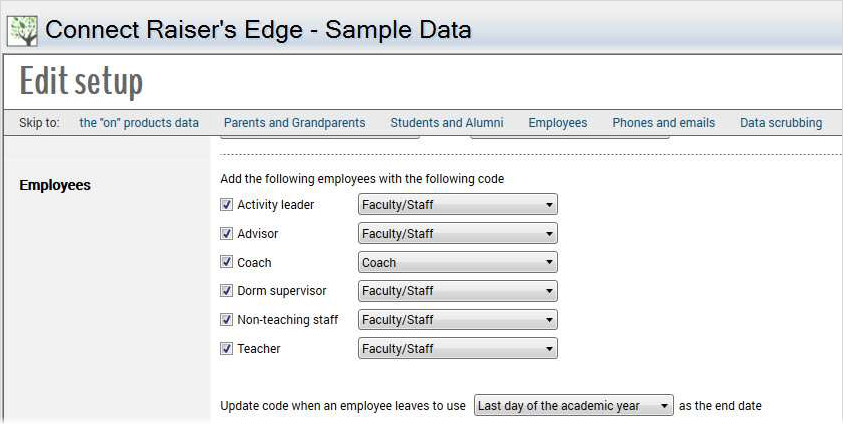
Determine how the Raiser’s Edge should handle data for employees.
-
Select the Education Management product employee role that should have separate constituent codes.
-
For each Education Management product role, select the corresponding constituent code.
-
Select the end date for constituent codes for employees who leave the school.
-
Consider switching the email and CC email addresses for employees. We recommend you switch email addresses for employees to provide fundraisers with the best email address for their communication needs.
-
Select Next Step.
-
-
Determine how the Raiser’s Edge should handle contact information.
-
Review address information.
-
These match! - When information is updated in the Education Management products, this information will be updated in the Raiser’s Edge.
-
These don’t! - When information is updated in the Education Management products, information for these address types won’t be updated in the Raiser’s Edge.
Tip: To remove duplicate, old, or erroneous address types, select Clean up these table entries. For details about how to clean up table entries, refer to The Raiser’s Edge Configuration & Security Guide.
-
These will get added! - When information is updated in the Education Management products , information with these address types is created in the Raiser’s Edge.
-
-
Review phone information.
-
These match! - When information is updated in the Education Management products, this information will be updated in the Raiser’s Edge.
-
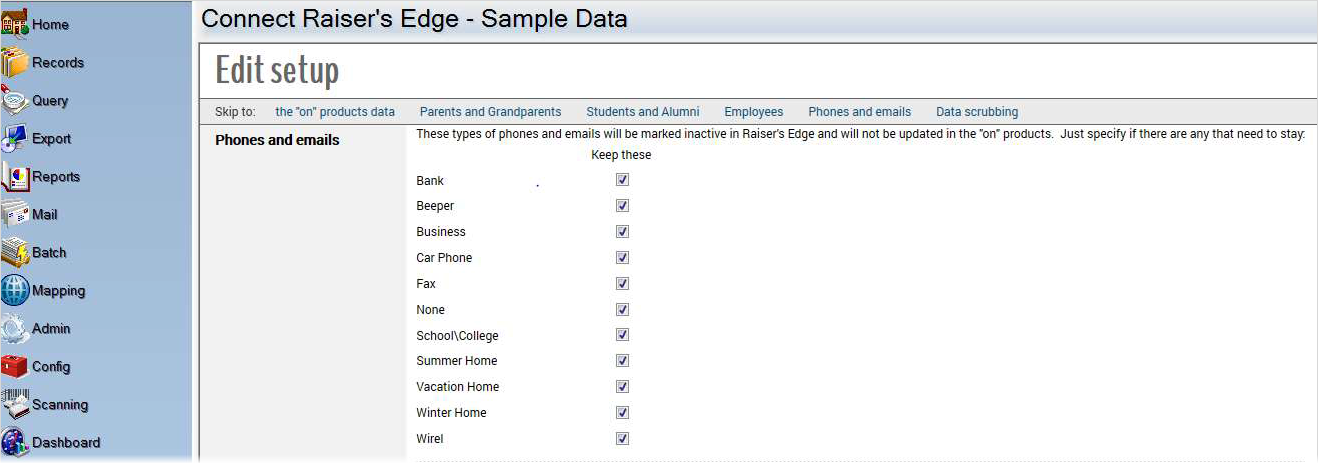
These don’t! - Select which information needs to remain in the Raiser’s Edge.
Information you don’t keep is marked inactive in Raiser’s Edge 7.94 and 7.95.
Information you don’t keep is deleted from the Raiser’s Edge 7.93.
When information is updated in the Education Management products, this information is not updated in the Raiser’s Edge.
Tip: To remove duplicate, old, or erroneous phone types, select Clean up these table entries. For details about how to clean up table entries, refer to The Raiser’s Edge Configuration & Security Guide.
-
These will get added! - When information is updated in the Education Management products, information with these phone types is created in the Raiser’s Edge.
-
-
Review digital information.
-
These match! - When information is updated in the Education Management products, these types of digital information will also be updated in the Raiser’s Edge.
-
These don’t! - When information is updated in the Education Management products, these types of digital information won’t be updated in the Raiser’s Edge.
-
These will get added! - When information is updated in the Education Management products, information with these types is created in the Raiser’s Edge.
-
-
Select Next Step.
-
-
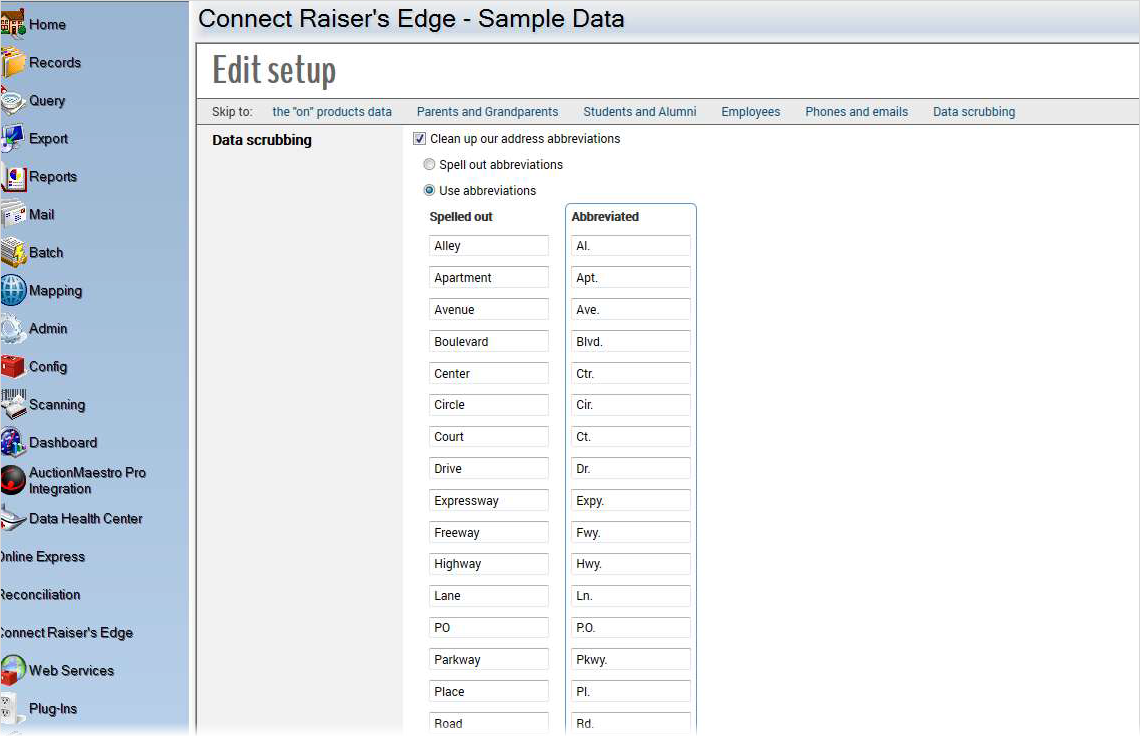
Determine standards to clean the data.
For each type of data, determine whether you want Connect Raiser’s Edge to “scrub” the data as it arrives from the Education Management products. If you select to clean the data, enter the standards you want the Raiser’s Edge data to use.
-
Select Let's match some people. The plug-in attempts to match records in your Raiser’s Edge database with ones from your Education Management products database. The possible matches appear for you to review and confirm.
For each person, review the information and determine whether the records match. For instructions, refer to Match Records.