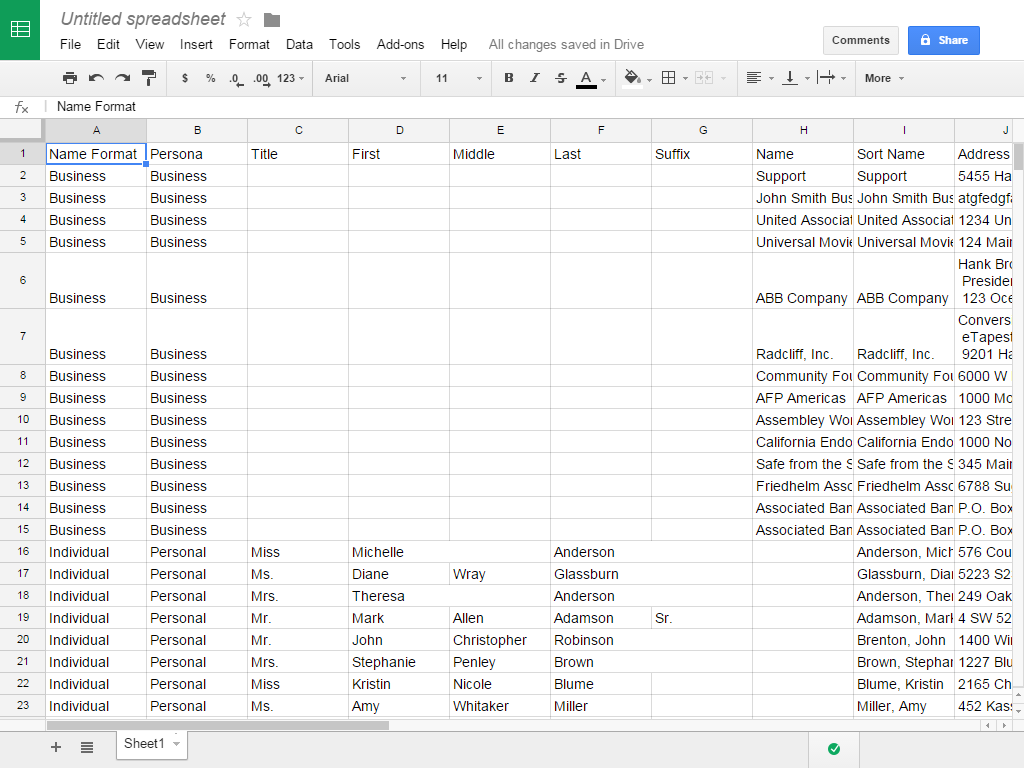
Before you begin, make sure your .csv file includes a name
format column to map to
an eTapestry name format. In this column, identify each row as Individual, Family,
or Business to correspond to eTapestry name
formats.
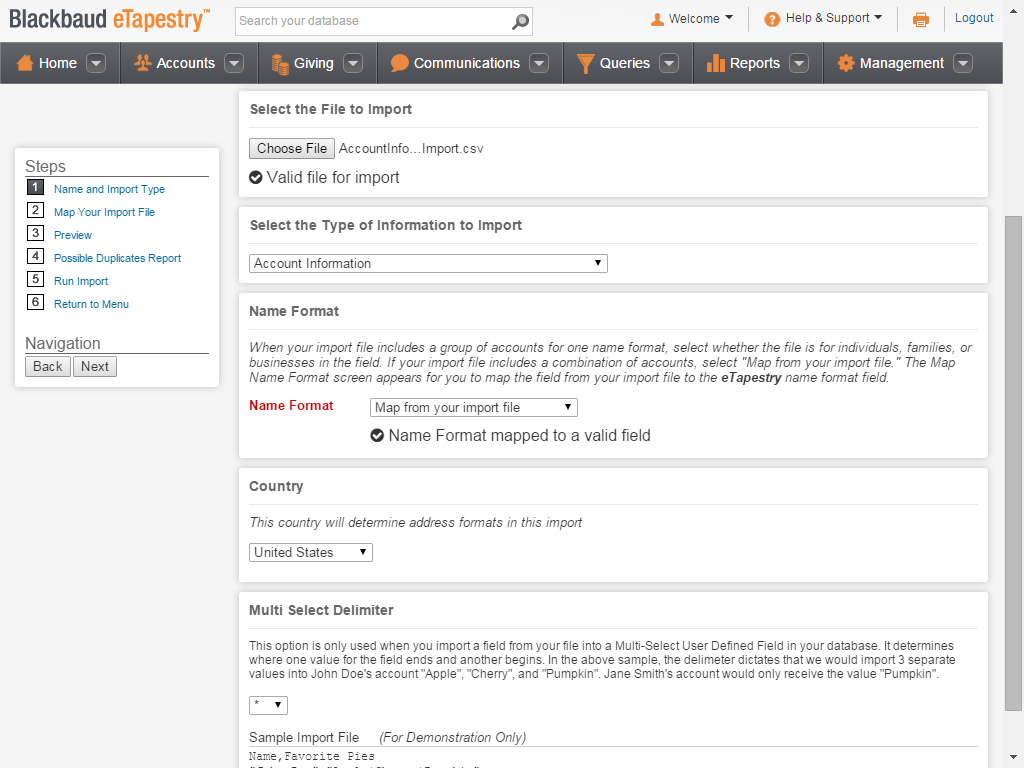
On Step 1, enter a name and
description for the import. After you select your import file, select "Account
Information" for the import type.
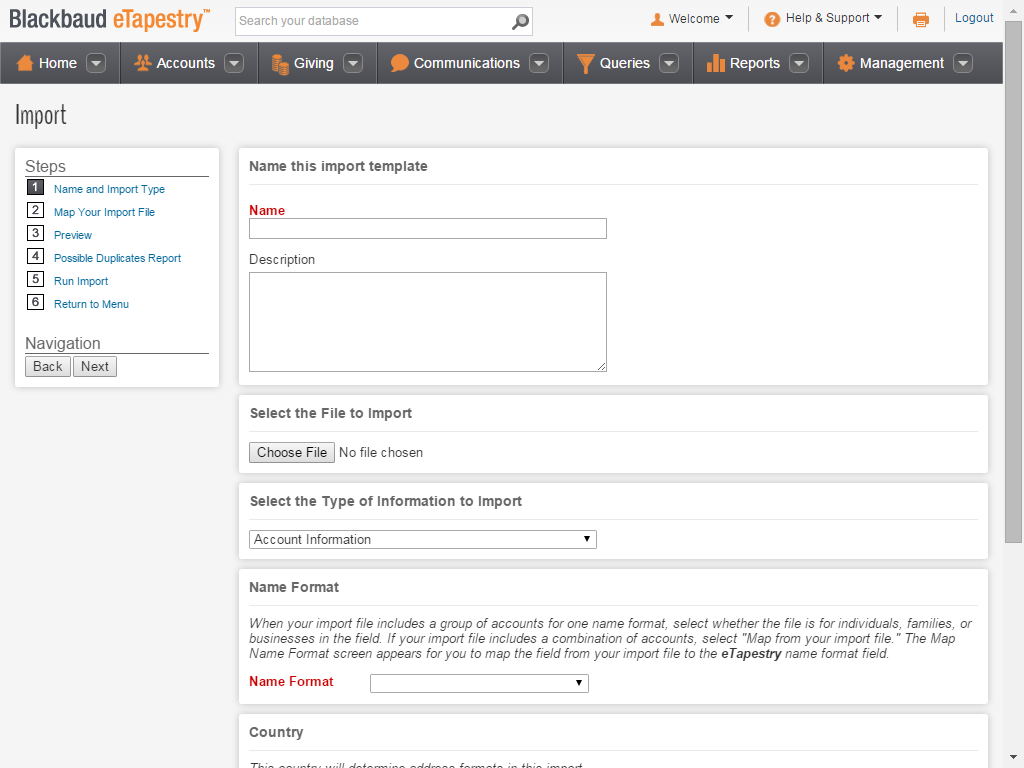
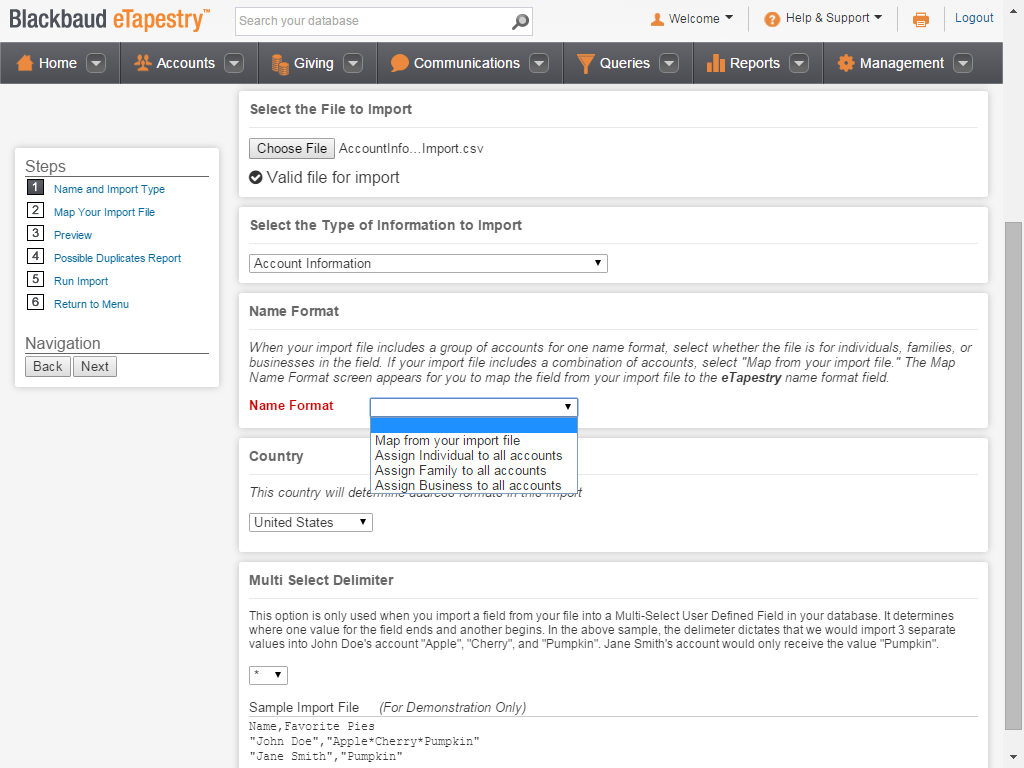
When you select Account Information, Name Format appears. In this field, select
whether the file is for individuals, families, or businesses when your import file includes a group of accounts for one name
format. Otherwise, select "Map from your import file" to import a
combination of accounts.
To advance to the next step, click "Map from your import file."
To advance to the next step, click "Map from your import file."

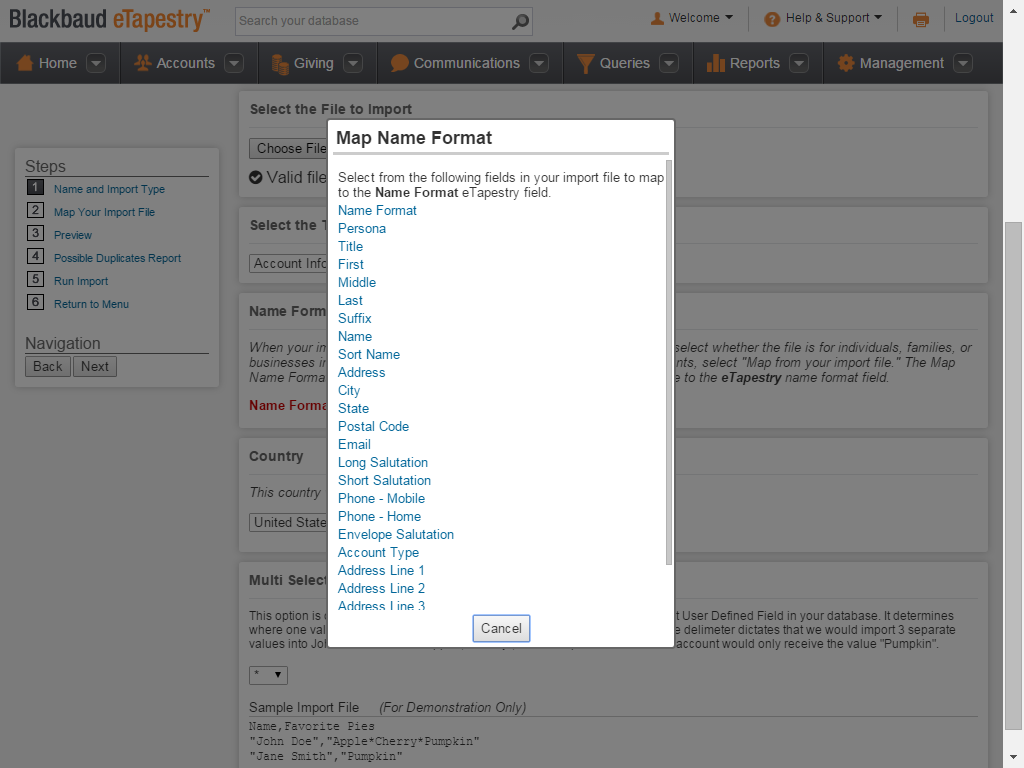
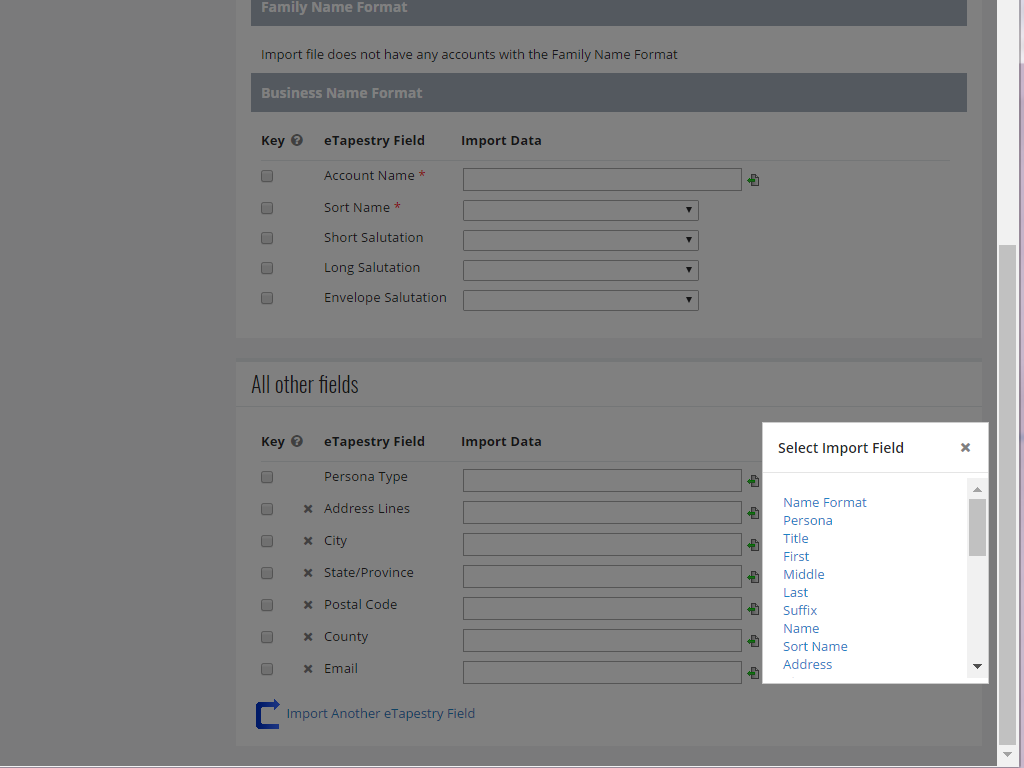
The Map Name Format screen
appears for you to map the name format field from your import file to
the eTapestry name format field.
To advance to the next step, click "Name Format."
To advance to the next step, click "Name Format."
After you map this, a "valid" message appears and
you can complete Step 1 by selecting the country to use for your
address information and the delimiter you
use to separate values in your file.
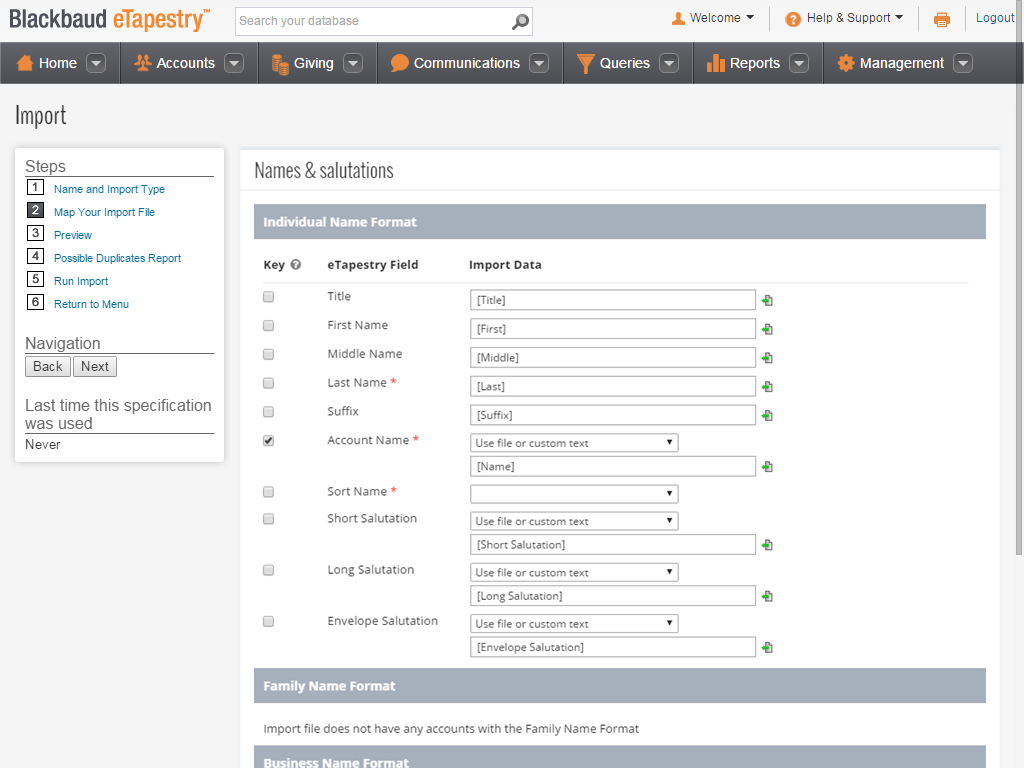
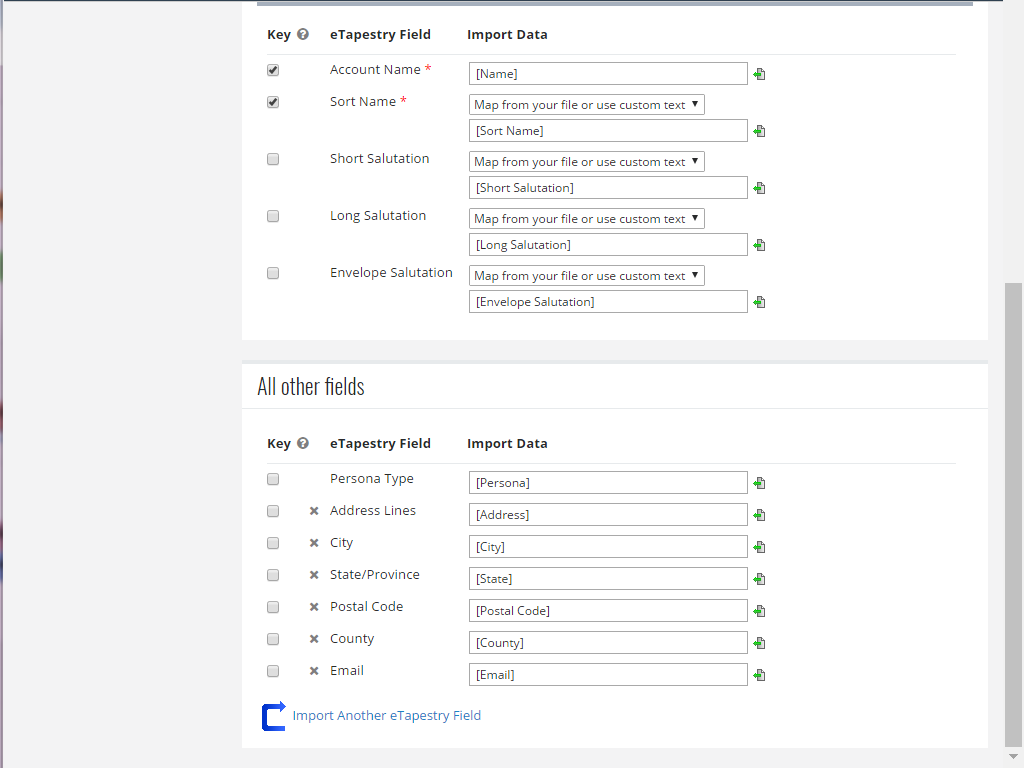
On Step 2, first key on Account Name
to check for duplicate accounts by name. Also, key
on the Persona Type field (located under All other
fields) to make sure persona fields update on the correct personas for existing accounts.
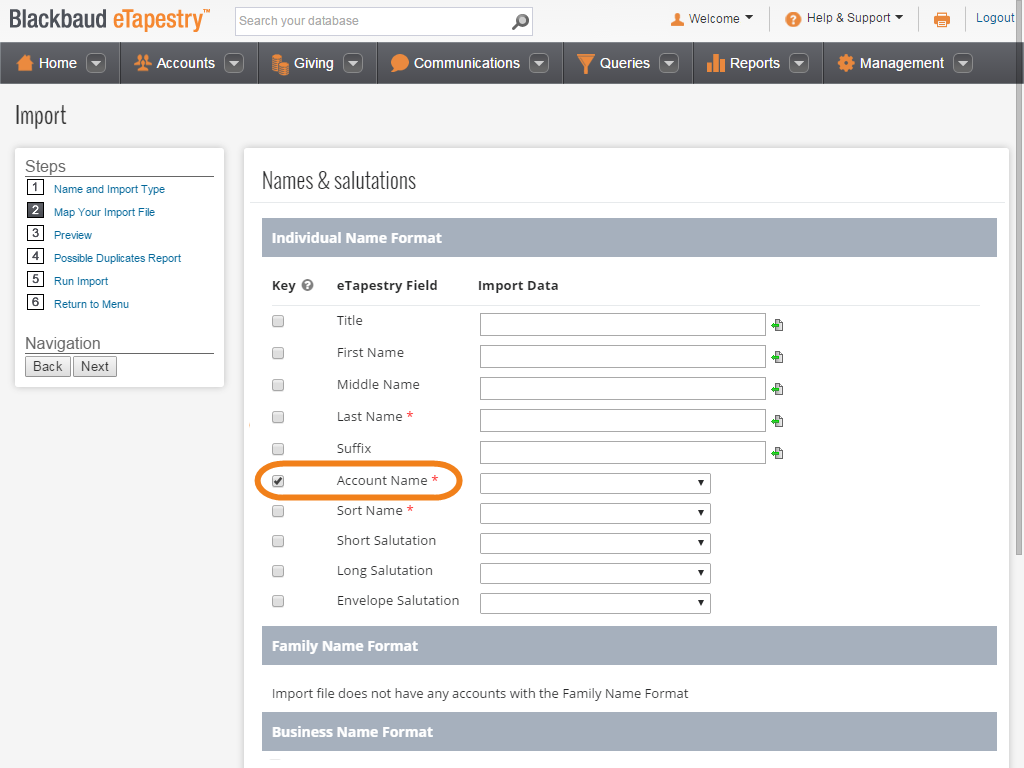
To map to a field in your import file, click
the icon beside the field.
For the Account Name, Sort Name, and Salutation fields, click the down arrow to select "Use file or custom text" to map data.
For the Account Name, Sort Name, and Salutation fields, click the down arrow to select "Use file or custom text" to map data.
After you return to the page, repeat these
steps to continue to map each field from your import file to the
corresponding eTapestry field.
To generate name data based on rules your organization has already established, use the down arrow to select �Use auto-generated Data Entry Rules.� For more information, click here.
You can map more than one field to an eTapestry field. For example, to import the sort name for an individual account, you can map "[Last],
[First]".
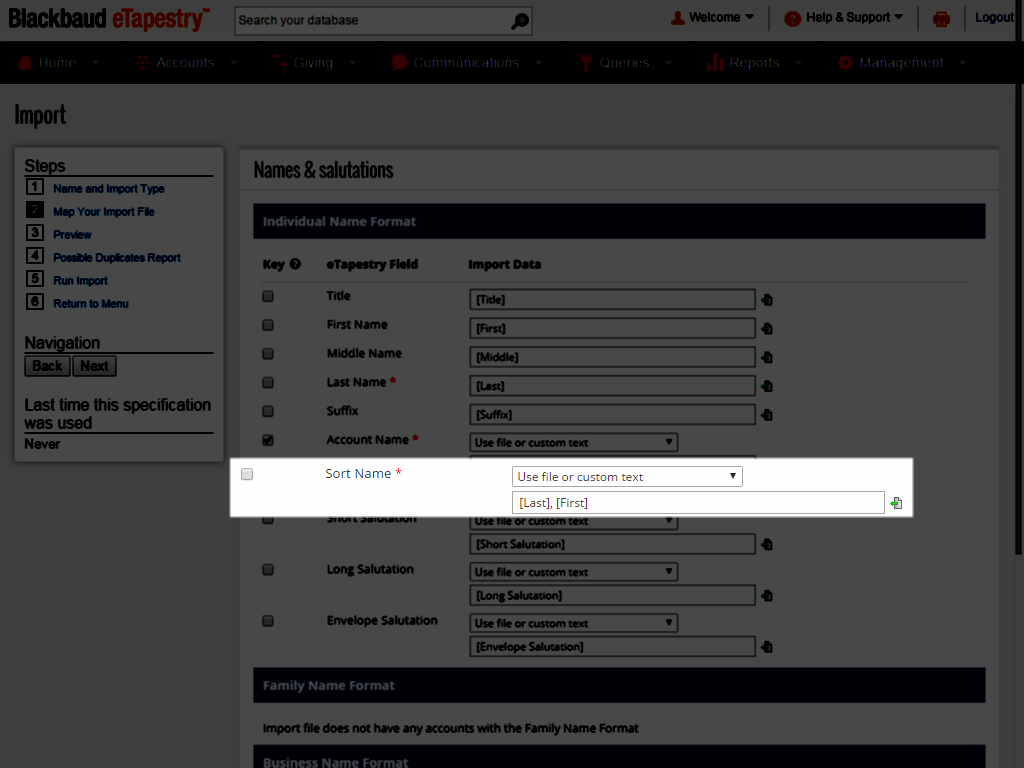
Note: The sort name is an example
of how to combine fields.
You do not need to map multiple fields for it if you have a sort name column in your import file.
To add additional fields to the import, click Import Another eTapestry field at the bottom of the page.
To advance to the next step, click Import Another eTapestry Field.
To advance to the next step, click Import Another eTapestry Field.
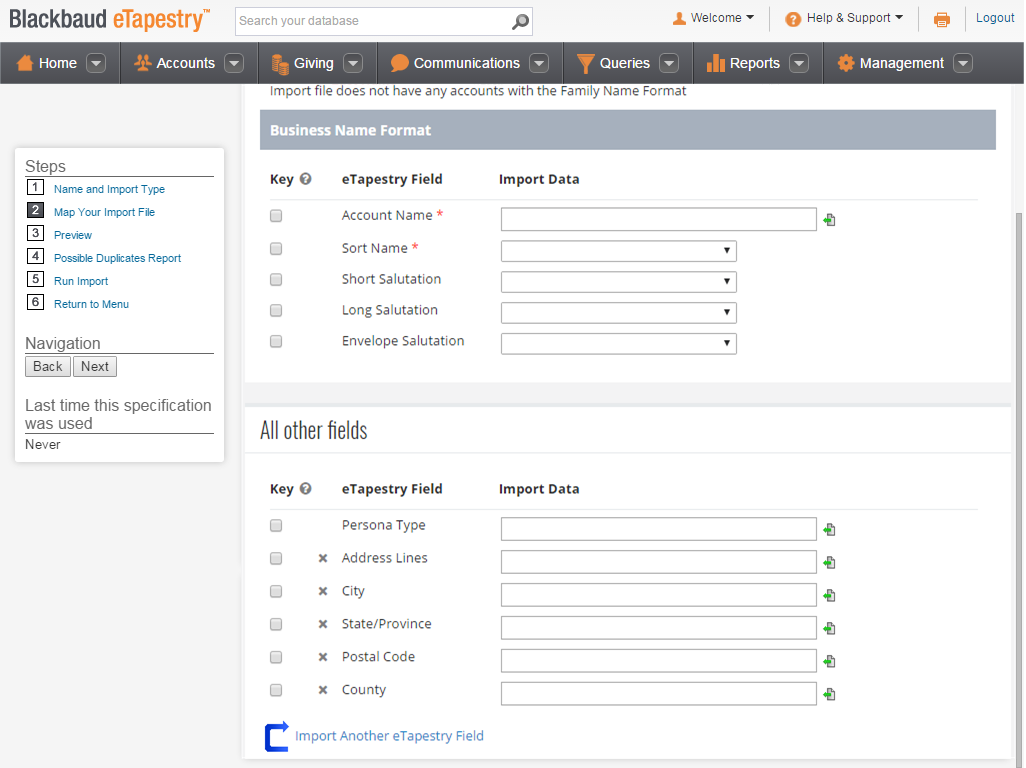
The Select eTapestry Field screen appears for you to select the additional fields from your file that you want to map to an eTapestry field.
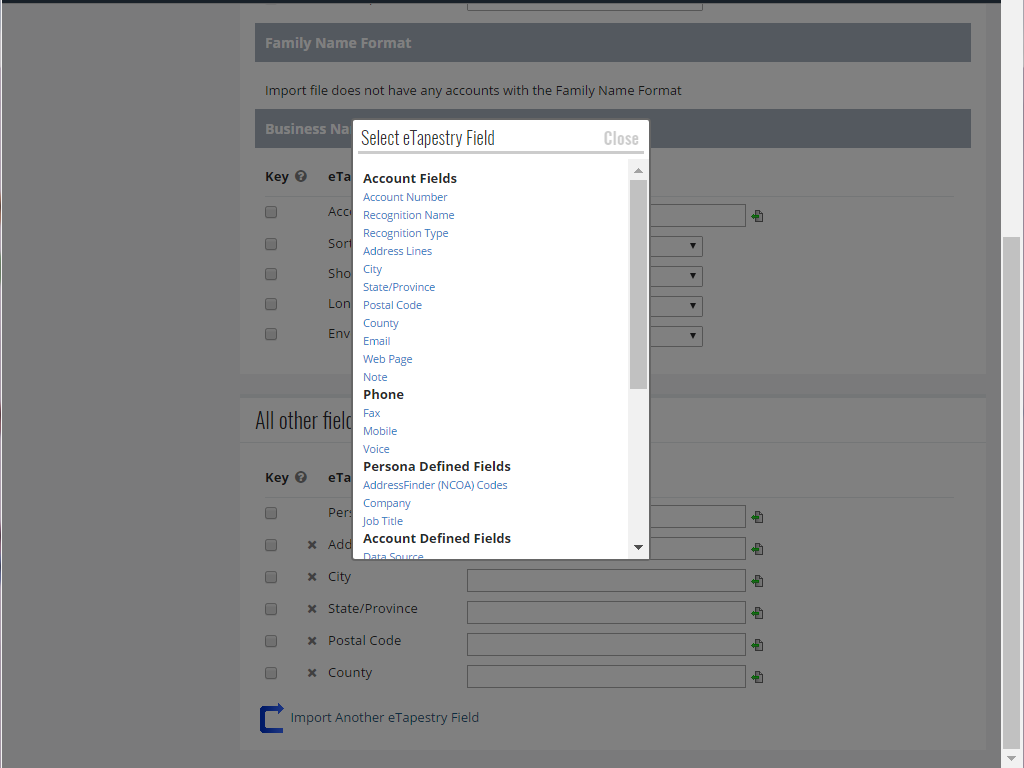
Select the additional eTapestry fields to map to fields from your import file. As you click each field, they appear in the eTapestry Field column.
To return to the page and advance to the next step, click Close.
To return to the page and advance to the next step, click Close.
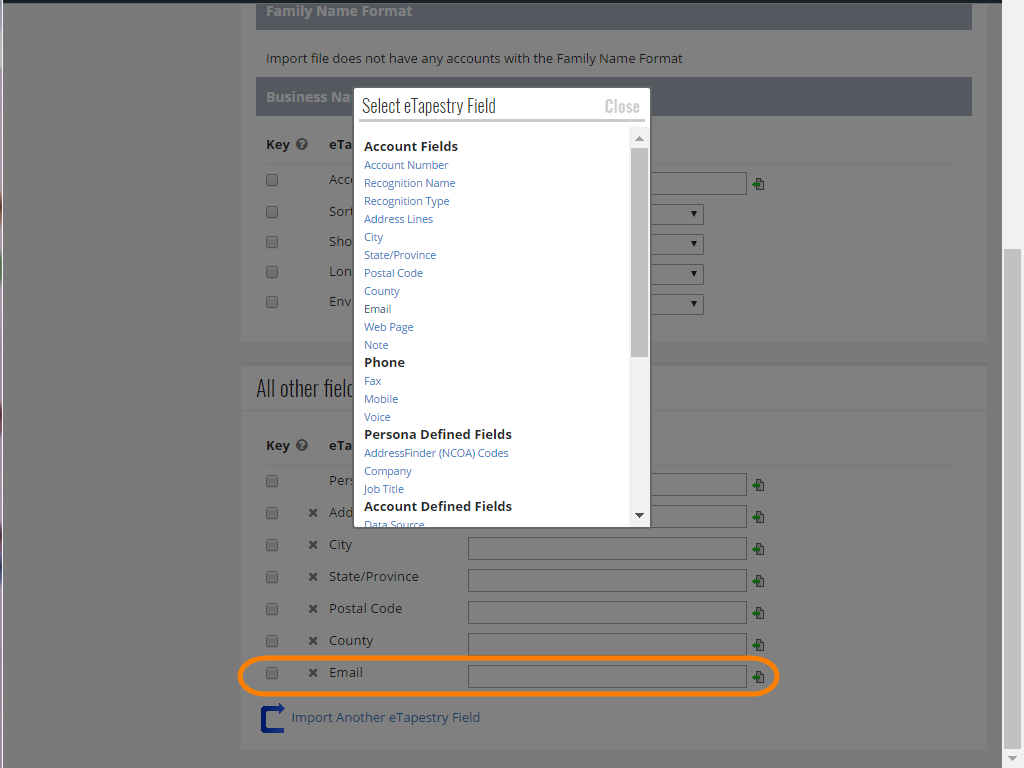
Click the icon beside each field to open the Select Import Field screen and map your fields to the additional eTapestry fields.
After you map all fields on the page, you can preview your import.
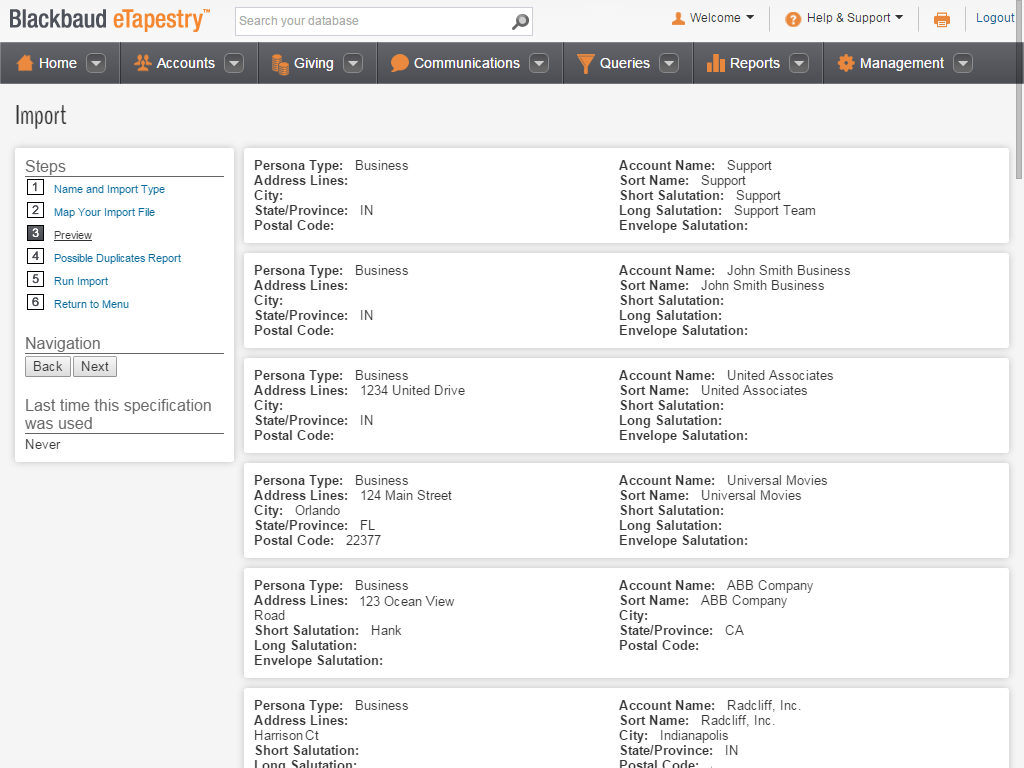
On Step 3, the exact data appears from the first 25 rows of your import file so you can verify that fields are mapped correctly. If you need to re-map a field, return to Step 2.
On Step 4, the Possible Duplicates Report appears. On the Import Summary, review import details such as the number of new accounts you are going to import in eTapestry.
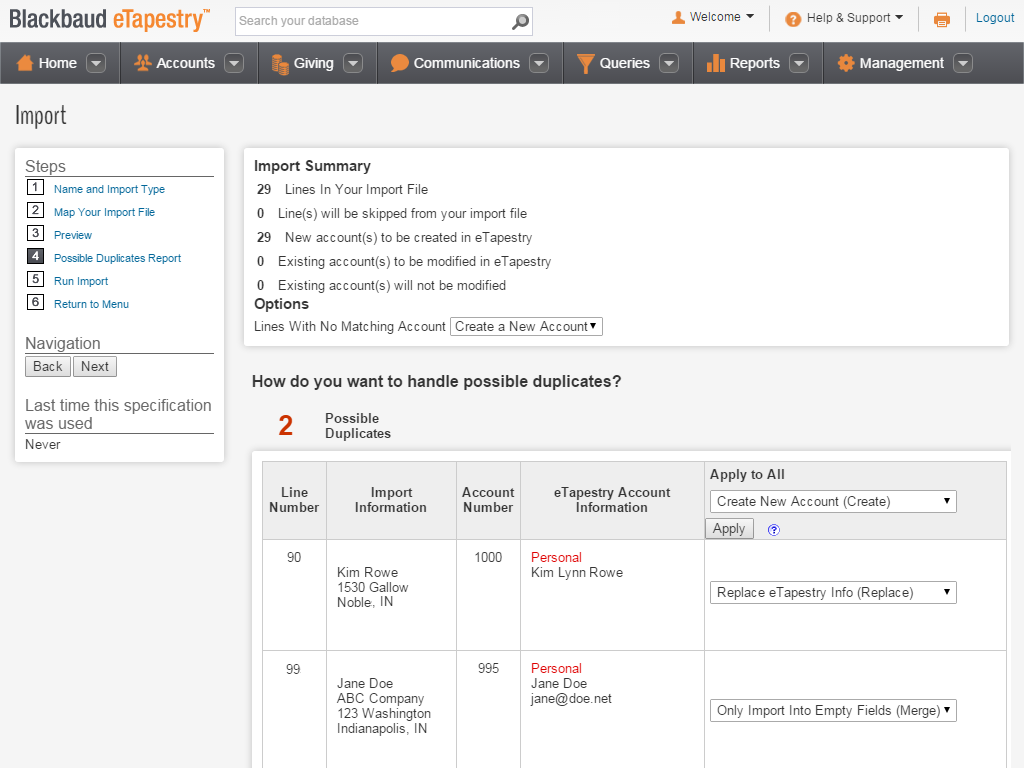
When potential duplicates appear based on the keys you selected on Step 2, decide how to handle each duplicate conflict. For example, you can select to create, replace, or merge data for accounts.
For information about duplicate options, refer to the eTapestry Help File.
For information about duplicate options, refer to the eTapestry Help File.
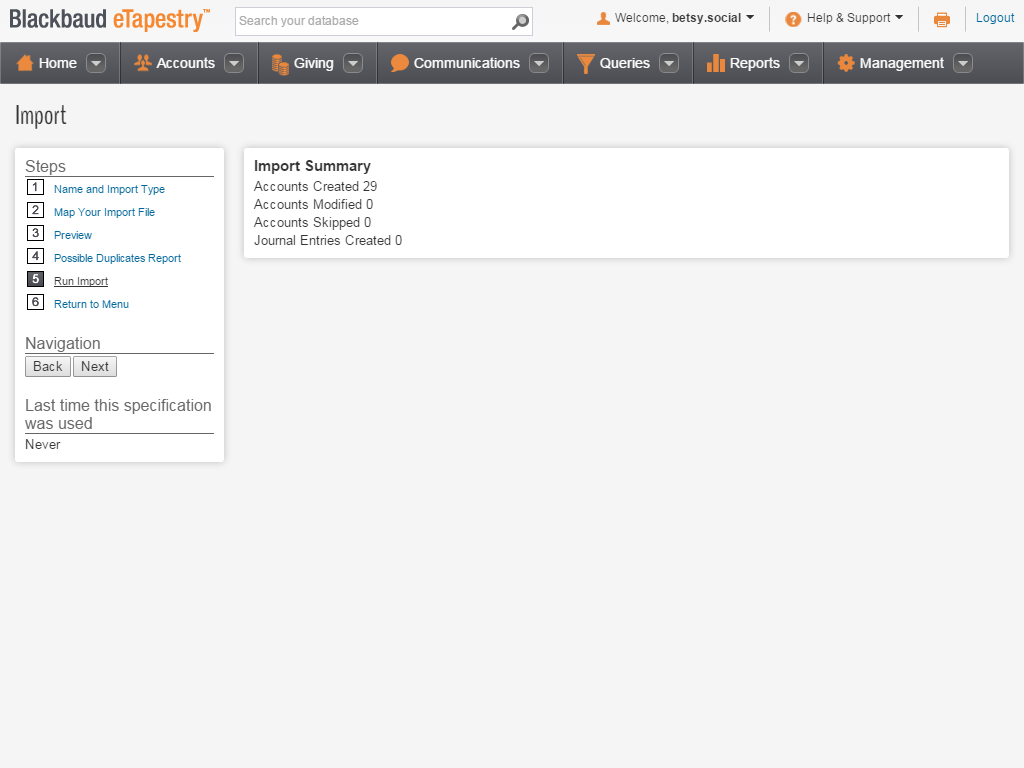
To run your import, select Step 5.
To advance to the next step, click Step 5: Run Import.
To advance to the next step, click Step 5: Run Import.
The import automatically runs. After it completes, the Import Summary appears for you to review the details of your import.